Showing posts with label Papertrey Ink. Show all posts

Monday, August 31, 2009

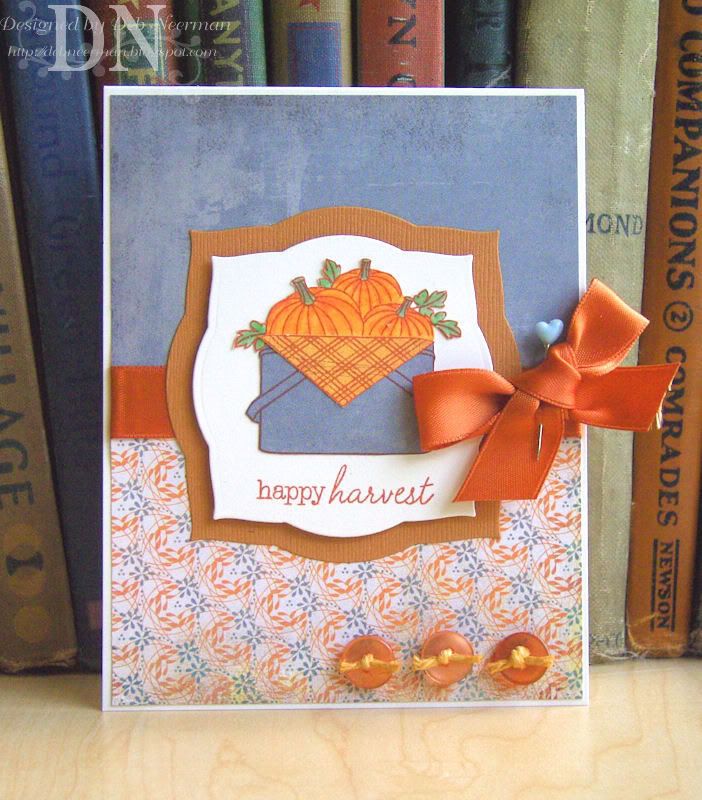
Happy Harvest ...

Pin It


Happy Monday, Stampers!

Today's card project was created for my Thanksgiving card stash using stamps from Papertrey Ink's "Vintage Picnic" set.

I stamped my image and sentiment in one of SU's new In Colors, "Dusty Durango," colored it using Copic markers, then cut out the focal point using a Spellbinders die.

For all the fall-like product info, check out the supply list, below.

Sooooooooo, this weekend I was over Sheila's, sitting in her kitchen leafing through a magazine. As I was flippin' through it, I noticed an article entitled, "Men's Secret Fear About Their Working Wives."

I slid it across the table to Sheila for her take. As her DH just happened to be nearby rooting through the fridge, she decided to get a first hand account.

"So, Ken, what's your innermost fear about my working?" she asked her husband.

"That you'll quit." Ken replied.

Thanks for visiting and have a great day!

~Hugs,
  • Card Stock: Bazzill Basics Textured Card Stock; PTI; Stampin' Up!
  • Designer Paper: "Ambrosia" Collection by BasicGrey
  • Stamps: "Vintage Picnic" Set by Papertrey Ink
  • Ink: "Dusty Durango" Dye Ink by Stampin' Up!
  • Color Medium: Copic Markers
  • Accessories: Vintage Buttons; Satin Ribbon; Heart Stick Pin; Vintage Twine
  • Tools: Die-Cut Machine; Spellbinders Dies; Scotch ATG 714 Adhesive; Foam Tape
  • Finished Size: 4 1/4" x 5 1/2"
Monday, August 17, 2009

Because ..... I Said So!

Pin It


Happy Monday, all and one!

Today's card project was created for last week's SCS's "Clean and Simple" challenge, CAS27, to use some bling on your clean and simple card. For all the challenging deets, clicky HERE. To go straight to the CAS27 card gallery, clicky HERE. For the ginormous view of my card, clicky on the photo.

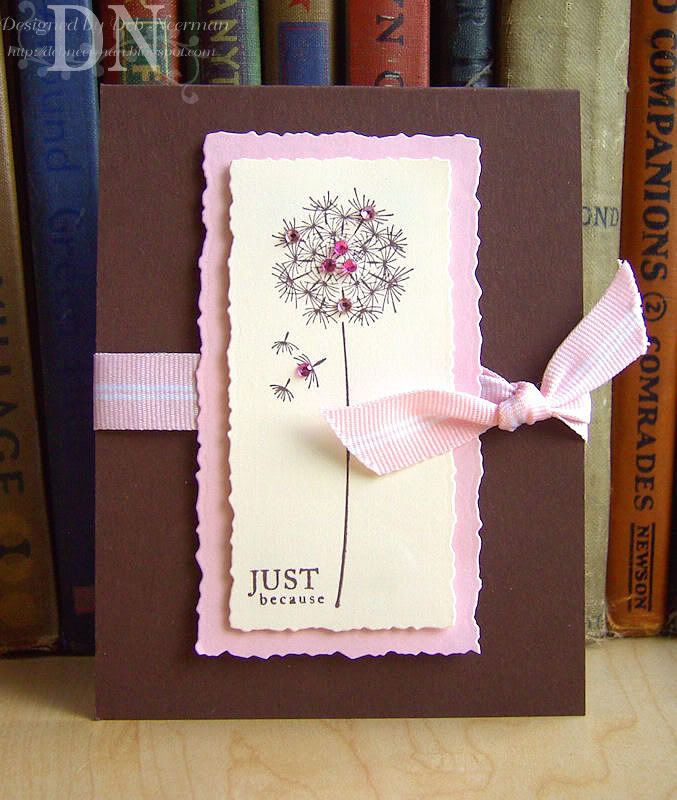
I lurve this dandelion stamp; isn't it purty?!? I stamped the purty dandelion with dye ink and added some self-adhesive faux gemstones and cut it out using a deckle-edged die. I added the sentiment, matted my image, and tied a ribbon around my card base. Easy peasy!

For the rest of the mind-boggling product info, check out the supply list, below.

Sooooo, this weekend Sheila's Dad took Reid-the-Wild-Child to the Palm Beach Zoo.

After a few blessed hours of quiet, Reid and his grandfather came home.

"Did you thank your grandfather for taking you to the Zoo?" Sheila asked.

Reid didn't answer.

She asked again, "Reid, did you thank Gramps for taking you to the Zoo?"

Still no answer.

Then Sheila kinda lost it: "You answer me right now, young man! DID YOU THANK YOUR GRANDFATHER?!?"

"Yes," Reid whispered.

"Well, why didn't you say so?"

"Because he told me not to mention it!"

I've been listing stuff in my eBay store like a crazy-woman. For a look-see without goin' all the way to eBay, check out my eBay store widget on the right sidebar! What won't they thin' up next?!?

~Hugs,

  • Card Stock: "Dark Chocolate" Card Stock by Papertrey Ink; "Very Vanilla" and "Pink Pirouette" Card Stock by Stampin' Up!
  • Stamps: Dandelion by Hero Arts; Sentiment by Papertrey Ink
  • Ink: Chocolate Chip Dye Ink by Stampin' Up!
  • Accessories: Faux Gemstones by Hero Arts; Pink Pirouette Ribbon by Stampin' Up!
  • Tools: Die-Cut Machine; Nestabilities Deckle-Edge Dies; Foam Tape
  • Finished Size: 4 1/4" x 5 1/2"
Monday, July 27, 2009

Sending Birthday Wishes ... by Train

Pin It


Happy Monday, all and one ... hope your weekend was fabulous-ish!

Today's card project was another I created for SCS's "Clean and Simple" color challenge, CAS24. For all the challenging deets, clicky HERE. To go straight to the CAS24 card gallery, clicky HERE. For the ginormous view of my card, clicky right on the photo.

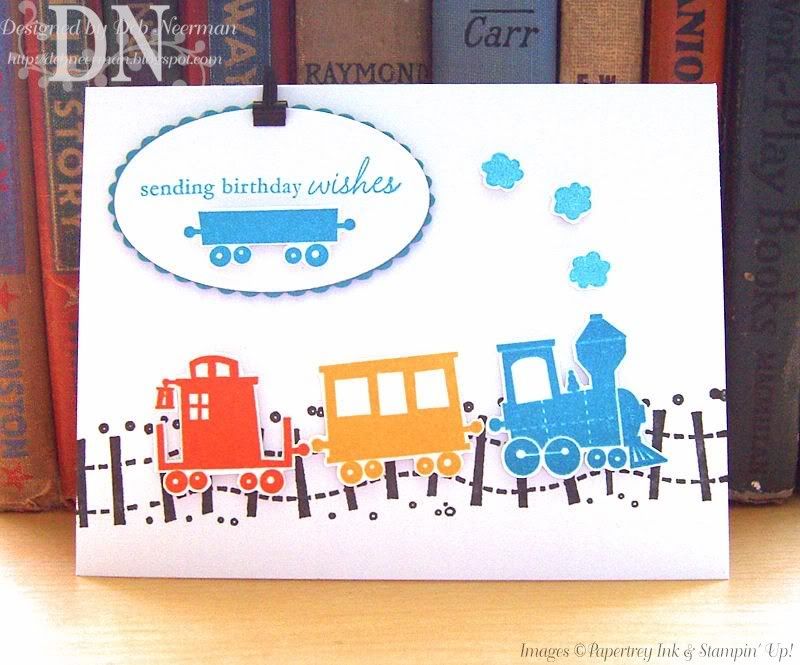
Isn't this l'il train set the cutest? The track was stamped using a wheel; the l'il train parts were stamped on card stock, then cut out and mounted over the track using foam tape. The l'il puffs of smoke were created and adhered to the card front in the same manner.

For all the thrilling product info, check out the supply list, below.

Sooooooooooo, this weekend the DH and I were hangin' out with Sheila and her DH. Since Reid-the-Wild-Child's birthday is coming up, plans were being made for the big day. AND, since Reid hasn't been the best of l'il boys lately, Sheila and Ken were also tossing around ideas on ways to improve his wild-child ways.

"Maybe we should buy him a bike for his birthday," Sheila suggested.

"Do you really think buying him a bike will help improve his behavior?" her DH asked.

"Well, no," Sheila admitted. "But it will spread it over a wider area."

Uh oh, look out Loxahatchee!

~Hugs!

  • Card Stock: Stampers Select White Card Stock by Papertrey Ink; Turquoise Card Stock by DCWV
  • Stamps: Sentiment from "Everyday Button Bits" by Papertrey Ink; Train, Track, and Smoke Stamps from "Choo Choo" Set by Stampin' Up!
  • Ink: "Sunflower" Dye Ink by Close to My Heart; Turquoise Hybrid Ink by Stewart Superior; "Tangerino Tango" Dye Ink by Stampin' Up! "Black Coal" Wheel Ink by Ancient Page
  • Accessories: Mini Library Clip by Stampin' Up!
  • Tools: Die-Cut Machine by Provo Craft; Nestabilities Dies by Spellbinders; Foam Tape
  • Finished Size: 5 1/2" x 4 1/4"

Monday, July 6, 2009

An Absolutely Fabulous Foursome ...

Pin It


Happy Monday, stampers ... hope your holiday weekend was safe and happy!

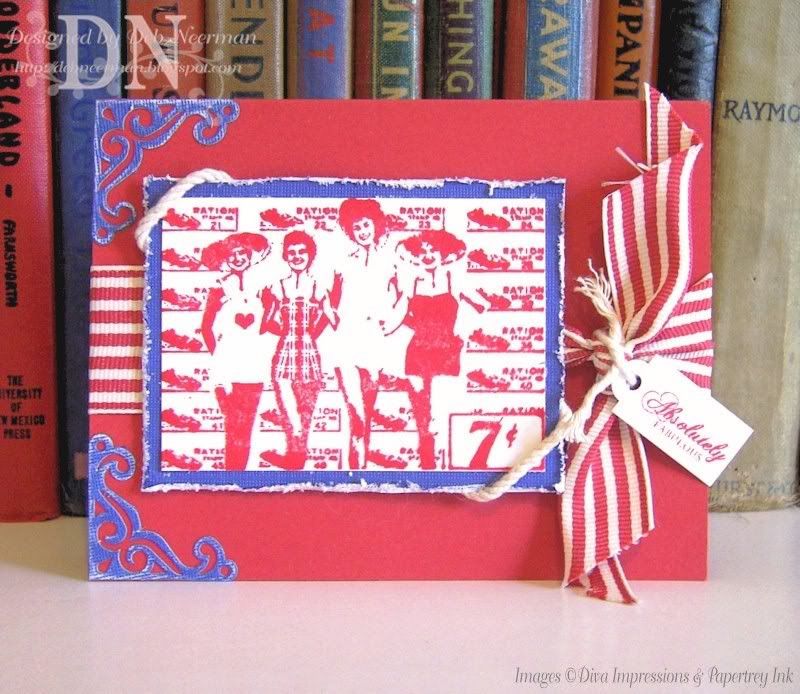
Today's card project was created for no-good reason using this vintage-inspired collage style stamp from Diva Impressions.

I added some sanded vintage-style photo corners, some Stampin' Up! twine and ribbon, and a cute l'il sentiment from Papertrey Ink.

For all the mesmerizing product info, check out the supply list, below.

Sooooooo, this weekend Sheila and I went downtown to do some window shopping. After driving around for 15 minutes, we decided to go park in the expensive-but-convenient parking garage.

Our bad luck continued as we ended up driving around and around the garage in search of an available space. Nothing. Suddenly, Sheila noticed a couple walking just ahead of us.

"Going out?" she called to them.

"No," replied the man, "just friends."

~Hugs,

  • Card Stock: Textured Card Stock by Bazzill Basics; "Stampers Select" White Card Stock by Papertrey Ink; "Riding Hood Red" Card Stock by Stampin' Up!
  • Stamp: Collage-Style Stamp by Diva Impressions; Sentiment by Papertrey Ink
  • Ink: "Riding Hood Red" Dye Ink by Stampin' Up!
  • Accessories: Striped Grosgrain Ribbon by Stampin' Up!; Twine by Stampin' Up!
  • Tools: Die-Cut Machine by Provo Craft; Vintage Die by Provo Craft; Tiny Tags Die by Provo Craft; Sanding Block; Edge Distressing Tool by Tim Holtz; Scotch ATG 714 Adhesive; Scrap Fusion Adhesive by Ivy Scraps; Foam Tape
  • Finished Size: 5 1/2" x 4 1/4"

Thursday, May 14, 2009

A Card & A Nugget Tin for a Spa ....

Pin It


Good trade, huh?!?

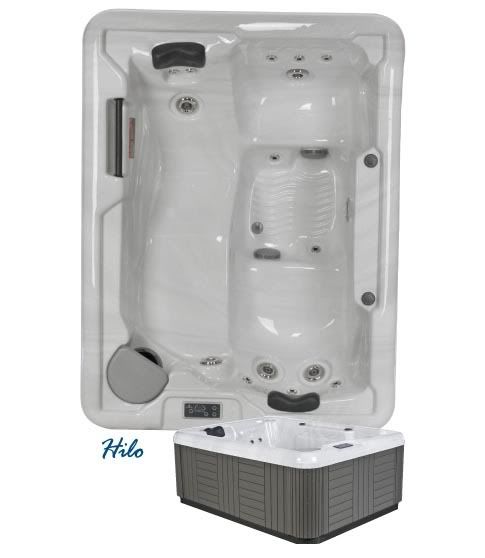
Ahhhhhhh, a hot tub! I've always wanted one and since we have THE perfect spot for one in our pool enclosure, this luxury item has been on my "wish list" for a very long time. And prolly would have remained on it forever if it weren't for Freecycle!

I'm a member of my local Freecycle group and last weekend another member posted that they had a "like-new Leisure Bay Spa" to give away. I responded, and surprise! we were the lucky recipients ... pretty kewl birthday present, huh?!?

And it turned out to be just like-new ... complete with all the chemicals, hook-ups, manuals, an underwater light-show feature, AND aromatherapy samples! And it perfectly matches the color of my walls! {No, my walls aren't black, they're "redwood," but this is the best photo I could find.}

If you don't know what Freecycle is, go to Freecycle.org and check it out. I joined Freecycle years and years ago and have received some much needed items and have freecycled some unwanted items to others. Freecycle's mission is to reuse and to keep things out of landfills by swapping items among members. Membership is totally free and there's sure to be a group in your area.

Today more than ever, why buy if you can get what you want or need for free ... or throw something away when you can be giving your unwanted items to families who do want 'em?!? For more info on Freecycle, or to join your local group, clicky HERE.

While Freecycle is completely free, a thank you card and a l'il gift is always appropriate. And whens the last time you created a Nugget Tin? Can't even remember, right? Three years ago, they were the. hottest. paper-crafting. gift. Now, not so much. But since I had all the necessary supplies on hand, this seemed to be the easiest, and fastest, little "thank you" gift.

TIP: I purchase my hinged Nugget tins HERE ... and pay just $1.05 for each. If you want to purchase larger quantities, they're even less. I think that's the lowest price you will find for these tins, but if you know of a lower price, please feel free to share your secret!

For the rest of the exciting product info, check out the Supply List, below.

So, here's someone you want working for you:

Last night, Sheila and I toddled over to the Mall at Wellington Green so she could buy some Clinique face stuff. As she was signing the receipt for her credit card purchase, the clerk noticed that she hadn't signed the back of the credit card. The clerk informed her that she could not complete the transaction unless the card was signed.

"Why?" Sheila asked.

"Because," she replied, "I need to compare the signature on the credit card with the signature you just signed on the receipt."

So Sheila grabbed her pen, signed the credit card in front of her, and slid the credit card back to her.

The clerk carefully compared that signature to the one Sheila had previously signed on the receipt.

"Okay," she finally said, "You're all set; they match."

Duh.

~Hugs,

  • Card Stock: "Stamper's Select" White by Papertrey Ink; "Kiwi Kiss" by Stampin' Up!
  • Designer Paper: "Bali Breeze" Collection (Retired) by Stampin' Up
  • Other Paper: Avery White Mailing Labels
  • Candy: Hershey's Nuggets
  • Stamps: "Holiday Treats" and "Limitless Labels" Sets by Papertrey Ink; "Trendy Trees" Set by Stampin' Up
  • Ink: "Cote d'Azure" Hybrid Ink by Stewart Superior; "Kiwi Kiss" Dye Ink by Stampin' Up; Versamark Watermark Ink by Tsukineko
  • Accessories: Fine Detail White Embossing Powder by Stampendous; Jump Rings; 5/8" Satin Ribbon; "Nuggets" Tin by Speciality Bottle
  • Tools: Die-Cut Machine; Nestabilities Dies by Spellbinders Paper Arts; 1 1/4" Circle Punch by EK Success; 1/16" Circle Punch by Fiskars; Stamp-a-ma-Jig by EK Success; Scotch ATG 714 Adhesive; Foam Tape

Monday, May 4, 2009

Hello L'il Birdie ...

Pin It


Yippee, it's Monday again! Hope your weekend was fab-you-low-so!

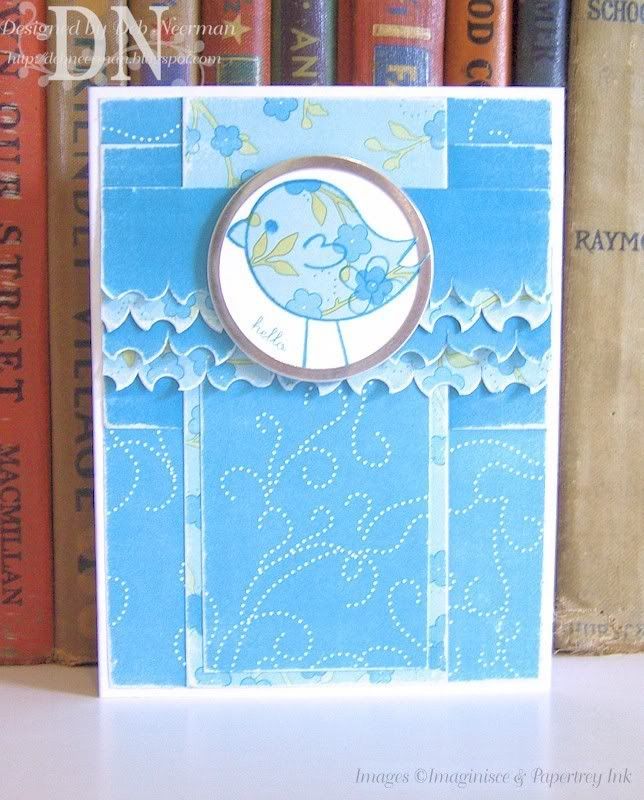
Today's card was created for SCS's "Sketch Challenge," SC226. For a look at the sketch I followed, clicky HERE. To go straight to the SC226 card gallery, clicky HERE. For the ginormous view of my card, clicky right there on the photo.

As you can see, I flipped the sketch upright. Then I added some weird fun punched borders, stamped and paper-pieced my l'il birdie on a metal-edged tag, and sanded the dickens out of the DSP.

For all the fascinating product deets, check the Supply List, below.

So, this past Saturday I was hangin' with Sheila when her mail arrived. She ripped open her dentist's bill and went crazy when she saw the huge balance due.

"I'm callin' that yo-yo right now," she proclaimed.

Of course, I had to follow ... it's like a train wreck ... you can't look away.

"I'm beyond shocked!" Sheila complained. "This invoice is three times what you normally charge."

She waited a minute, then slammed the phone down.

"What?" I asked.

"He said that because I screamed so loudly last time I came in, I scared away two other patients."

Yikes!

~Hugs,

  • Card Stock: "Stamper's Select" by Papertrey Ink
  • Designer Paper: "Bali Breeze" Collection by Stampin' Up (Retired)
  • Stamps: L'il Bird by Imaginisce; Sentiment by Papertrey Ink
  • Ink: "Cote d'Azure" Hybrid Ink by Stewart Superior
  • Accessories: Metal-Edge Tag by Making Memories
  • Tools: Tag Maker by Making Memories; Slit Punch by Stampin' Up; 1/4" Circle Punch by Stampin' Up; Scotch ATG 714 Adhesive; Foam Dimensional Tape; Sanding Block

Tuesday, April 21, 2009

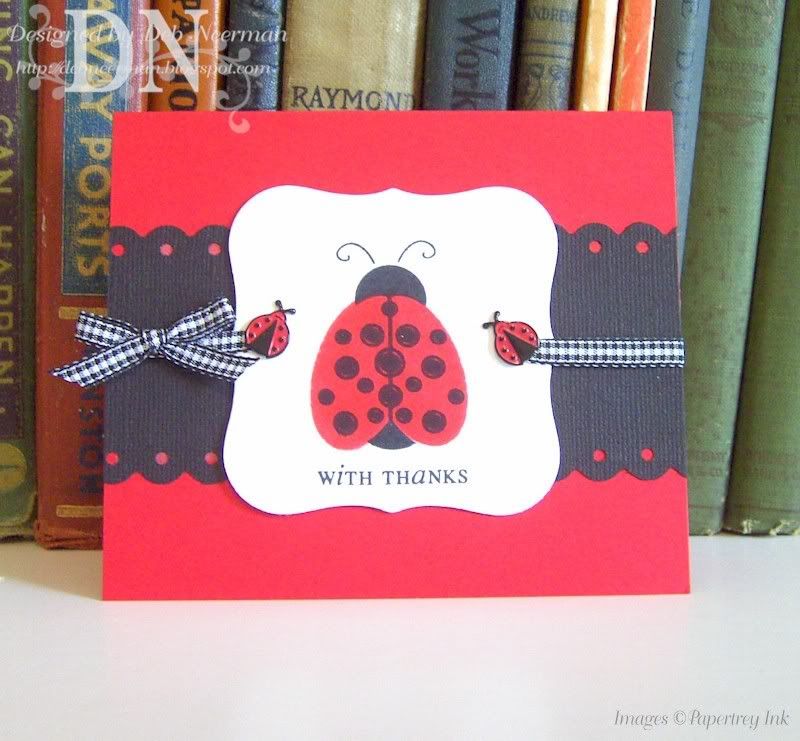
Lottsa L'il LadyBugs ...

Pin It


Happy Tuesday, all and one! Oh. And happy "Kindergarten Day" too. Oh, goodie, let's get out our blankies and take our afternoon nap!

Today's card was created for SCS's "Clean and Simple" challenge, CAS11. This week's challenge is an "inspiration" challenge direct from the children's bedding department at JC Penney's.

For a look at my inspirational kid-let bedding, clicky HERE. For all the challenge deets, clicky HERE. To go straight to the CAS card gallery, clicky HERE. For the ginormous view of my card, clicky on the photo. Phew, that's exhausting ...

For all the exciting product deets, check out the supply list, below.

Soooooooooo, yesterday I was hanging out in Sheila's kitchen when we heard the unmistakable sounds of kids laughing and splashing. Sure enough, four or five teenage girls were ... ummm, skinny-dipping in her pond.

Sheila's DH, Ken, went outside and strolled down to the pond. Once the girls saw him, they all went to the deep end of the pond.

One of the girls shouted to him, "We're not coming out until you leave!"

Ken replied, "I didn't come down here to watch you young ladies swim naked ... or to make you get out of the pond naked. I'm just here to feed the alligators."

WoWzA! I didn't know teenage girls could move that fast!

Have a great day, Kiddies!

~Hugs,

  • Card Stock: Black Textured Card Stock by Bazzill Basics; "Stamper's Select" White by Papertrey Ink; "Real Red" Card Stock by Stampin' Up!
  • Stamps: "Little Lady" Clear Acrylic Set by Papertrey Ink
  • Ink: "Tuxedo Black" Dye Ink by Memento; "Real Red" Dye Ink by Stampin' Up!
  • Accessories: Black and White Checked Gingham Ribbon by Michaels; Ladybug Brads, Unknown
  • Tools: Die-Cut Machine by Provo Craft; Labels 1 Nestabilities Die by Spellbinder's; Crop-A-Dile by We Are Memory Keepers; "Threading Water" Border Punch by Fiskars; Glue Dots by Mini-Glue Dots; Scotch ATG 714 Adhesive

Monday, April 13, 2009

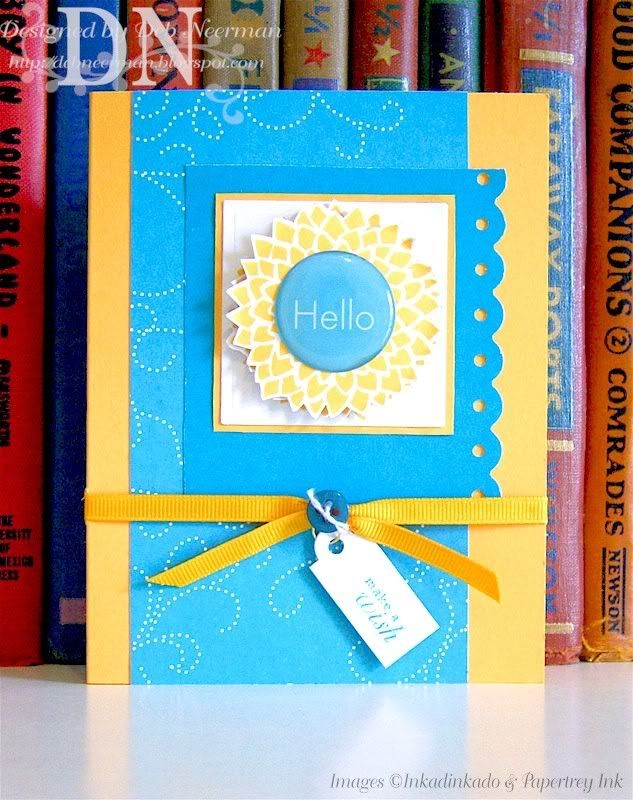
Could This BE Any Brighter?!?

Pin It


Happy Monday, all and one ... hope your holiday weekend was wonderful!

And let me start by apologizing to all of you for not getting to posting comments on your blogs these past few days. I'm having a devil of an allergy season ... one of the very worst ... and have actually spent more time sleeping than I have awake!

Today's card project was created for SCS's Sketch Challenge, SC223. For a look at the sketch I followed, clicky HERE. To go straight to the SC223 gallery, clicky HERE. For a ginormous view of my card, clicky on the photo.

For the low-down on all the dirty deets, check out the supply list below.

So, this weekend the DH, who's a computer tech, got a call from a customer. The nice lady told the DH that her computer wasn't working properly. After she described the problem, the DH told her to bring the computer over for service.

He told her, "Unplug the power cord and bring it up here and I'll fix it for you."

About ten minutes later, she showed up at the door... with the electrical cord in her hand.

I. Kid. You. Not!

~Hugs,

  • Card Stock: Papertrey Ink
  • Designer Paper: Stampin' Up!
  • Stamps: Flower by Inkadinkado; Sentiment by Papertrey Ink
  • Accessories: Epoxy Sticker; 1/4" Grosgrain Ribbon; Vintage Button; Cotton String; Jump Ring
  • Tools: Die Cut Machine; Nestabilities Large Square Die; Border Punch by Fiskars; Tiny Tag Die by Provo Craft

Wednesday, March 11, 2009

It Takes a Village (Idiot) to Make an Accordion Fold Flower ...

Pin It


So, I saw the directions ... if you can call three photos and three sentences, "directions," for this accordion flower in the new Stampin' Up! Sale-A-Bration catalog and thought to myself, "Self, you can do that!"

Well, after two hours, three youtube videos, and one 12 x 12 sheet of designer paper, here it is. Maybe I'm accordion-fold-challenged, but has it taken anyone else that long to make one of these things? Mine looks a little beat up, huh? Well, that's 'cuz I beat-up on it! And it's not even cute ...

For all the gory details, refer to my supply list, below. Oh. And, if you want, I can also refer you to all the youtube videos, too.

So, about three months ago, Sheila and I and the DH's went out to dinner at this new Chinese restaurant in town. Sheila fell in love with the elegant calligraphy on the hand-written menu and umm, "borrowed" it to take home. She spent the next several weeks knitting a sweater with Chinese characters down the front.

Last Saturday night, we all went to a cocktail party to celebrate our mutual friends twenty-fifth wedding anniversary. Since the weather was really cool ... and the sweater really did look fantastic ... she decided to wear it.

Liang, who is Chinese and lives next-door to the happy couple asked where she got the symbols.

"From a menu," she admitted.

"Do you know what they say?" he asked.

"Ummm, no ... and now I'm afraid to ask," Sheila said, "but tell me anyway."

"Cheap, but good," he responded.

Yikes!

~Hugs,

  • Card Stock: "Ripe Avocado" by Papertrey Ink
  • Designer Paper: Stampin' Up
  • Stamp: Sentiment from "Simple Little Things" Set by Papertrey Ink
  • Ink: "New England Ivy" by Close to My Heart
  • Accessories: Natural Jute Twine; Wooden BBQ Skewer from Publix-Where-Shopping-is-a-Pleasure; Vintage Button
  • Tools: Die-Cut Machine by Provo Craft; Tag from "Tiny Tags" Set by Provo Craft; "Threading Water" Border Punch by Fiskars; Stylus by Fiskars; Circle Punch by Punch Bunch; "The Ultimate" Craft Glue by Api; Scotch ATG 714

Monday, March 2, 2009

Funky, Fun, & Frugal Finds:

Pin It


Ahhhh, alliteration ...

Hey, there you are! And happy "Old Stuff Day!" Now, if you have any old stuff at your house that you don't want anymore, jess let me know and I'll make arrangements to take it off your hands ... 'cuz I jess love old stuff! When I go out, the DH never knows what I might come home with. Especially 'road side' stuff. Why, I can see something, assess it's worth, and come to a screeching halt in seconds ... all at 45+ mph! I know, it's a gift.

And if anyone has an old Hoosier they don't want, well, lucky you 'cuz I'm ready to take it off your hands!

ONward H-C-M's:

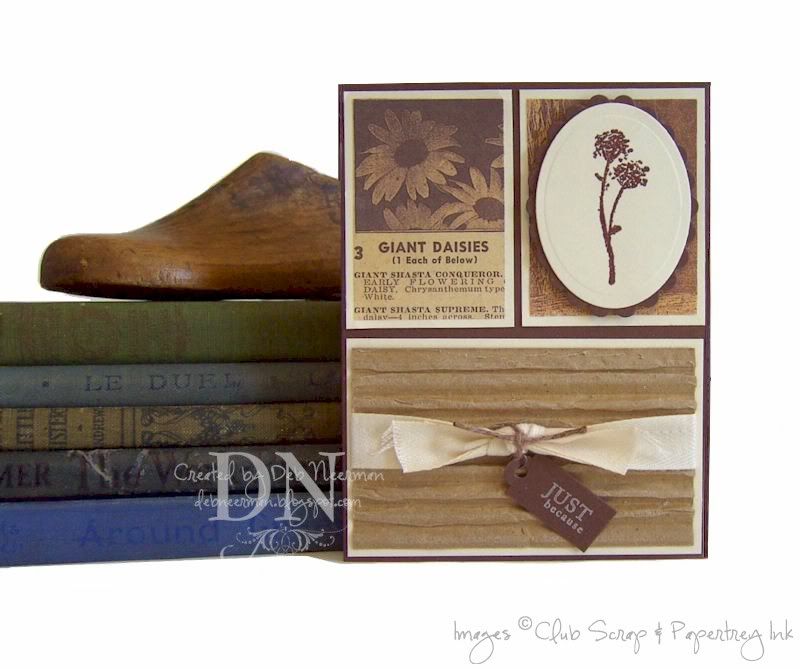
Today's old-lookin' card was created for SCS's "Way to Use It" challenge. This week's challenge, WT207, is "Frugal Finds." For all the challenge deets, click
HERE. For the ginormous view of this card, clicky on the photo.

I'm also linking this card to
Michelle's "Stampers Dream Dreamy Challenge." To check out the SDDC5 challenge deets, click HERE.

My funky frugal find is the corrugated cardboard I used on the bottom panel of my card. This piece was packed around the sides of a box of card stock I'd ordered. I'd planned on using it in a project sooner or later; the Splitcoast challenge was the perfect opportunity to do so.

For all the card info, check out the supply list, below.

So, today I thought I'd share this quick l'il video with you. If you're under 35 or so, you might not get this but ... watch anyway:


BTW, I'm liquidating my eBay store inventory and closing up shop. If anyone would like to purchase wholesales lots of paper, and other fun mixed media goodies, drop me a quick note and let me know what you're interested in. Trust me, you'll get a good great awesome buy!

To check out my eBay store, clicky HERE. Thanks!

Later!

  • Card Stock: "Dark Chocolate" and "Vintage Cream" by Papertrey Ink
  • Other Paper: Packing Cardboard from Papertrey Ink
  • Stamps: "Just because" by Papertrey Ink; Flower Silhouette by Club Scrap
  • Ink: "Vintage Cream" Hybrid by Papertrey Ink; Versamark by Tsukineko
  • Accessories: Dark Chocolate Embossing Powder by Comotion; Twill Ribbon; Waxed Linen Thread by 7gypsies; Jump Ring
  • Tools: Die-Cut Machine; Tag Die by Provo Craft; Nestabilities Dies by Spellbinder's; ATG 714; Heat Gun; Dimensionals

Tuesday, February 17, 2009

Celebrate You ... or, You; Celebrate!

Pin It


Hey, there you are! So, today is "Champion Crab Races Day" ... and if you have crabs, I hope they're all champions. Or win races ... something ...

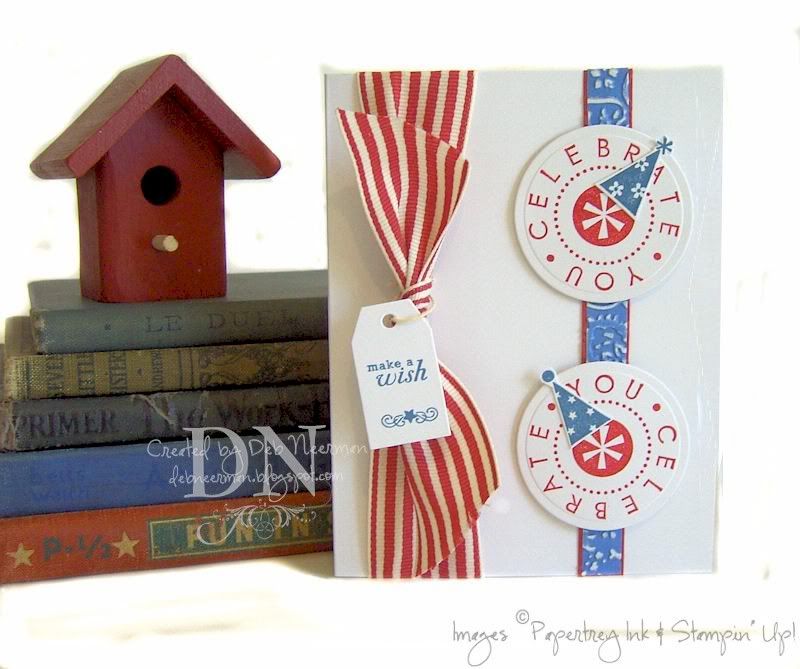
Today's card project was created fast using stamps from SU's "Party Hearty" set and more of that yummy Riding Hood Red grosgrain ribbon.

I stamped the sentiment, from Papertrey Ink, on card stock then ran it through the 'Bug with a die from the "Tiny Tags" collection. For all the blah, blah, blah, check out the supply list, below.

Soooooo, on Sunday Sheila and I went downtown to an art show at the Norton.


One piece was a huge canvas that was black with yellow blobs of paint splattered all over it. The next painting we looked at was a murky gray color that had drips of purple paint streaked across it.

Sheila walked over to the artist and said, "I'm sorry, but I don't understand your paintings."

"I paint what I feel inside me," explained the artist.

"Ohhhhhhhhhhhhh," Sheila said, "You should try Tums."

I. Kid. You. Not.

~Hugs!

  • Card Stock: Bazzill Basics; Close to My Heart; "Stampers Select" by Papertrey Ink
  • Stamps: "Party Hearty" Set by Stampin' Up; Sentiment by Papertrey Ink
  • Ink: "Riding Hood Red" Dye Ink by Stampin' Up; "Indian Corn Blue" Dye Ink by Close to My Heart
  • Accessories: Grosgrain Ribbon by Stampin' Up
  • Tools: Die-Cut Machine; Nestabilities Large Classic Circle Die by Spellbinder's; "Tiny Tags" Die by Provo Craft; Embossing Folder by Provo Craft; Dimensionals

Friday, January 30, 2009

Somethin' Tells Me it's All Happenin' at the Zoo ...

Pin It


I do believe it, I do believe it's true ...

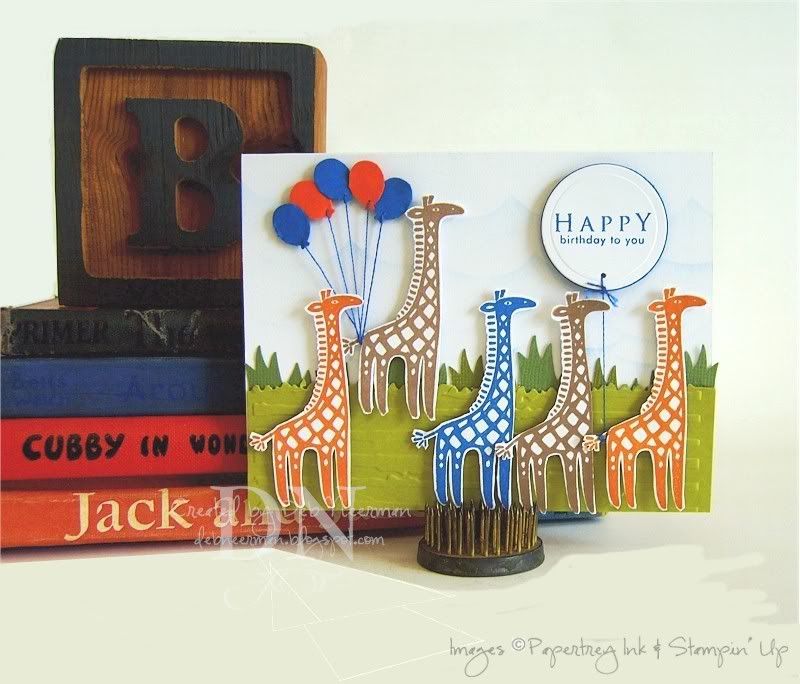
In fact, right now you can see blue, brown, and orange giraffes at the Palm Beach Zoo. I kid you not! Where do you think I got the idea?!?

So this month flew by, huh?!? I swear the time/space continuum is in overdrive and the planet is wildly spinnin' out of control. Yup, we'll be crashin' soon ... December 21, 2012, to be exact. Which brings me to "National Escape Day!" Yesirree, you go ahead and figure out how to get outta here alive and I'm totally on board!

ONward H-C-M's:

Today's card project was created for my sweet l'il nephews birthday. The giraffes are from SU's retired "Wild Things" collection and the sentiment is from PTI's "Faux Ribbon" set. The "grass" was created in a Cuttlebug embossing folder, and the l'il clumps of grass were creating using a (surprise!) grass clump punch.

If you clicky on the photo, you can see where I created some clouds with a template and chalk ink. I punched out some l'il balloons with (surprise!) a balloon punch, and tied 'em to the giraffes tail with embroidery floss.

Soooooo, yesterday Sheila and I took her wild-child, Reid, to the barber for a haircut.

"Make it short," Sheila said, "with a bare patch above his left ear, but longer on the right side so that it covers his right ear. I also want the left side burn above his left ear and the right side burn below his right ear."

The barber, a nice man who obviously didn't realize who he was dealing with, looked puzzled and said, "I don't think I can do that."

Sheila snapped, "I don't know why not ... that's the way you cut it the last time I brought Reid here!"

Ouch!

I'll be back before you know it with my special Valentine's Day gift ... just for you! You can hardly wait, huh?

~Hugs!

  • Card Stock: Bazzill Basics; Stamper's Select, Papertrey Ink; Kiwi Kiss, Pacific Point, and Tangerine Tango by Stampin' Up
  • Stamps: Giraffes from "Wild Things" Collection, Stampin' Up; Sentiment by Papertrey Ink
  • Ink: "Sky Blue" Chalk Ink by Clearsnap; "Pacific Point" Dye Ink by Stampin' Up; "Chocolate" and "Autumn Terracotta" Dye Ink by Close to My Heart
  • Accessories: DMC Embroidery Floss
  • Tools: Die-Cut Machine; Cuttlebug "Distressed Stripes" Embossing Folder; Nestabilities Large Classic Circle Die; Grass Punch by Carlacraft; Balloon Punch, Unknown; 1/16" Hand-held Punch by Fiskars; Dimensionals; Cloud Template by Moi

Friday, January 2, 2009

Green Card Makin' ...

Pin It


Hey, there you are! Well, first off, let me wish you a very happy "Run It Up the Flagpole and See if Anyone Salutes It" day!

That's prolly what that guy was celebrating when I accidentally, inadvertently cut him off in traffic. 'Cuz he stuck up his finger and it looked JUST like a l'il flagpole! Pretty kewl, huh?!? Guess it's one of the more popular holidays ...

ONward Hoarding Card Makers:

This card ^ is a recent green/recycling project ... one that won't significantly impact the planet but what the heck, it's a start, right? And just think, if every card maker in Blogdom created one card a week from a recycled magazine image, why we could save say, ... 4 sheets of glossy paper a month! That's a half of one tree a year!! Now we're talkin'! Spread the word ...

Before I toss my magazines in the recycle bin, I go through them looking for ... stuff, including neat images. I found this particular image in a back issue of "Country Homes" magazine and decided it would look loverly on a card front. Even though I now have proof to the contrary ...

Soooo, last weekend the DH and I had tickets for the pre-tournament cocktail party hosted for a celebrity golf tournament. Since we had an extra set, we invited Sheila and her DH to come along.

Several of the famous athletes who were playing in the tournament were at the door greeting guests. Among them was Joe Montana, the pro football Hall of Fame quarterback and Super Bowl winner.

Shaking Sheila's hand, he said, "Hi there, Joe Montana!" She didn't know Joe Montana from Joe Schmo, so in all sincerity she extended her hand and said, "Hello, Sheila Florida."

We're all still giggling about this; just not in front of you-know-who ...

~Hugs,

  • Card Stock: Bazzill; Papertrey Ink
  • Designer Paper: Making Memories
  • Stamp: Papertrey Ink
  • Ink: Staz-On
  • Accessories: Satin Ribbon; Faux Gemstone Flowers
  • Tools: Ticket Corner Punch; Decorative Edge Scissors; Flower Punch; Cuttlebug Die-Cutting Machine; Nestabilities Die; Foam Dimensionals

Friday, October 17, 2008

Yay! It's "Gaudy Day" ... Do I Win?!?

Pin It


Wooohooo, it's "Gaudy Day!!!" This ^ card is my official entry ... prolly could be gaudier, but it's a damn fine start, wouldn't you say?

ONward H-C-M~s:

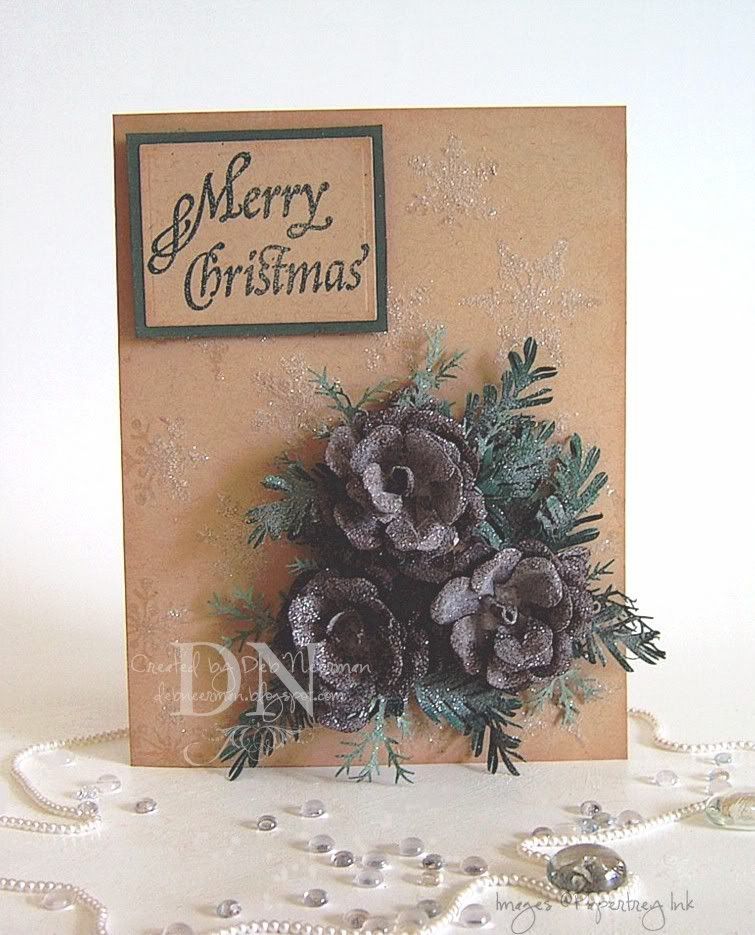
Today's card project was created for Allison's "Suggestive Sunday" blog challenge. This week, Allison's challenge required the creative use of punches ... or something like that. I read punches and kinda zoned out from that point forward.

My pine cones (yup, that's what they're supposed to be), were created with a pear punch ... and fern and pine bough punches. 'Course I haven't used the fern and pine bough punches in a particularly creative manner ... I just clipped into the fern fronds to try to create the appearance of needles. The only truly "creative" punch-use was creating the cones using the pear punch. But you can't have pine cones without branches and whatnot, sooooo ... there they are.

I stamped my snowflakes on my card base using glue then poured sprinkled Crystal Snow over ... umm, everything. ALL of the snowflakes are glittery but the ones on the left-hand side of the card look bare. IRL, they're sooooooo stinkin' glittery, I almost can't stand it. Just a light thing, KWIM? But those pine cones? They're buried in Crystal Snow! But first, I sprayed them with Artists Spray Mount Adhesive.

TIP: Man, don't ever spray Artists Spray Mount Adhesive anywhere indoors! You know those non-stick craft sheets? Yeah, it's not non-stick when it comes to Spray Mount Adhesive ... honestly boy and girls, it took me longer to clean up the spray adhesive mess than to make the pine cones, make the card, photograph the card, or edit my photos ... and it's still stuck to my hands. {Sigh} Good times!

The sentiment, maker unknown, was stamped in Versamark, heat embossed with "Moonlit Forest Glitz" powder, and mounted on dimensionals. And that's all folks!

So, yesterday Sheila came over all agitated and asked me to go to Publix-Where-Shopping-Is-A-Pleasure with her.

"What's wrong, Kiddo?" I asked.

She thrust a box of animal crackers at me and said, "See this? I bought this box of animal crackers and look! It says right on it, "Do not eat if seal is broken."

She reached into the box and sure enough ...

Seriously.

~Hugs,

  • Card Stock: Bazzill Basics
  • Designer Paper: None (AGAIN! Why do I hoard this stuff? Why?!?)
  • Stamps: Snowflakes from "Snowflake Serenade" by Papertrey Ink; Sentiment, Unknown
  • Ink: Versamark; "Creamy Brown" Fluid Chalk Ink by Clearsnap
  • Accessories: "Crystal Snow" by Stampendous!; "Moonlit Forest Glitz" EP by Comotion
  • Tools: Die-Cut Machine; Spellbinder's Die; Pear Craft Punch by Punch Bunch; Pine Bough Craft Punch by McGill; Large Fern Craft Punch by Punch Bunch; Golden Heavy Gel Medium; "Palette" Glue Stamp Pad by Stewart Superior; Black Dimensionals; The Ultimate Craft Glue by Api; Artists Spray Mount Adhesive by 3M

Friday, September 26, 2008

Let it Snow, Let it Snow, Let it Snow ... at Your House

Pin It


I'm sending lots of snowy wishes your way ... 'cuz I know how much you Northerners l-o-v-e snow. But that's not the only reason. The other reason is that today is "National Good Neighbor Day," and I'm just tryin' to be a good neighbor!

ONward H-C-M's:

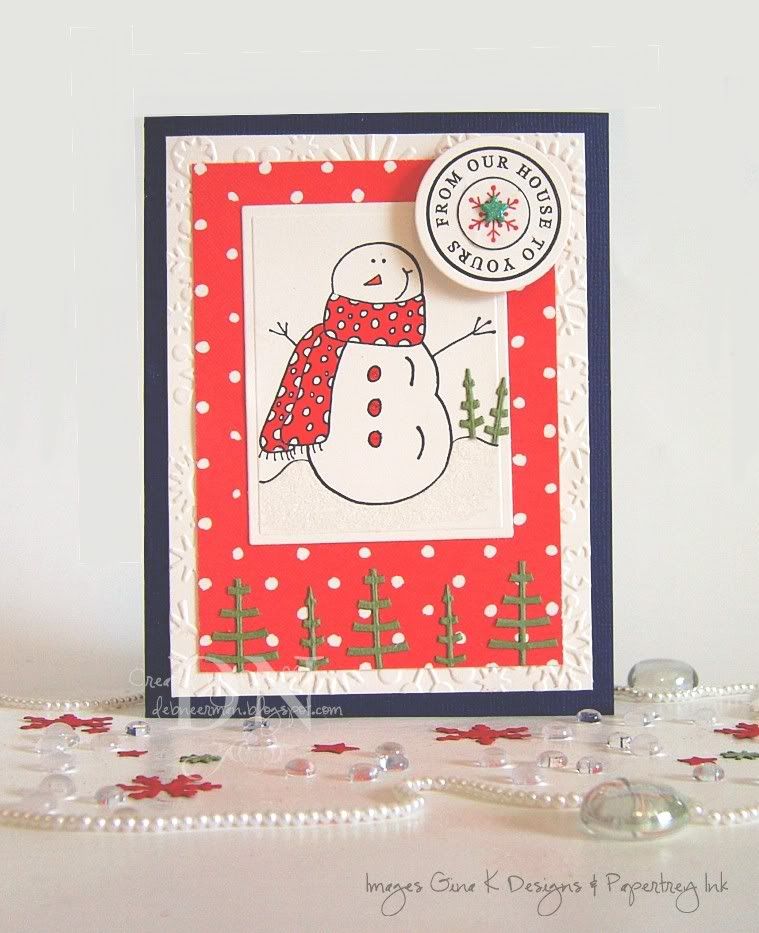
Today's card project was created for Allison's "Suggestive Sunday" blog challenge. This week, Allison challenged us to create a paper project using a snowman. I'll bet you didn't see that coming, huh?

I stamped my image on Vintage Cream card stock, and colored Mr. Snowman in with Copic markers. Notice my intricate and subtle shading here ... LOL! Right; the Copic's and I are barely speakin' these days.

I embossed my background card stock, added some red Stickles to his buttons and drew a horizon line with a black pen. The red patterned paper is actually half of an A•Muse "Kitchen" note card and I die cut some funky green 'trees' to embellish the note card paper.

There is a ton of super-fine snow glitter on this card and no matter how many different photos I took, I could NOT get it to show up ... nor the Copic W1 shadow under the snowman ... just let's pretend you see 'em, okeedokee?!?

Easy-peasy-snowman-easy!

So, the DH is building a hurricane-shutter-storage-box-thingie and asked me if I wanted to run down to the local Home Depot with him. Never one to miss an opportunity to get free paint sample cards and Formica chips, I agreed.

While the DH was talking boards with the nice man in the orange apron, a guy walked up and said, "S'cuse me, but I need some four-by-twos."

The clerk said, "You mean two-by-fours, don't you?"

The guy said, "I'll go check," and walked away. He returned a few minutes later and said, "Yeah, I meant two-by-fours."

"Alright. How long do you need them?"

The man paused, then said, "A long time. We're gonna build a house."

Seriously; I was there! Completely true ... the unadulterated truth. Hey, I can't help it if funny things happen all around me ... all the time ... can I? It must be a funny-karma thing ... plus my name, Deb, means "she who causes laughter everywhere she goes," in ... some other language ... I think.

~Hugs,

  • Card Stock: Bazzill Basics; Papertrey Ink
  • Patterned Paper: A Muse Kitchen Note Cards
  • Stamps: Snowman by Gina K. Designs; Sentiment by Papertrey Ink
  • Ink: Black, Archival by Ranger; Cranberry, Close to My Heart
  • Accessories: Copic Markers; American Craft Pen; Shimmer Brad by Making Memories; Stickles by Ranger; Super-Fine Glitter by Stampendous
  • Tools: Die-Cut Machine; Cuttlebug A2 Embossing Folder; Spellbinder's Dies; Cuttlebug Die; Dimensionals; Scrap Fusion PA

Tuesday, September 23, 2008

It's National Checker's Day!

Pin It


Say, do you have a Checkers restaurant near you? If so, get thy self down there and get a free meal today! It's not advertised but just do what I did ... order your meal, then when the cashier tells you how much you owe, tell them that today is National Checker's Day and that according to your attorney, all Checkers' meals are free for the askin' today. Yum, the only thing better than Checkers is free Checkers! And free checkin' ... that's pretty kewl too.

ONward Hoarding-Card-Makers:

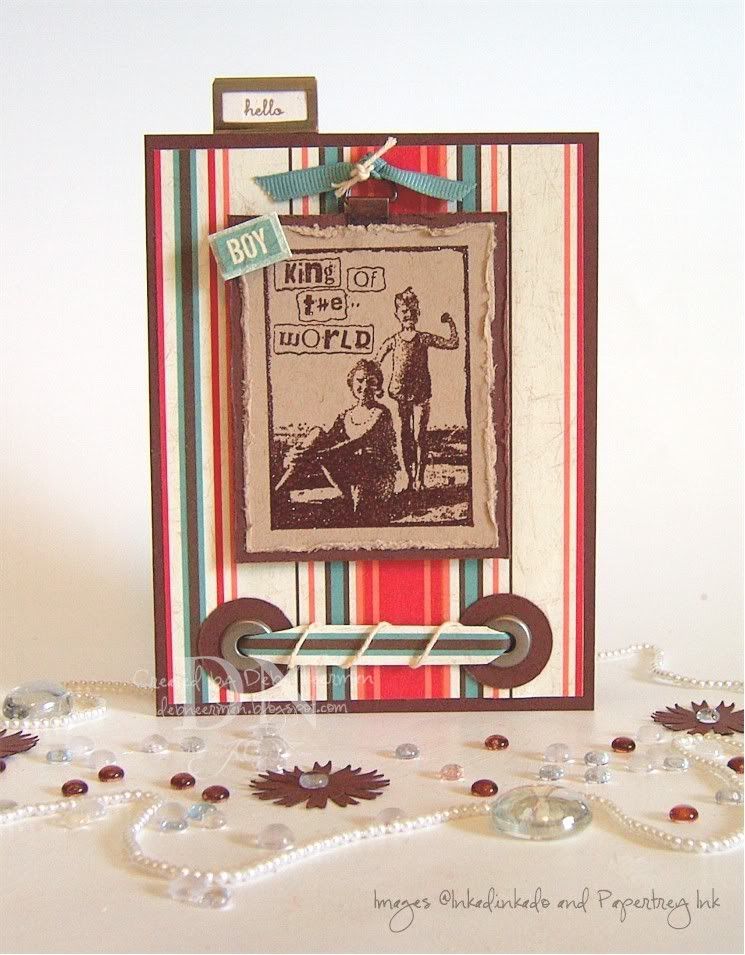
Today's card project was created for no good reason 'cept that I found this image on my work table all ready stamped, embossed, and distressed. Bein' that I never look a gift horse in the mouth (dangerously yucky), I assumed that the Goddess of Card Making wanted me to use it. So I did.

Isn't this DP gorgeous?!? I'm soooo in love with this new patterned paper from Close to My Heart! This is from the brand new "Perfect Day" collection and you can get it HERE. And you should ... 'cuz it's soooo pretty! I know you'll be thankin' me later for enabling you now.

For the rest of the deets on this card, check out my supply list, below.

So, my friend Sheila is helping out her uncle in his bakery this week. No, thank goodness, she doesn't bake, but she does know how to work the cash register.

Yesterday morning, a gunman burst in and demanded all the cash. As Sheila nervously handed over the cash, she noticed the rolls of coins in the back of the register.

"Do you want the rolls too?" she asked.

"No," said the robber, waving his gun. "Just the money."

Seriously.

~Hugs,

  • Card Stock: Bazzill Basics Kraft; Papertrey Ink
  • Designer Paper: Close to My Heart, "Perfect Day" Collection
  • Stamps: Hero Arts; Sentiment by Papertrey Ink
  • Ink: Clearsnap Dark Brown Fluid Chalk Ink; Versamark; Close to My Heart
  • Accessories: Grosgrain Ribbon; Vintage Cotton Twine; SU Jumbo Eyelets; Frame Hanger; Metal Index Holder: 7gypsies; Stacked Word Sentiment; Clear Embossing Powder; Distressing Tool
  • Tools: Crop-a-Dile; Heat Gun; Circle Punch; Dimensionals; Mini-Glue Dots

Thursday, August 28, 2008

O, Joy. A Joyful Card Opening Technique ...

Pin It


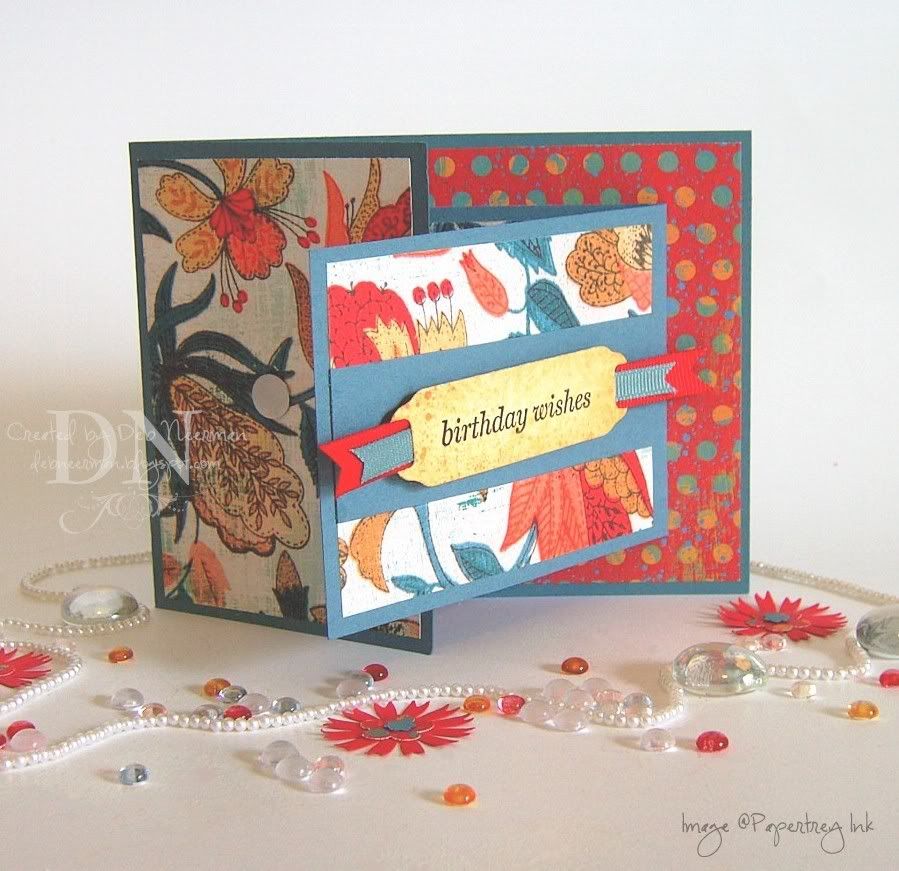
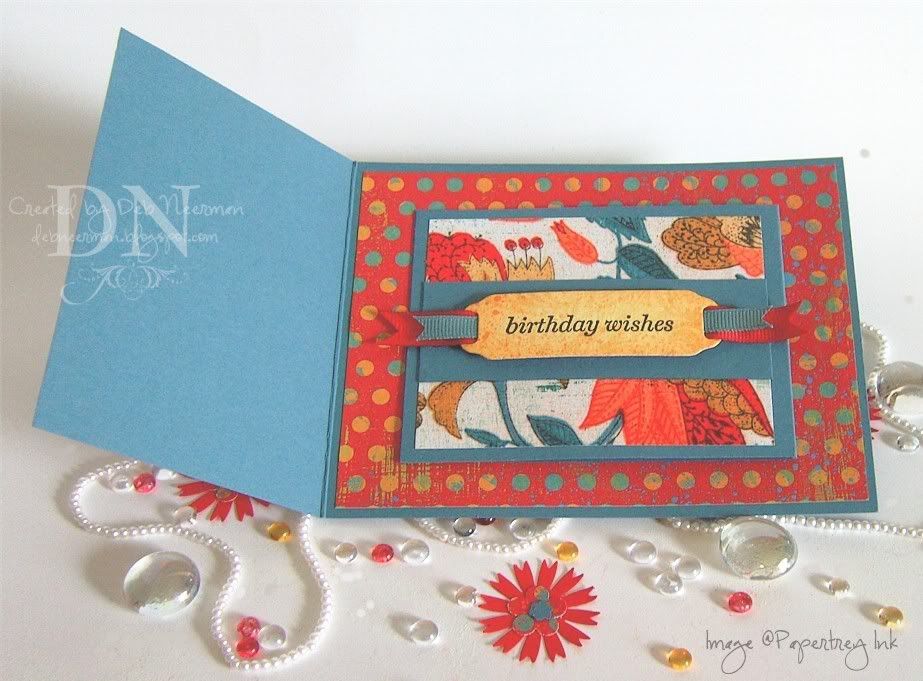
Does anyone have any idea why this card is called a "Joy Fold" card? I mean, it was fun and all, but fell w-a-y short of being a "joy." Successfully completed childbirth is a "joy." This was more like a "not unpleasant" card fold ...

You can find the joyous directions for this card on Splitcoast Stampers. Click HERE for all the joyful deets.

The top photo shows a full frontal; oh, joy!

This ^ is the partially-open-joyful-view.

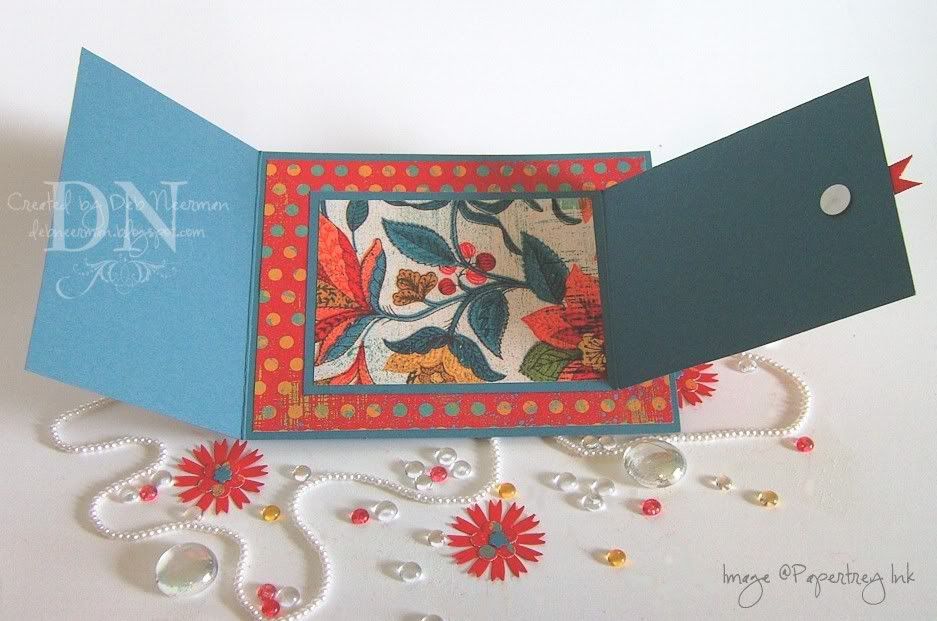
There are a variety of different ways you can create the closure for this joyful card; I used BasicGrey magnetic closure snaps. The round silver object you see on the left is one piece of the said magnetic snap closure set.

TIP: To easily match up your magnetic snaps, attach one to your card stock in the desired position. Attach the second magnet to the first, and mark the back of the second magnet with chalk or a charcoal pencil, then close. The chalk or charcoal will leave a faint mark on the exact position where the second magnet should be adhered.

FUN FACT: Snappin' this card closed IS a joy! The fun is only achieved by using magnetic snaps, though ...


Joyous semi-interior view ^.


Joyous full interior view ^. The round silver disc you see on the right is the other piece of the magnetic snap closure set.

I created my "Joy Fold" card using "Blue Bayou" card stock from Stampin' Up!; the DP is from Daisy D.

My sentiment was stamped with Brilliance ink and cut with a die from Spellbinder's "Ribbon Tags" collection, then threaded with grosgrain ribbon and mounted on dimensionals.

Oh Joy.

Hey, quick question: Why do croutons come in airtight packages? Isn't it just stale bread to begin with? Food for thought ...

Anyway ... thanks so much for spending part of your busy day with me!

~Hugs,

  • Card Stock: "Blue Bayou" by Stampin' Up!
  • Designer Paper: Daisy D's Paper Company
  • Stamp: "Simple Little Things" by Papertrey Ink
  • Ink: "Graphite Black" Brilliance by Tsukineko
  • Accessories: Magnetic Closure Snaps by BasicGrey; Grosgrain Ribbon; Derwent Charcoal Pencil
  • Tools: Die-Cut Machine; Ribbon Tag Die by Spellbinder's; Scrap Fusion PA; Black Dimensionals

PS: I've added more stamps, stamping magazines, and kewl stamp catalogs to my eBay store inventory. Most auctions are starting at just .99 with low shipping; click HERE to go to my store and see if you can find a treasure or three. Now THIS is joy!

Wednesday, August 20, 2008

Don't Forget to Wipe Your Feet ... A "Tag, You're It" Challenge Entry

Pin It


Happy National Radio Day, boys and girls!

My photos are not the best and I apologize. My excuse is the crummy weather we here in So Florida are currently 'enjoying.' Between tornado, flood, tropical storm, monsoon, and hurricane warnings, it's either the lack of natural light or the lack of electricity that's to blame for my yucky photographs. Sorry 'bout that, kids!

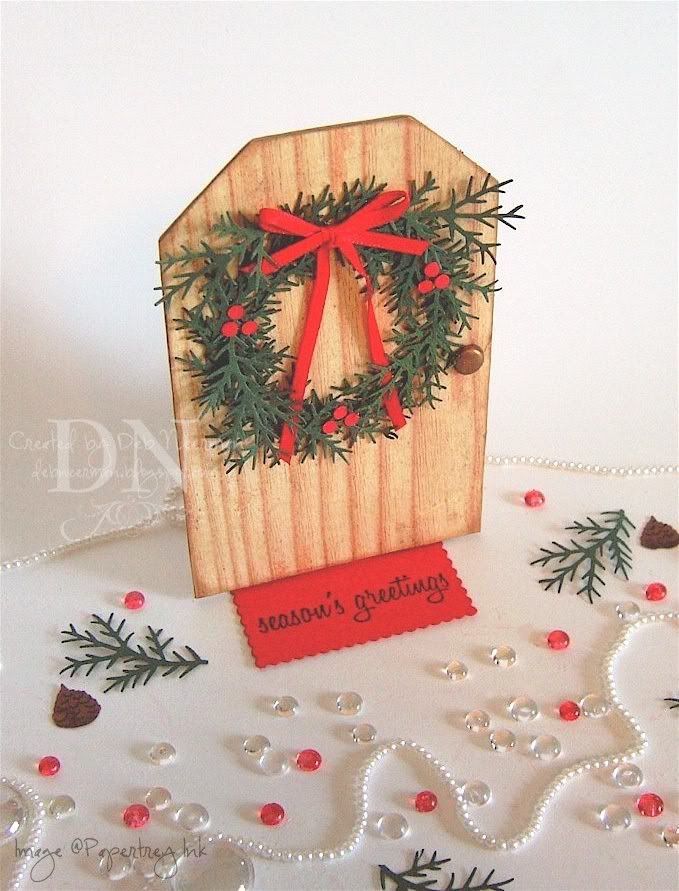
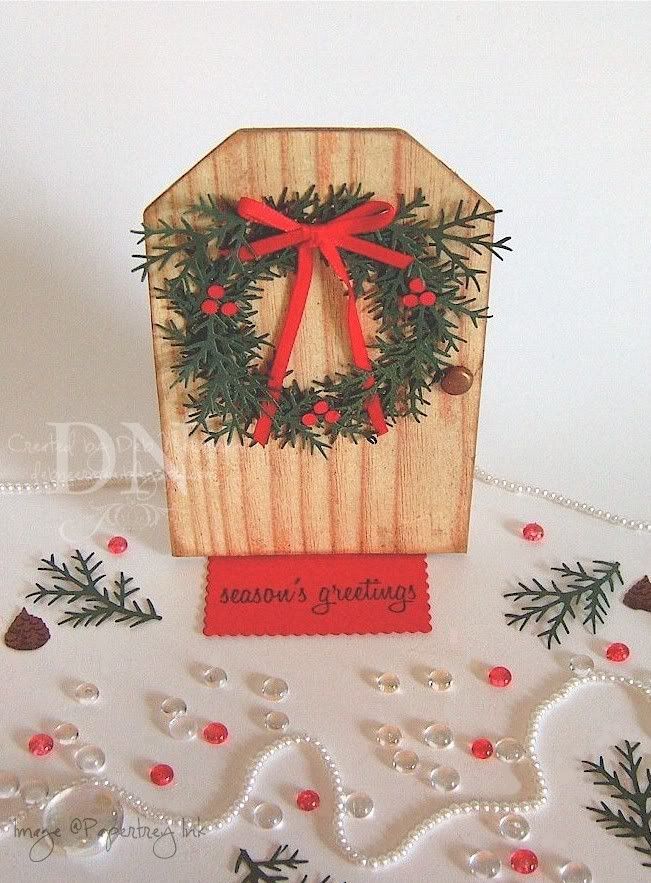
Today's project was created for Anne and Sam's "Tag, You're It" blog challenge. This week's theme is Christmas ... I know you didn't see that comin'!

I covered my chipboard tag with DP from Cosmo Cricket's "Wanted" collection, then sponged the edges with fluid chalk ink. Next, I created a wreath using card stock and a pine bough paper punch. I added some ribbon and some "holly berries" to the wreath, and used a copper brad to create my "door knob."

I stamped my sentiment on red card stock and cut it out using a scallop-edge rectangular die. I created a hinge from matching card stock to attach my "door mat" to my "door."


Easy-peasy and ready to serve in just ..... ohhhhh, let's say, 30 minutes!

One quick, cute, topical joke to share:

At the Olympic Games, a girl bumps into a man carrying an eight-foot-long metal stick.
"Excuse me," says the girl to the man, "Are you a pole vaulter?"
"No," says the man, "I'm German, but how did you know my name is Walter?"

Hey, thanks for dropping by today!

~Hugs,

  • Card Stock: DCWV; Bazzill
  • Chipboard Tag
  • Designer Paper: Cosmo Cricket, "Wanted" Collection
  • Stamp: Papertrey Ink
  • Ink: Brilliance by Tsukineko; Colorbox Fluid Chalk
  • Accessories: Antique Copper Brad; 1/8" Satin Ribbon
  • Tools: Die-Cut Machine; Nestabilities Die; Pine Bough Punch; Mini-Hole Punch; "The Ultimate" Glue; Mini-Glue Dots

Thursday, August 7, 2008

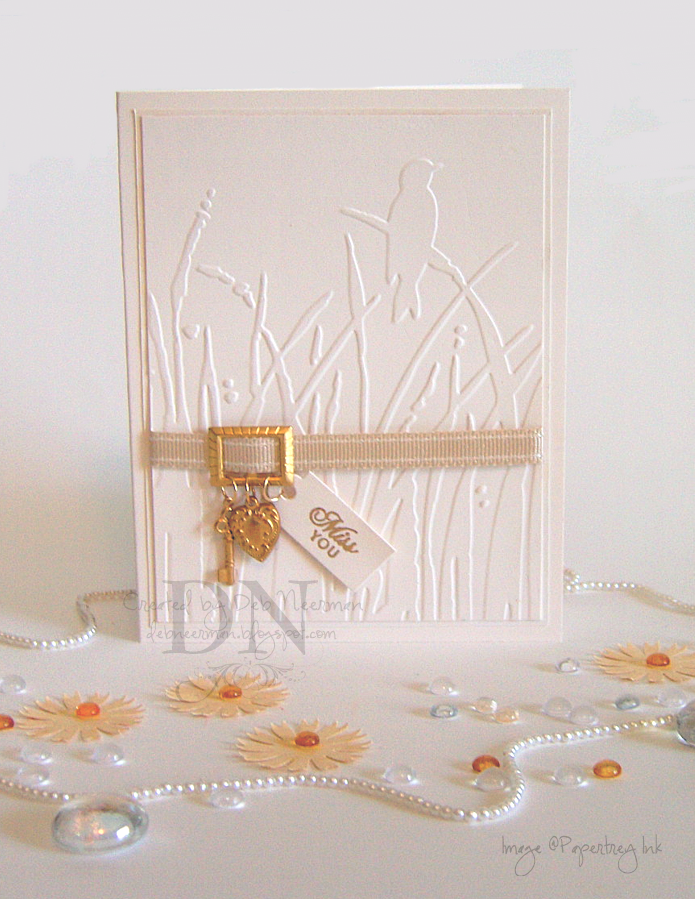
'White on White' ... or is it 'Cream on Cream'

Pin It


Phew, today's one of those days where I feel like I'm diagonally parked in a parallel universe ... but enough about me!

Today's cream-on-cream white-on-white project was next to impossible to photograph, so let me apologize for my crappy photo right now and get it over with.

This card was created for Sharon's "Stamp Simply" blog challenge ... and is this ever "stamped simply!" Sharon's instructions called for creating a card that is basically white on white; allowing us to add some very light pastels while keeping the color scheme as light/white as possible.

I ran my cream white card stock through the Cuttlebug in the newly released, "Bird Call" A2 embossing folder, then matted it on cream white DP from Cosmo Cricket's "Fleuriste" collection.

I die-cut a little cream white tag then stamped my sentiment, by Papertrey Ink, in Versamark, and heat embossed with gold powder.

Finally, I adhered some ribbon, including a ribbon slide, then attached my little tag, heart charm, and key charm with jump rings.

Easy-peasy and ready to serve in just 15 Minutes!

Thanks so much for spending part of your busy day with me; YKYR!!

~Hugs,

Friday, August 1, 2008

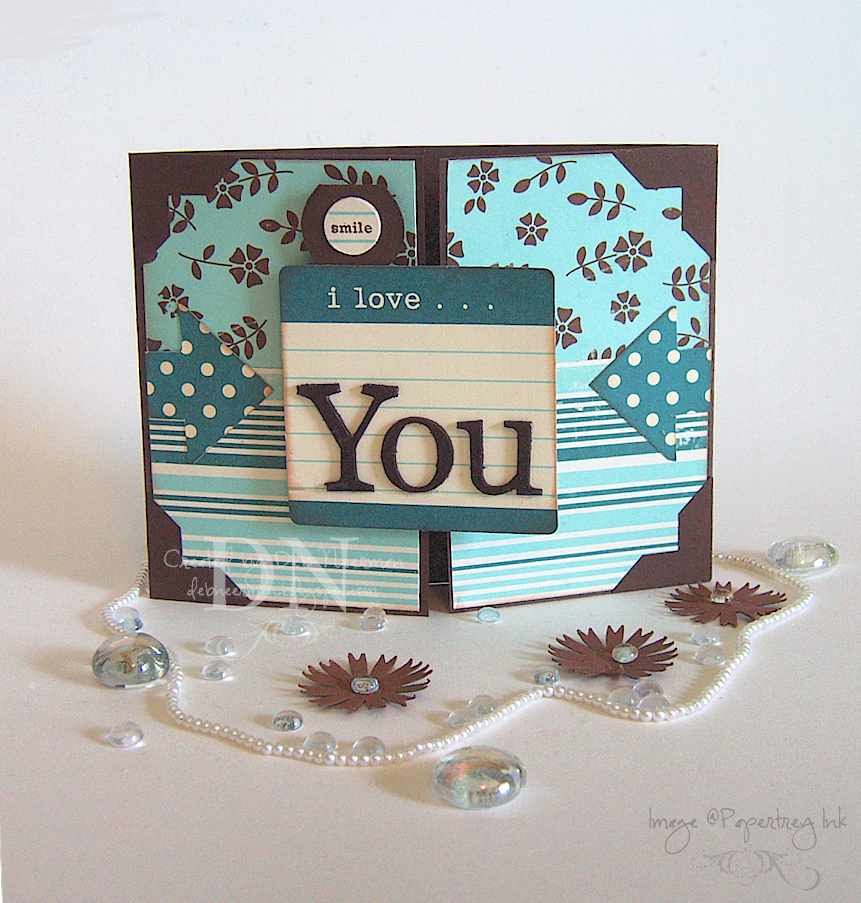
"I Love You" Gatefold Card ... A 15 Minute Project

Pin It


TGIF!

Today's 15 Minute gate fold card was created super-fast using die-cuts from October Afternoon's "County Fair" collection.

I cut my card stock to 4 1/4" x 11", then scored the card stock (starting from the left-hand side), at 2 3/4" and again at 8 1/4". I cut my designer paper to fit the front flaps, added a couple of die-cut arrows, and punched out some photo corners.

I inked up some Grungeboard mini-letters and applied them to a die-cut journaling card, stamped my Papertrey Ink sentiment on a 1/2" punchie, and attached it to a die-cut round file tab.

Finally, I attached the die-cut on to the left-hand side fold using dimensionals. Easy-peasy and ready to serve in just 15 minutes!

Quick update on the Y.ou K.now Y.ou R.ock "Rock the Cover" challenge: as of this writing, we have seventeen simply amazing entries! Click HERE to see 'em. Be sure to get your entry in on or before August 5; and, don't forget to vote for your favorite beginning on August 6!

Thanks so much for spending part of your busy day with me!

~Hugs,