Showing posts with label Tutorials. Show all posts

Thursday, March 18, 2010

Congrats; You Survived St Paddy's Day!

Pin It


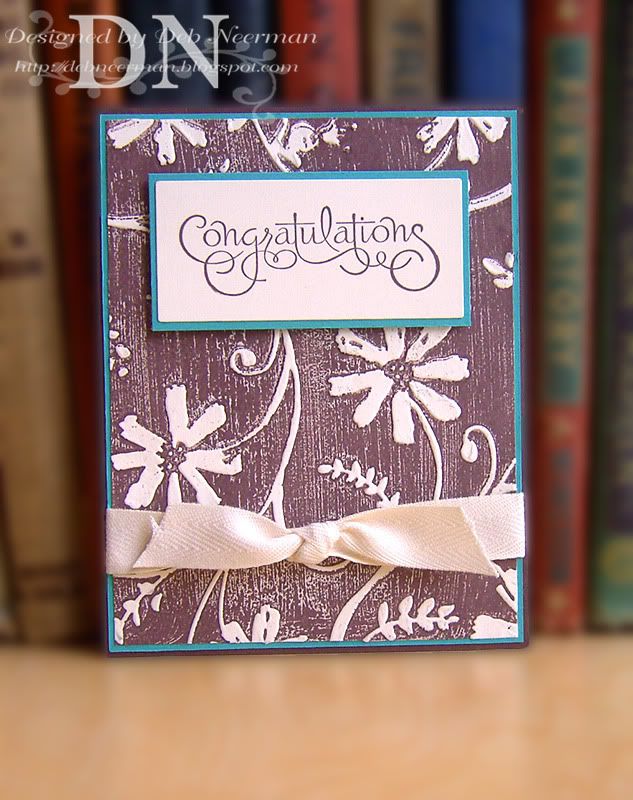
Well, it appears we both survived all of the St. Paddy's Day festivities: and by "festivities," I mean green beer ... or Guinness ... or Newcastle Ale ... or all of the above. So, congratulations!

Today's card project features a super-simple technique called the "Letterpress technique." It's easy, fast, fun, and creates a really unique background:

To create this background, I inked up the inside (ink the top flap - the side with the printing), of an A2 embossing folder with "Chocolate Chip" dye ink. Use the direct-to-paper/folder technique to ink up your folder, and try to get the ink down as evenly as possible on the folder.

Then, simply insert your card stock, run it through your die-cut machine and voila! Just be sure to clean your inky folder as soon as possible with warm, soapy water ... or a cool, wet baby wipe.

An easy, fun, and interesting background created with something you already own ... all of this AND ready in just 15 Minutes!

For the ginormous view of my card, clicky on the photo; for the rest of the cool, easy, and interesting product info, check out the Card Recipe, below.

Sooooooooo, I wanted to mention that my email address was hijacked yesterday and everyone in my address book got a link to some truly glorious spam. I didn't send this ... and I certainly wouldn't ... but I'm issuing the blanket apology here to any of you who may have received this l'il treasure from me.

Well, not me-me, but some-spammer-who-pretended-to-be-me. I believe I've stopped the spammer ... 'til the next time someone decides to hijack my email addy. But, hey! Wanna know how many zero-spam-tolerant group lists I was tossed off yesterday?!? All of 'em ... so, there you have it: every cloud DOES have a silver lining!

Thanks so much for swingin' by today ... especially with that awful headache you've got!

~Hugs,


Today's Challenges:
Card Recipe:
  • Card Stock: "Bermuda Bay," "Chocolate Chip," and "Very Vanilla" Card Stock by Stampin' Up
  • Designer Paper: None
  • Stamp: Sentiment from "Well-Scripted" Stamp Set by Stampin' Up
  • Ink: "Chocolate Chip" Dye Ink by Stampin' Up
  • Accessories: Twill Tape Ribbon by Stampin' Up
  • Tools: Die-Cut Machine; Rectangle Die; Cuttlebug A2 Embossing Folder; Stampin' Dimensionals and SNAIL Adhesive by Stampin' Up
  • Finished Size: 4 1/4" x 5 1/2"
Shop for Stampin' Up products online ... 24/7 ... HERE

Tuesday, February 16, 2010

'B' is for Birthday ...

Pin It


Happy Tuesday, Stampers!

Today's card project is known as a "Tri-Fold Shutter" card. Even though this card looks difficult, it's super-easy to create and your recipient will think you're the craftiest. card-maker. ever! Best of all, this card will fold up to fit in an A2 envelope.

Since I haven't made one of these cards in for-evuh and was overcome with the desire to make long cuts with an uber-sharp craft knife, I did:

Wanna make one? Here's the Reader's Digest Condensed version:

1. Create your card base by scoring a 5 1/2" x 12" piece of card stock at 2", 4", 8", and 10".
2. Turn card stock a quarter turn, and measure in to 1 1/2" at the long edge.
3. Using a metal ruler, make a continuous slit with a craft knife between the score marks at 2" and 10" at 1 1/2" down.
4. Repeat on the opposite long side.
5. Fold card.
6. Trim patterned paper to fit each section. I don't measure ... I just cut and fit each section.
7. Embellish, and you're done!

For the ginormous view of my card, clicky on the photo ... and for the 4-1-1 on all the spring-like product info, check out the supply list below.

Soooooooooo, on Sunday while I was hangin' out with Sheila, Reid-the-Wild-Child slashed and burned his way into the room.

"Mom, since there's no school, will you take me to the Zoo tomorrow?"

"No," Sheila replied, "If they want you, they can come and get you."

Thanks for stopping by ... have a great day!

Today's Challenges:

  1. All That Scraps: Tri-Shutter Card
  2. Secret Crafter: Multifold
  3. Pollycraft Monday: Double Up
  4. Cute Daisy May: Bright and Cheerful
  5. 365 Cards: Stacked Up
  6. Stamp Till U Drop: A Square, A Bird, A Flower
  7. Tanda Teaser: Quick and Cute
  8. Stamp Something: Something Cute
  9. Paper Play Challenge: Special Birthday Card
  10. Jacksonbelle Embellishments: Try a New Fold
  11. Practical Scrappers: Flowers

Card Recipe:

  • Card Stock: Mustard Textured Card Stock by Bazzill; "Bermuda Bay" and "Very Vanilla" Card Stocks by Stampin' Up
  • Designer Paper: "Bloom & Grow" Collection by My Mind's Eye
  • Stamps: "Party Hearty" and "Sheltering Tree" (Retired) Stamp Sets by Stampin' Up
  • Ink: "Kiwi Kiss," "Pumpkin Pie," and "Bermuda Bay" Dye Ink by Stampin' Up
  • Accessories: Flat-Back Pearls by Mark Richards; Glitzy Brad Pitts by KI Memories
  • Tools: Die-Cut Machine; Flower Dies; Large Bird Punch by Stampin' Up; Butterfly Punch by MS; Bird Punch by MS; Trefoil Border Punch by MS; Stampin' Dimensionals and SNAIL Adhesive by Stampin' Up
  • Finished Size: 5 1/2" x 12"
  • Folded Size: 4 1/4" x 5 1/2"

Thursday, January 28, 2010

Let the Games Begin!

Pin It


Happy Thursday, race fans!

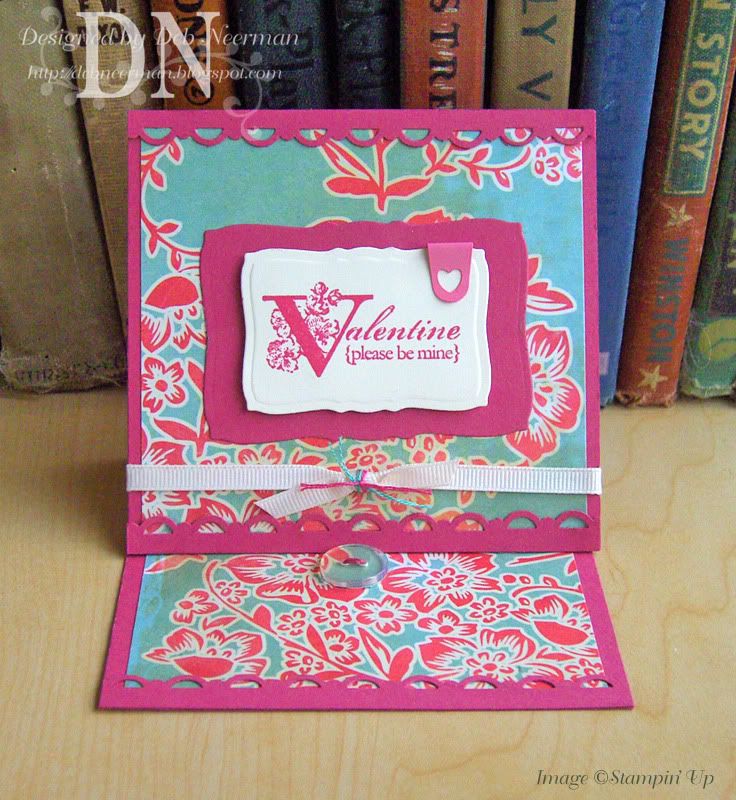
Today's super-simple card project was created for the "Stamptacular Sunday Challenge," #43, to create a 'pop-up' card. I decided to create my card using the uber-popular "Easel" card format.

For all the challenging deets, or to join in on the fun, clicky HERE to visit the Stamptacular Sunday Challenge blog.

If you've been in a coma ... or abducted by aliens ... and haven't heard about this quick and easy technique, here's a quick tutorial:

1. Score a 4" x 8" piece of card stock at 4" and again at 6";
2. Fold on score lines;
3. Cut a 4" x 4" square of card stock;
4. Cut patterned paper into two 3 7/8" x 3 7/8" squares (you can eyeball this - you just want to create a l'il margin ... or not, your choice);
5. Glue one 3 7/8" x 3 7/8" square of patterned paper to the bottom front of the scored and folded 4" x 8" card stock;
6. Adhere the remaining 3 7/8" x 3 7/8" piece of patterned paper to the 4" x 4" piece of card stock;
7. Adhere the 4" x 4" piece to the front fold even with the bottom edge of the card stock;
8. Adhere a brad, button, or other raised thingie to the bottom to create a "stop";
9. Embellish with stamped images, ribbons, flowers, punchies, stitching, or whatever your heart desires; and,
10. You're done!

These are really easy to assembly-line and they fold up perfectly for mailing in a regular A2 envelope. These cards are so easy to make that with just a little help ... especially in the cutting department ... the kid-lettes can make some too!

For all the eye-popping product info, check out the supply list below.

Sooooooooo, Sheila and I were talking yesterday about how addictive games on the Internet can be.

"Oh, please, I know. I've been playing them w-a-y too much," Sheila said.

"What makes you say that?" I asked.

"Well, right before I start dreaming at night, a blue strip appears with the words 'Loading ... Please wait.'"

Oooohhhhhh. Well, maybe she is playing 'em too much ...

Thanks so much for stopping by today ... have a great day!

~Hugs,

  • Card Stock: "Rose Red" and "Very Vanilla" Card Stock by Stampin' Up
  • Designer Paper: Cosmo Cricket
  • Stamp: "Holiday Best" Hostess Stamp Set by Stampin' Up
  • Ink: "Rose Red" Dye Ink
  • Accessories: 1/4" Grosgrain Ribbon; DMC Embroidery Floss; Heart Clip-Thingy; Clear Button by Stampin' Up
  • Tools: Die-Cut Machine; Spellbinders Dies; Scallop Trim Border Punch by Stampin' Up (Free with $50.00 Purchase!); Stampin' Dimensionals; SNAIL Adhesive by Stampin' Up

Wednesday, April 22, 2009

Inside Out Greetings ...

Pin It


Happy Hump Day all and one! Oh! And a happy "National Jelly Bean Day" to you and yours. Now, please pass the j-beans ...


ONward Hoarding-Card-Maker's:

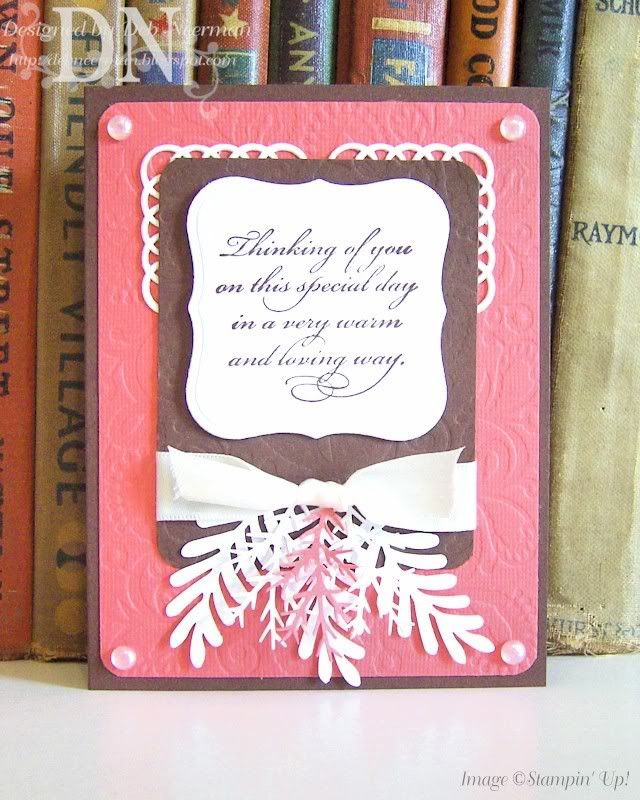
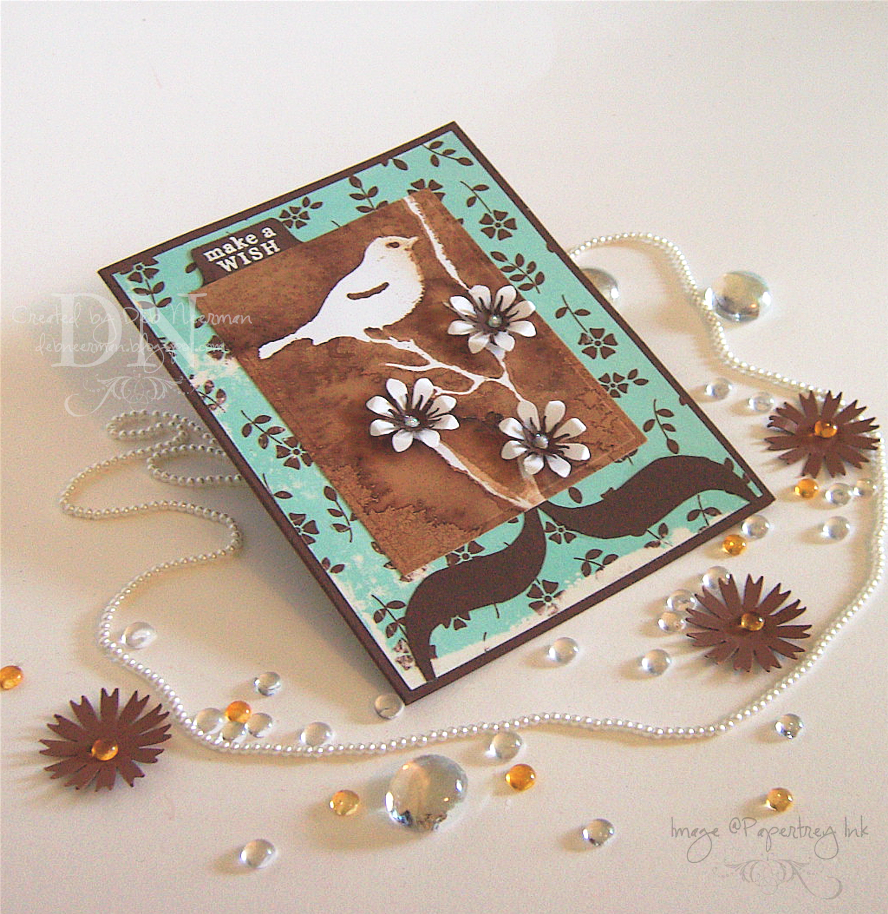
Today's card was created for no-good reason using a sentiment stamp from Stampin' Up! This sentiment, from SU's "Elegant Greetings," is meant to go on the inside of the card, but because I'm wild and crazy, I put it on the outside. Whoa! I s'pose this means I'll have to put the outside sentiment, "Happy Birthday," on the inside.


So, I used one of Spellbinder's new Impressabilities embossing templates ... and I'm terribly sad to report that I'm not too wild about these. They seem very thin and quite fragile compared to the 'Bugs embossing folders. And I found it difficult to get a deep impression.


In case you'd like to try these Impressabilities embossing templates in your Cuttlebug, here's my stacking order:

  1. Spacer Plate A;
  2. Spellbinder's Embossing Template;
  3. Card Stock;
  4. Rubber Gasket / Spellbinder's Tan Mat;
  5. Chipboard and 4 -5 Card Stock Shims; and,
  6. Cutting Plate B.

For all the exciting product deets, check out the Supply List, below.

Soooo, I was yakkin' on the phone with Sheila yesterday when she put me on "hold" ... kinda ... to have this conversation with her DH:


"Are you talkin' to Deb? Again?!?" I heard Ken ask.


"Well, duh, yes. I have to talk to Deb everyday." Sheila responded.


"Why? Didn't you just talk to her yesterday? What could you possibly have to tell her?"


"Well, for one thing, I have to tell her you just said that." Sheila snapped.


Ummmmmmmmm, no, you dont ...


I'll be back on Friday - Jury Duty calls!


~Hugs,

  • Card Stock: Bazzill Basics; Papertrey Ink
  • Stamp: "Elegant Greetings" Set by Stampin' Up!
  • Ink: "Chocolate Chip" Dye Ink by Stampin' Up!
  • Accessories: 5/8" Satin Ribbon; "Pearl" Dew Drops by Robin's Nest
  • Tools: Die-Cut Machine; Labels One Die by Spellbinder's; "Vintage" Die by Provo Craft; "Impressabilities" Embossing Template; Corner Rounder Punch; Rock Fern Punch by Punch Bunch; Pine Bough Punch by McGill; Foam Dimensional Tape; Scotch ATG 714; "The Ultimate" Craft Glue by Api

Monday, October 6, 2008

In Gratitude ...

Pin It


Why doesn't someone create a stamp that reads, "In Debt?" I'd buy it*!

Say, today is "National Come and Take It Day" ... and you might as well 'cuz I'm not usin' it; I only hoard it ... that's my job.

ONward Hoarding-Card-Makers:

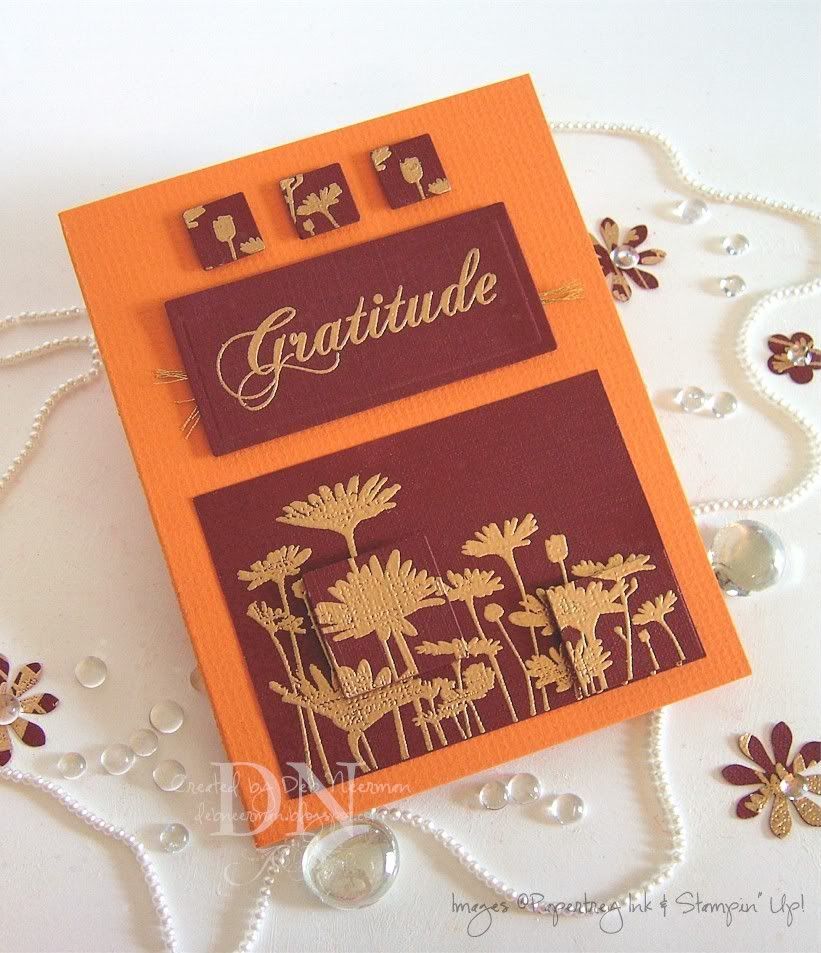
Today's card project was created for my T-Day card stash using SU's "Upsy Daisy" stamp set ... a set I dearly love.

I gold embossed the image twice, then cut out sections from one image to adhere over the original image using dimensionals. This is a variation of the "Spotlighting" technique.

For the deets on the original spotlighting technique, the uber-talented Beate Johns has created a tutorial just for you on
Splitcoast. Clicky HERE to view Beate's tutorial.

See? Easy-peasy!

So, yesterday Sheila talked me into going to hear a local dietitian speak on "Eating, Dieting, and Permanent Weight Loss."

"The material we put into our stomachs is enough to have killed most of us sitting here, years ago. Red meat is awful. Soft drinks erode your stomach lining. Chinese food is loaded with MSG. Vegetables can be disastrous, and none of us realizes the long-term harm caused by the germs in our drinking water."

"But there is one thing that is the most dangerous of all and we all have eaten it or will eat it. Can anyone here tell me what food it is that causes the most grief and suffering for years after eating it?"

While I watched in amazement, Sheila jumped up, waved her arms, and shouted out, "Wedding cake!"

Seriously.

And hey, today is the last day to get your entry in for the
Y.ou K.now Y.ou R.ock challenge, "Background Music." Julie and I can't wait to see what you've created!

~Hugs,

  • Card Stock: Bazzill Basics; WorldWin
  • Stamps: Sentiment by Papertrey Ink; Images by Stampin' Up!
  • Ink: Versamark
  • Accessories: Detail Gold Embossing Powder; Metallic Embroidery Thread by DMC
  • Tools: Die Cut Machine; Spellbinder's Dies; Heat Gun; Dimensionals

*Which is why I'm in debt in the first place ... see how it all just falls nicely into place?!?

Monday, August 4, 2008

Howdy! Wanna Try the "Bandana" Technique?

Pin It


Happy Monday ... yikes, better duck!

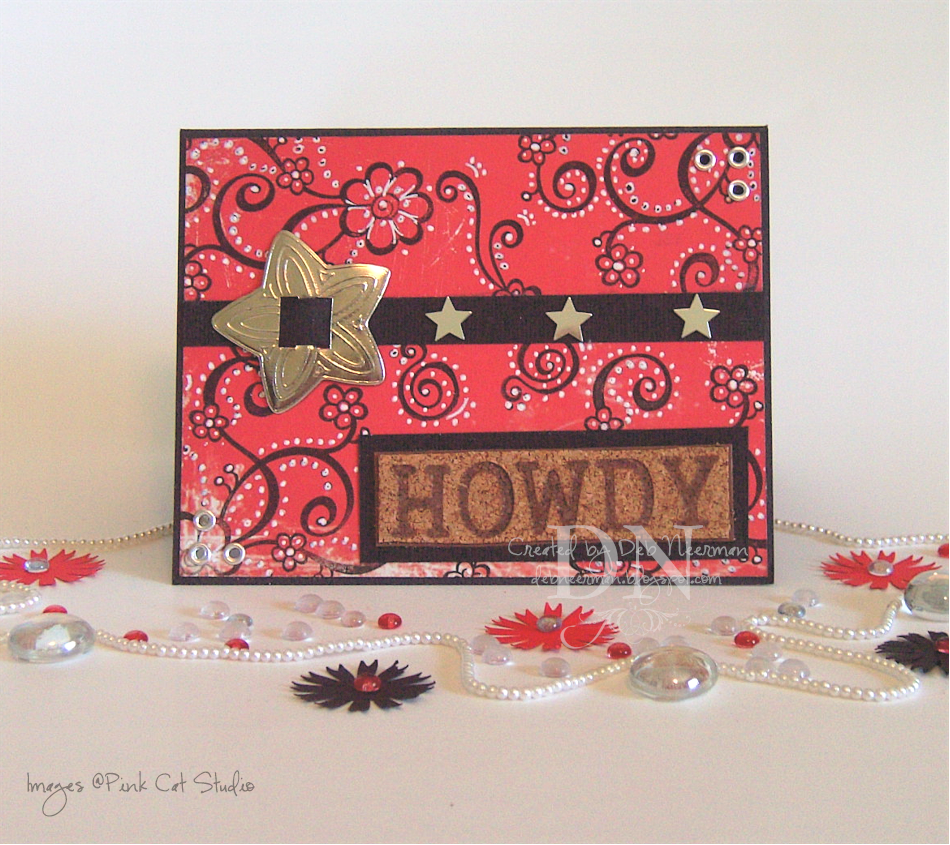
Today's card project was created using the "Bandana" technique. This kewl technique was created by Ranger Industries, featuring their Inkssentials White Opaque Pen ... which is the pen I've used here. For a ginormous closer look, click on the photo.

This technique is super-easy and lots of fun ... you can create your own background to work on, or use designer paper as I've done here. This distressed red paper is from Cosmo Cricket's "Dutch Girl" collection. Yes, I have been using a lot of this collection recently ... but that's only because I hate to put paper back into my over-organized storage cabinet.

I stamped my flourishes, from Pink Cat Studio, using Brilliance "Graphite Black" ink, then heat set. Then, using my Inkssentials pen, I drew lots of little dots, squiqqles, and outlines. And that's it!

I created a 'ribbon' out of matching card stock, added a silver concho, or ribbon slide, depending on your location, some little silver stars that Mel sent me, some eyelets, and my matted, burned sentiment.

This brand-style sentiment was left-over from an earlier project ... if you'd like to know how it was created, click HERE for the deets.

Give the "Bandana" technique a try! If you do, I'd love to see what you create ... just leave a quick link-up in the comments.

Thanks so much for spending part of your crazy Monday with me!

~Hugs,

Saturday, July 26, 2008

Walnut Ink Resist ... Using a Mini Mask

Pin It


Happy Saturday, boys and girls! I don't know about you, but I've loved Saturdays since I was a little kid ... 'cuz Saturday mornings meant just one thing: cartoons! Which has absolutely nothing to do with my post ... but when have I ever let that stop me!

Today's card project was created as an experiment: I wanted to see if I could create a mask resist using a Heidi Swapp mini-mask and walnut ink. As always, if you'd like a ginormous closer look, simply click on the photo.

I placed the mask on Xerox 110# card stock and sprayed on buckets (not really), of walnut ink. I like to really saturate the card stock, allowing the ink to pool up around the mask. Doing so, creates lots of kewl splotches and blotches of color making for a more interesting background.

In spite of the instructions, I left the mask in place overnight while the ink dried; when I removed it, I was really pleased with the results. I was afraid that the mask would allow the ink to seep underneath, ruining the project, but it held up just fine to my buckets (not really), of walnut ink. In fact, very little ink bled under the mask and, as an experiment, I touched up some areas with a Ranger Inkssentials opaque white pen. It blended in perfectly!

I created some flowers with craft punches, stamped and white heat embossed a sentiment, and attached a card stock bracket to the bottom of the card. Finally, I added a dot of Stickles in the center of each flower for some bling.

TIP: Always save the sheet your push-out die-cuts come in; you can easily trace new "die cuts" using the leftover negatives!

I'm pretty pleased with this technique and will definitely be trying it again with other mini-masks. If you create a mask-resist background, leave a comment and a link-up; I'd love to see your project!

Thanks so much for spending part of your busy weekend with me!

~Hugs,


Card Stock: Xerox 110#, CutCardStock; Designer Paper: "County Fair" Collection by October Afternoon; Stamp: Sentiment from Papertrey Ink; "Bird" Mini-Mask by Heidi Swapp; Ink: Versamark Watermark; Fine White Embossing Powder by Powder Keg; Walnut Ink: 7gypsies; White Opaque Pen: "Inkssentials" by Ranger Industries; Stickles by Ranger Industries; Various Craft Punches; File Tab Punch: Stampin' Up!; Adhesive: Scotch ATG 714, Scrap Fusion PA by Ivy Scraps

Saturday, July 5, 2008

15 Minute Project ... Using the "Glimmer Mist Resist" Technique

Pin It


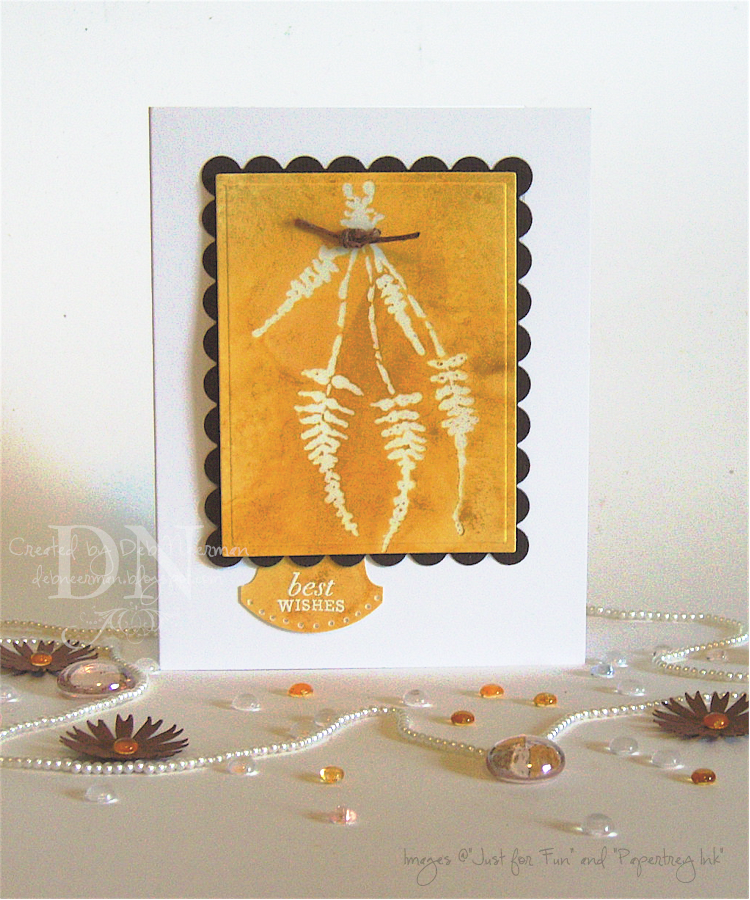
Today's "15 Minute" card project was created using clear embossing powder and gold Glimmer Mist by Tattered Angels. If you'd like a ginormous larger view, simply click on the photo.

I have several spray bottles of Glimmer Mist and never remember to use it ... sooooo, I decided to try to create a resist using the Mists with a clear embossed image. I know you have some Glimmer Mist in your studio too, so drag it out and let's create some kewl clear resist backgrounds!

First, I stamped my primitive herb image with Versamark on Xerox 110# card stock. I then placed the stamped image in a shoe box and sprayed heavily with gold Glimmer Mist. Really soak your card stock ... and allow the Glimmer Mist to pool up around the clear embossed image; doing so creates some really interesting patterns!

Allow the card stock to dry overnight ... then simply use a slightly damp rag to gently wipe the Glimmer Mist off the embossed image and voila!

Using a scrap of the Glimmer Mist(ed) card stock, I punched out a round file tab, then embossed my sentiment using white embossing powder. I used my piercing tool to punch little holes around the bottom edge of the file tab and went over the holes with a white Sharpie paint pen.

I punched two tiny holes on either side of the herb swag and, using wax linen thread, tied a square knot.

Finally, I cut my image out using Nesties in the Cuttlebug, then mounted it using black dimensionals on a dark brown scallop edge mat. TIP: Try mounting your card stock mats using black dimensionals; they "disappear" on your project.

I'd love to see what you create using the clear embossing resist technique with Glimmer Mists. Link up your creation in the comments so everyone can check out your creation!

Hope you're having a relaxin' and creative weekend; thanks for sharing part of it with me!

~Hugs,


Card Stock: Xerox 110#, Bazzill; Stamps: "Herb Swag" ... I made that up; I don't know what the name of this stamp is, but it's manufactured by Just for Fun ... Sentiment stamp by Papertrey Ink; Versamark Watermark Ink; Gold Glimmer Mist by Tattered Angels; Sharpie Paint Pen; Clear Embossing Powder: Unknown, I store all my clear emobossing powder in a covered plastic box ); White Embossing Powder by Powder Keg; Waxed Linen Thread by 7gypsies; Piercing Tool by Making Memories; Round File Tab Punch by Stampin' Up!; Large Classic Square Rectangle Die and Large Scallop Rectangle Die by Spellbinder's; Die-Cut Machine by Provo Craft; Adhesive: Scotch ATG 714; Black Dimensionals: Unknown, Obtained in a Sticky Share


Tuesday, May 20, 2008

Blog Candy Winner ... and The Yogurt Video!

Pin It

If you read Carol Burrage's blog, you've prolly already seen this video. But if you haven't, or want to watch it again 'cuz it's hysterical, well, here you go:


Okay, now that I've gotten that outta my system, (LOL - that statement is way funnier after you see the video), it's time to announce the winner of the Diva Impressions rubber stamp give-away. I went to Random.org and plugged in the number of comments (not including deleted comments), and got this:

Random Integer Generator
Here are your random numbers: 9
Timestamp: 2008-05-20 22:58:18 UTC

Comment #9 reads, "Favorite technique, huh? I'd have to say distressing. Right now everything I do needs to be distressed in one way or the other. Love the look and the process. Thanks for offering these great stamps as blog candy. You rock!," and was posted by Sheila D. Congrats to Sheila and please send me your snail mail addy so I can get your new stamps off to you! Oh! And you rock too ... almost as much as J.K.!

Thanks to all of you for visiting, comment, and posting. I have lots more of these stamps to give away ... so check back for another chance to win some time this weekend.

Finally, I quickly wanted to respond to a couple of questions I received about THIS project.

First off, the secret to creating these particular flowers is the punch:

This is called the "Mega Lily Theme Punch" ... I purchased mine some time ago and don't remember exactly where but I believe I found it online. A quick Google search indicates it's still available ...and can be purchased for around $17.00. This punch contains all the lily petals and the leaf.

I shaped my punched petals with a molding tool but a small spoon will work too. I use tweezers to curl the tips and the edges of the flowers and the leaves and a stylus to create veins. The whole shebang is created on a punched snowflake base; if you don't have a snowflake punch you can do what I do, which is I cut a snowflake die in my Cuttlebug and glue all the flowers and leaves in place on the 'fingers' of the snowflakes. And speaking of glue, you want the fastest drying, strongest hold, clear-drying glue you can find. For me, that's "The Ultimate" glue by Api.

And I think that about covers it ... if I can clarify anything for you (and that would prolly be every thing since I'm sure my explanation is as clear as mud), I'm happy to try.

Thanks so much for spending part of your busy day with me!

~Hugs,


Friday, May 16, 2008

Bloom with Abandon ... Walnut Ink Resist Technique

Pin It


Happy Friday, boys and girls, and welcome to another edition of MACM! No, no, nothing like Kristina's Make a Card Monday. My version of MACM is "Making a Card ... Mess!"

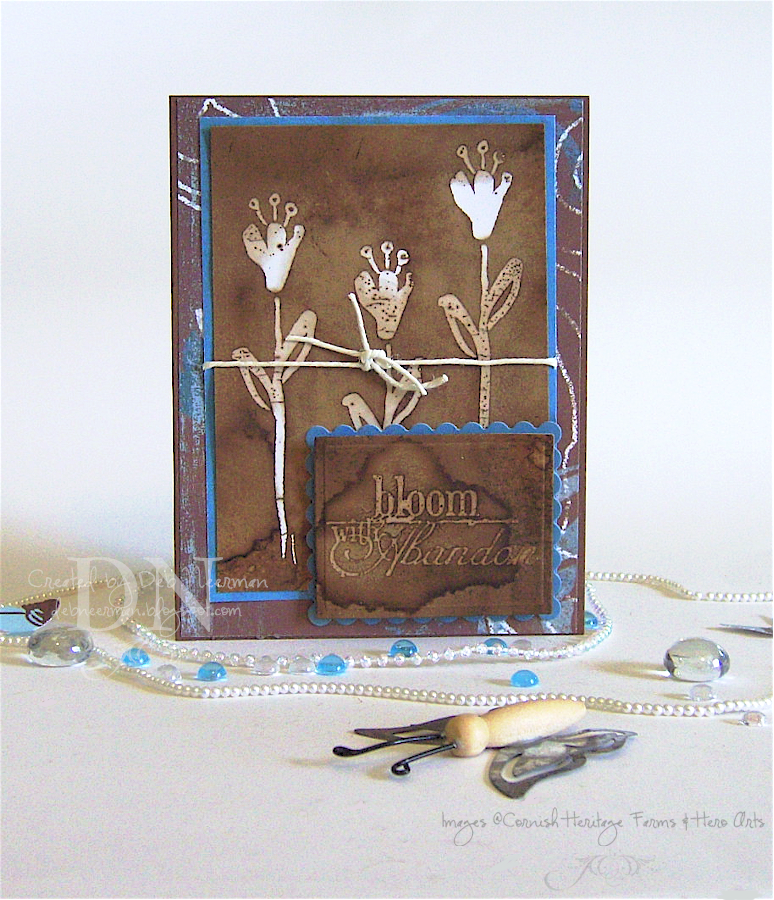
With my art roots being in mixed media collage and assemblage, mess-making comes naturally to me! But with my "spray in a box" technique, this project really isn't all that messy ... and, if you're like me, you already have 20 gallons of walnut ink stashed somewhere in your studio. Today we're gonna put it to good use!

It's really very simple to achieve this look: you'll need white matte card stock, a bold stamp, watermark ink, clear embossing powder, a heat gun, walnut ink, an old shoe box, and a soft cloth or paper towels.

I stamped my "Long Stemmed Lily" stamp three times on Xerox 110# matte card stock using Versamark watermark ink. I covered my stamped images with clear embossing powder and embossed with my heat gun. I followed the same steps with my sentiment stamp.

Now for the messy fun part! Fill a spray bottle with walnut ink (follow package instructions, or ask me for mixing directions, if you're starting with walnut ink crystals). Place your stamped and embossed images in the empty shoe box and spray ... liberally ... with the walnut ink. Then spray again ... liberally. I like to cover the entire sheet of card stock with ink, encouraging lots of little puddles ... that's what makes the piece interesting! Using your hands, rotate the inked card stock, allowing the ink to puddle and pool. Once you're satisfied with the ink's coverage, you're done! Simply allow the card stock to dry naturally ... overnight is best.

When completely dry, simply wipe the embossed areas with a cloth or a paper towel. You might slightly dampen the cloth or paper towel for faster removal. Then use your uber-kewl, walnut-ink, clear-embossed-resist piece in your next project!

This technique is a great way to enhance a vintage-inspired project, but any stamp or style will work here ... with the possible exception of finely detailed stamps. Try it! I'd love to see what you create, so if you do use this technique please post a link in the comments.

Thanks so much for sharing part of your busy day with me; have a great weekend!

~Hugs,


Card Stock: Cut Card Stock, Xerox 110#; Designer Paper: My Mind's Eye "Bohemia" Collection; Stamps: "Long Stemmed Lily" by Hero Arts, "Bloom with Abandon" Cornish Heritage Farms; Ink: Versamark Watermark; Walnut Ink: 7gypsies; Waxed Linen: 7gypsies; Die-Cut Machine: Provo Craft; Dies: Nestabilities by Spellbinder's; Adhesive: ATG 714; Dimensionals: All Night Media

Wednesday, May 14, 2008

15 Minute Project ... and a Blog Challenge Entry

Pin It


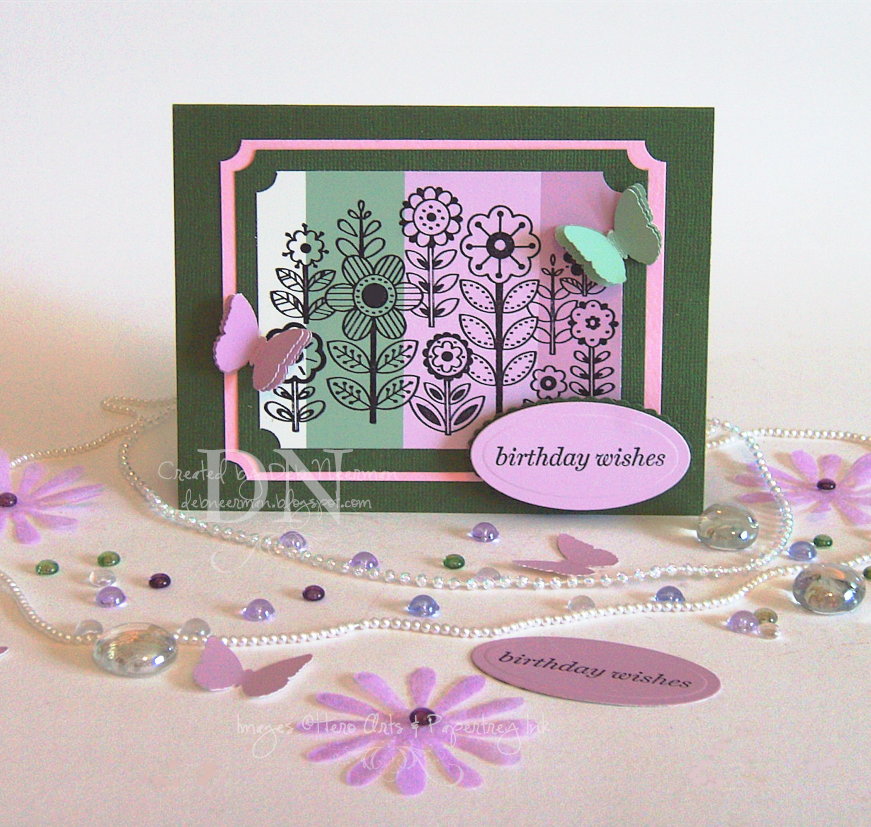
Today's "15 Minute" card project was created for Allison's "Suggestive Sunday" blog challenge. This week, Allison's challenge required that you use a stamp that you would normally stamp, then color ... but don't. In other words, no coloring allowed!

I decided to stamp my image on a paint sample card ... allowing me to stay within the challenge guidelines and to add some color to my project ... pretty sneaky, huh?

I love using paint sample cards in my projects! Mostly because they're free but also because they're always so colorful ... usually featuring all the latest designer colors and, like this ^ paint sample card, some really kewl color combinations!

TIP: When stamping on paint sample cards, be sure to use a solvent ink, like Staz-On, to insure that the ink stays put. To prevent smudging your stamped image, lift your stamp straight up ... while holding the paint sample card down with the other hand.

Using scraps left over from the same paint sample card, I punched out some butterflies and cut an oval for my sentiment. Easy peasy and ready to serve in just 15 Minutes!

Thanks so much for sharing part of your busy day with me! And please feel free to ask me any question you might have about stamping in general or stamping on paint sample cards in particular, okeedokee?!?

Hugs,


Card Stock: Bazzill, Prism; Paint Sample Card: Lowe's Home Center; Flower Stamp: Hero Arts, "Pattern Flowers"; Sentiment Stamp: Papertrey Ink, "Simple Little Things" Limited Edition Anniversary Collection; Ink: Staz-On by Tsukineko; Die-Cut Machine: Provo Craft; Die: Spellbinder's Nestabilities "Petite Scallop Oval" Collection; Butterfly Punch: Martha Stewart Crafts; Ticket Corner Punch: Stampin' Up!; Adhesive: ATG 714; Dimensionals: All Night Media

Thursday, May 8, 2008

It's a Girl's World After All ... a Blog Challenge Entry

Pin It


Today's 8" x 4" card project was created for Allison's "Suggestive Sunday" blog challenge. For this week's theme, "Girls of the World," Allison provided us with some really cute clip art images to use to create our entries. If you'd like to download this collection for your personal use, click HERE.

As you can tell, there's no stamping on this card. Here's a perfect project for all of you non-stampers ... I know you're out there!

I paper-pieced my girls by first printing out a copy of the entire sheet on regular text weight paper. Then, using an 80# sheet of white card stock, I held the printed sheet behind the card stock and determined the placement of my designer paper. Next, I simply taped my DP over the area where my selected images would print, and ran the prepared card stock through my printer. If I haven't explained this well, and I prolly haven't, please feel free to ask questions.

I cut out the clothing from the DP, colored my girls with Copic markers, and added some Stickles to each girl. You might have to click on the image to see it but it's there!

The background was created by running card stock through my 'Bug using Cuttlebug's "Perfectly Paisley" embossing folder. Because my paper was much longer than the folder, I simply ran it through once, flipped the card stock so that the non-embossed portion of the card stock was in the folder, and ran it through again.

Finally, I set some eyelets, ran some soft fibers through the set eyelets, and created a scallop border using a pair of Fiskars decorative edge scissors ('Clouds).

Tomorrow, I thin' I'll be posting some more Diva Impression rubber stamps to give away. Hope to see you back for that!!

~Hugs,


Card Stock: Bazzill, Cut Card Stock; Copic Markers; Clip Art Images; Designer Paper, American Traditional Designs, "Bohemian Chic" Collection; Decorative Edge Scissors: "Clouds" by Fiskars; Die Cut Machine: "Cuttlebug" by Provo Craft; Embossing Folder: "Perfectly Paisley" by Provo Craft; Dies: "Nestabilities" by Spellbinder's; Crop-A-Dile; Dimensionals: All Night Media; Stickles by Ranger Industries; Eyelets: American Craft; Fibers: EK Success, "Adornaments"

Friday, April 4, 2008

15 Minute Project ... Embossing a Frame in the Cuttlebug

Pin It


Today's "15 Minute Project" was created super-fast using a mask, a makeup sponge, and some ink. Oh, yes, and a couple of stamps, too!

I created this embossed frame on my card front in the Cuttlebug using a die from the Nestabilities Large Classic Rectangle set. This is an easy technique that adds so much to your card project! Click on the photo for a closer look.

Here's the stacking recipe:

  1. Spacer Plate A;
  2. Cutting Plate B;
  3. Your choice of Nestabilities positioned on the front of your open card, cutting blades face up. It's important that you open your card and allow the back half of your card to lay free and clear;
  4. A 4" x 4" sheet of craft magnet material ... this helps hold your die in place and also adds some needed bulk to your stack;
  5. Spellbinder's tan embossing mat;
  6. Two sheets of scrap card stock; and,
  7. Cutting plate B.

Run the whole shebang through your 'Bug and voila: an elegant yet classic look that will dress-up even the simplest of cards.

Next, using Painter's Masking tape, I masked off the card front, leaving just the center frame exposed. I used the same tape and a 1" circle punch to create a round mask. TIP: attach your masking tape to a scrap piece of card stock before punching; doing so will prevent your tape from turning into an ugly, sticky mess inside your punch.

I applied my circle punched mask to the upper-right hand corner of the center frame and sponged on Staz-On yellow ink ... when I was happy with the yellow, I over-sponged with Palette Hybrid orange ink.

Next, I tore a scrap of paper and laid it over the yellow and orange ink, and sponged on Palette Hybrid green ink. To create the illusion of shadows, I turned the sponge sideways and sponged using the edge of my make-up sponge. Once I was happy with the foreground, I stamped on the palm trees.

Finally, I removed my masks, stamped my sentiment, and was done ... it took me longer to type this post than it did to create the card!

Thanks so much for spending part of your busy day with me ... and have a wonderful weekend!

~Hugs,

Xerox 110# Card Stock; Ink, Staz-On Sunflower Yellow, Palette Hybrid in Giverney Green and Orangerie; Stamp, Palm Tree (Unknown), Sentiment, See D's Inque Boutique; Cuttlebug Die Cutting Machine; Spellbinder's Nestabilties Die; Scotch Masking Tape; Dollar Store Make-up Sponge

Wednesday, March 26, 2008

15 Minute Project ... Using an Embossed Background Created with Watermark Ink and the Cuttlebug

Pin It


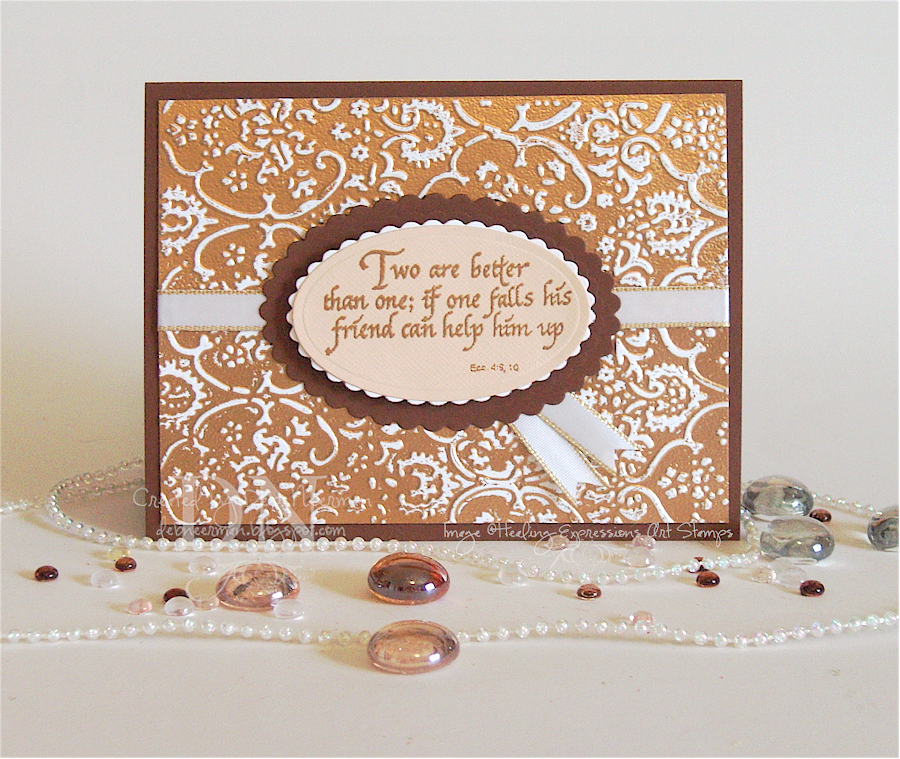
Today's "15 Minute Project" was created using an inspirational stamp from Healing Expressions Art Stamps. This unique Biblical sentiment stamp is perfect for sending support and friendship to someone special. I think it would make a really neat anniversary card too, but that's just me ...

I stamped the text using watermark ink and embossed with copper embossing powder. I mounted my stamped and embossed image on two oval scallop mats using dimensionals.

The kewl background was created using Versamark inside a Cuttlebug embossing folder; I embossed using copper powder. For this project, I used the "Textile" folder but any of them would work ... including the 2 x 2 embossing folders.

Using watermark ink, I coated the inside of the top flap (it's the flat side where the word "Cuttlebug" is printed in black ... it's the same side you'd use for normal folder embossing in the 'Bug), with a liberal coating of Versamark.

Insert your card stock, or other background paper, face up in the folder and run through your machine. Remove and coat the card stock with a generous coating of embossing powder. Then, heat emboss as you normally would.

You should clean your embossing folder as soon as possible to avoid staining ... watermark ink won't stain but other inks may. I used baby wipes to clean mine but soapy water works too.

My bloggin' friend, Julie, created a lovely distressed background with the same technique ... however, she used bronze Pearl-Ex for her color medium. Click HERE to take a look at Julie's amazing piece of art! Talk about WoW, huh?!?

Imagine all the creative possibilities using this kewl technique ... you'll have a hard time deciding where to begin!

I believe this technique began it's life on SCS, and I'd be delighted to credit the inventor. If anyone knows exactly who dreamed up this fun technique, please let me know.

Happy creating!

Hugs,


EDITED TO ADD: Jennifer (jennifer-g on SCS) was kind enough to write and tell me that Kurtis, the Stampin' Kub, was the creator of this kewl technique. Click HERE for the complete tutorial. Thanks, Jennifer; you rock!

And Kurtis, if you've somehow got lost in Blogdom and are reading this, thank you for creating and sharing such a fun and easy technique to use with the 'Bug!!

Thursday, March 13, 2008

Two 15 Minute Projects ... Using Fiskars Texture Plates in the Cuttlebug

Pin It


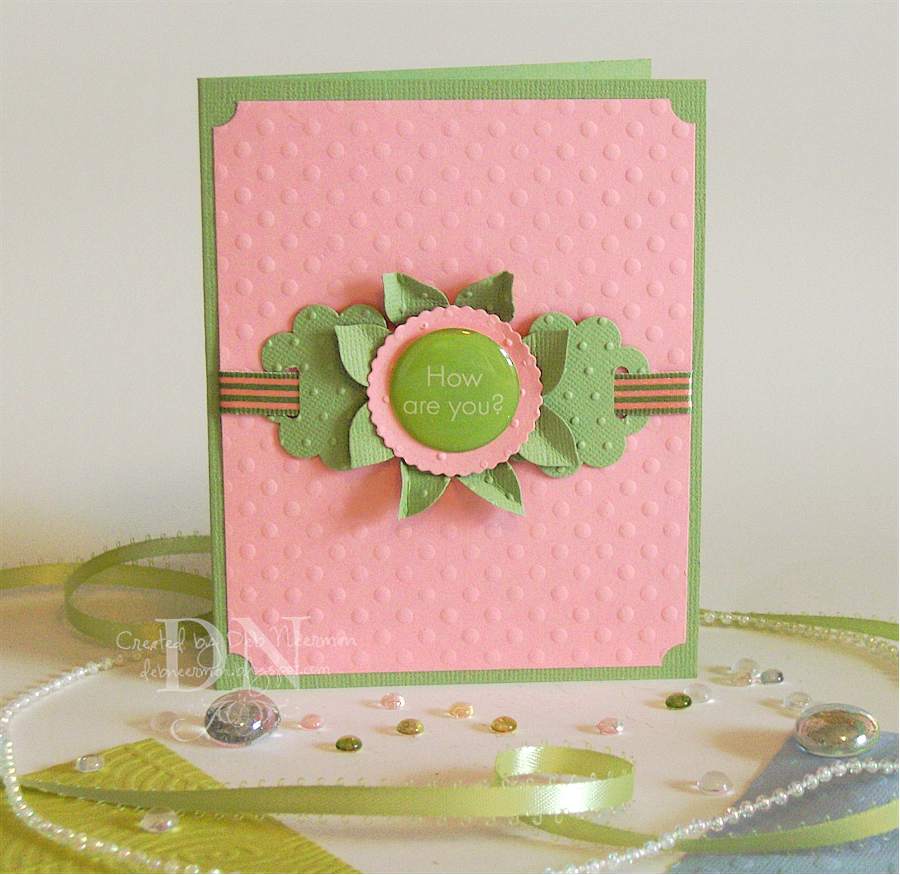
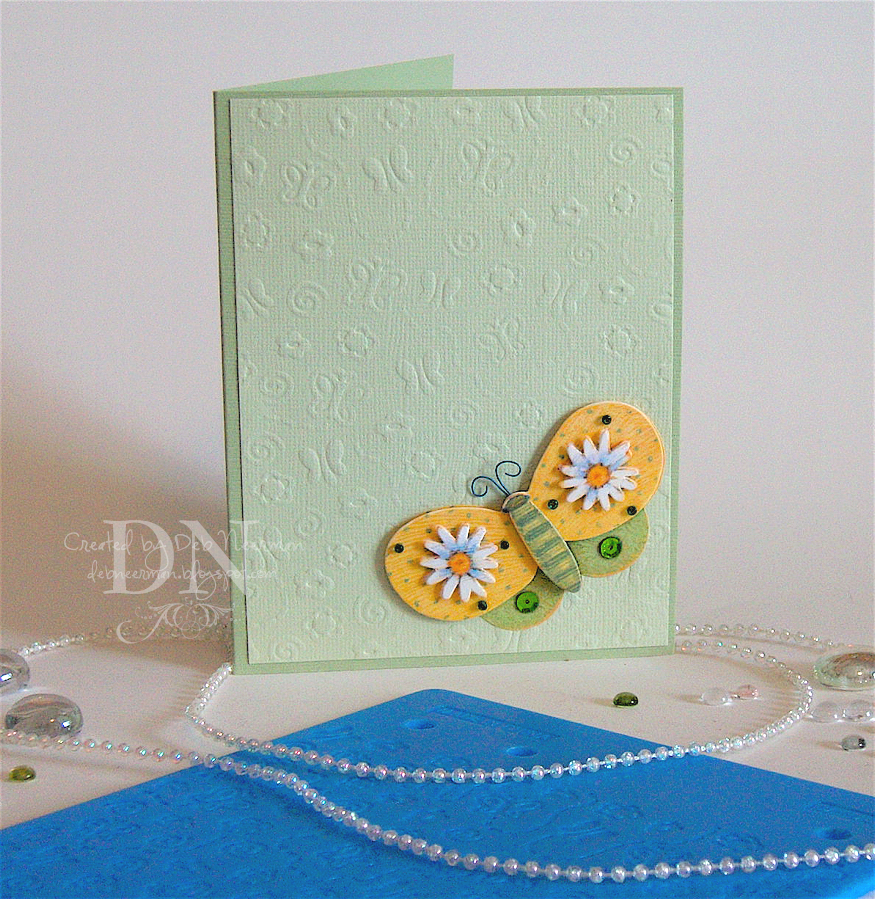
Today's 15 Minute Projects were created with backgrounds texturized using Fiskars Texture plates and the Cuttlebug. This ^ background was created with Fiskars Plate, "Dots."

The embossed dots on the "flower" were created in the "Swiss Dots" Cuttlebug embossing folder using Bazzill card stock.

In the foreground, you can see two additional backgrounds created with Fiskars Plate, "Feathers," and Fiskars Plate, "Raindrops." As always, you can click on the photos for a closer look at the backgrounds.

After a few fits and starts, I came up with this recipe to create these kewl texturized backgrounds:

  1. Spacer Plate A;
  2. Fiskars Texture Plate, face up;
  3. Card Stock, face down;
  4. Two 1/16" thick rubber gaskets (6" x 7 3/4" overall);
  5. One Spellbinder's Tan Embossing Plate; and,
  6. Cutting Plate B.

As I mentioned in my previous post, always use great care when attempting to move large stacks through the Cuttlebug. Please scroll down and refer to my previous post for where to purchase these gaskets, additional tips, and some precautions.


This ^ background was created with Fiskars Plate, "Whimsy," which is shown here in the foreground.

Please note that what works in my old 'Bug, may not work in yours. The rollers in the Cuttlebug are not set exactly the same in each and every machine. You should have no problem passing this stack through your machine, but if your 'Bug is new, you may not have success right off the bat. Try again later when your machine has broken in a bit.

These cards will go in my emergency stash; I'll add more embellishments or stamped sentiments when I'm ready to use them.

Overall, I'm pretty pleased with these backgrounds ... and especially happy to know that I'll get lots of use out of all the Fiskars plates I purchased. Even better, no boring, time-consuming rubbing with the texturing tool. The Cuttlebug makes texturing card stock a snap!!

Have fun creating these neat backgrounds with Fiskars Plates and the Cuttlebug. I'd love to see what you make with your Texture Plates and the Cuttlebug!

Thanks so much for sharing part of your busy day with me!

~Hugs,

Tuesday, March 11, 2008

15 Minute Project ... Using Brass Embossing Stencils in the Cuttlebug

Pin It

If you're like me, you're always trying new techniques, or tips, or tools, or all of the above.

After several false starts, and a couple of scary moments, I was able to finally get a great impression using my old brass embossing stencils and the Cuttlebug:

Not a bad impression, if I do say so myself! Be sure to click on the photo for a super-sized view.

Here's the stacking recipe:

  1. Spacer plate A;
  2. Cutting plate B;
  3. Brass stencil;
  4. Card Stock
  5. One Spellbinder's tan embossing mat;
  6. Two 1/16" thick rubber gaskets (6" x 7 3/4"); and,
  7. Cutting plate B.

Now, and this is the hard part: actually finding the 1/16" thick rubber gaskets! I found mine after several unsuccessful searches in a Home Depot. Then one day, I unexpectedly stumbled over them on an end cap.

Later, when I went back to buy more, they had gone missing. The helpful hardware man said that his computer showed them being 'somewhere' in their massive inventory, but they couldn't be found. I believe they originally came from the plumbing department. But persevere, they're in there somewhere! You might even search online for 1/16" thick rubber gasket, buying it cut to at least 6" x 6," or purchasing a larger sheet and sharing with your friends and blog pals. You might even try using other flexible 1/16" thick material such as Fun Foam, a dollar store mouse pad, rubber jar openers that political candidates stick in your front door, rubber shelf liners, or pink hair-roller or packaging foam.

The second hardest part is getting the stack through the 'Bug ... on my first attempt, the 'Bug wasn't having any of it ... and I just couldn't bring myself to force the stack through the machine. Fear'll do that to ya!

But, being the ridiculously stubborn fearless gal that I am, not to mention my distaste for 'losing' to inanimate objects, I tried again. I'll be honest: the 'Bug was squealing and hopping around, the sound of plates crunching and crackling hurt my heart, and my nerves were shot ... but I did it anyway. Surprisingly, and much to my relief, it worked like a charm! And in spite of all the noise, no damage to either the machine or my plates.

It's been my experience with my 'Bug that it will get 'used to' accommodating increasingly thicker stacks and, once you get a stack through it, each successive use goes through easier and faster. Meaning that if your 'Bug is newish, you might want to "break it in" for a couple of months or so before attempting the dangerous but impressive triple axle.

From my experience and those of others, it seems that no two 'Bug rollers are set exactly the same, so proceed cautiously. We don't want to kill your 'Bug here! Begin by leaving one of the 1/16" rubber gaskets out of the stack and see how easily it goes through and adjust accordingly. Also try experimenting with card stock, paint sample cards, or chipboard shims in place of one of the rubber gaskets.

While this stacking recipe worked for me, there's no guarantee, either implicit or implied, that it will work for your machine. And I hereby absolve myself of all responsibility if your 'Bug goes belly-up on this chancy maneuver. The last thing I want anyone to do is ruin their Cuttlebug ... so please, PLEASE proceed with care and caution, and DO NOT force anything through the 'Bug that really doesn't want to go. However, if your jonesin' for the new 'Bug that I hear is about to debut, have at it!

If this stacking recipe works for you, I'd love to see what you've embossed! Either post a link in my Comments to your online gallery or blog, or email me and I'll upload your image to my image host.

Ingredients: Textured Card Stock, (Bazzill); DP, (BasicGrey); Scraps of Digital Paper; Brass Stencil, (Plaid); Dimensionals, (Fiskars); Ribbon, (Offray); Velvet Flowers, (Maya Road); Eyelets, (Unknown, Found in Mt. Eyelet)

Tomorrow, I'll show you the beautiful results I got using my Fiskars Texture Plates in the 'Bug.

Thanks for sharing part of your busy day with me!

~Hugs,

Wednesday, February 27, 2008

15 Minute Project: Recycle Your Magazines ... Into Pretties!

Pin It


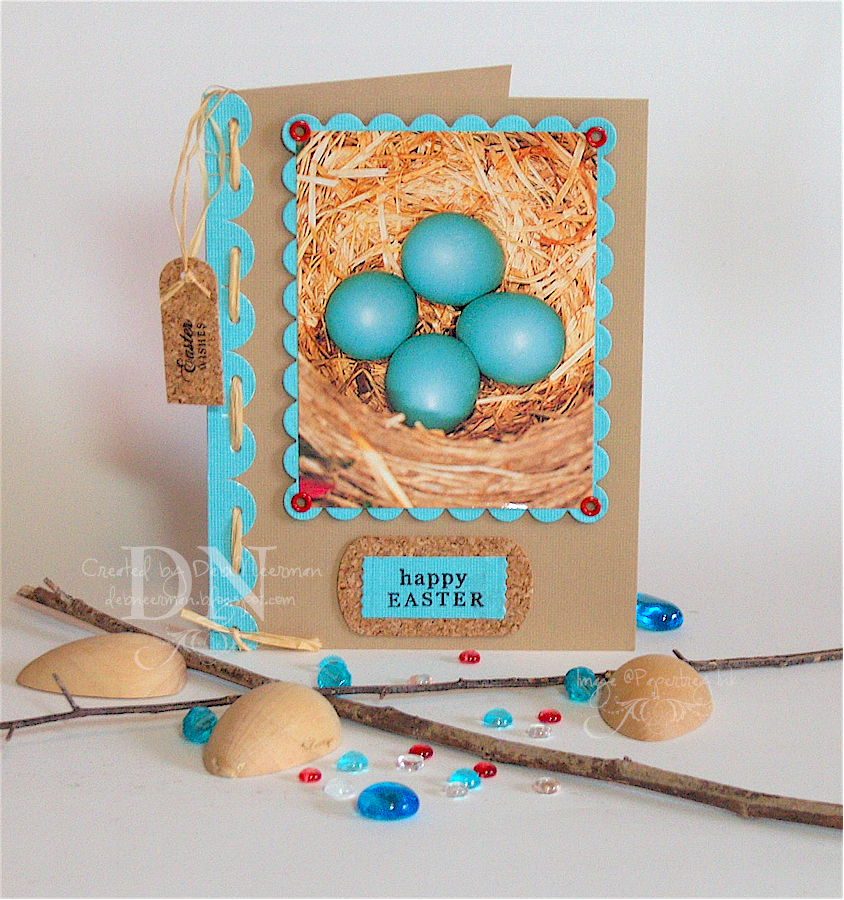
Today's card was created with an image I found in an old nature magazine. Always go through your old magazines before you toss 'em ... not only will you find some terrific photographs to use in your art work, you'll be livin' green ... and saving a tree or two!

I matted my recycled focal image onto a scalloped edge mat, and adhered some bright red eyelets. I created the large scallop border using my slit punch and wove some raffia through the holes I punched.

I used self-adhesive cork to create the tag and the mat for my sentiment. The tag was cut with a die from the Cuttlebug "Tiny Tags" set and the mat was punched with a key chain tag punch.

I stamped my sentiments using Staz-On ink, adhered 'em, and I was done!

Tip: To speed up your card making process, cut several mats or tags when die-cutting ... you'll have a stockpile to go to when you're in a rush.

Thanks so much for spending part of your busy day with me! And I hope you'll find a couple of minutes to create a card for Lois (see post below).

~Hugs, Deb

Ingredients: Textured Card Stock, (Bazzill Basics, DCWV); Self-Adhesive Cork, (Karen Foster); Stamps, "Unlimited Labels" and "Mixed Messages" collections (Papertrey Ink); Ink, Staz-On (Tsukineko); Raffia, (Unknown; I've had this for-evuh); Eyelets, (Unknown; found in Mt. Eyelet); Die Cut Machine and Tag Die (Provo Craft); Nestabilities (Spellbinder's); Key Chain Tag Punch, (Stampin' Up!); Slit Punch (Stampin' Up!)