Showing posts with label Winter Cards. Show all posts

Wednesday, January 13, 2010

A Day Late, A Dollar Short ...

Pin It


Happy Stump Day, Hampers!

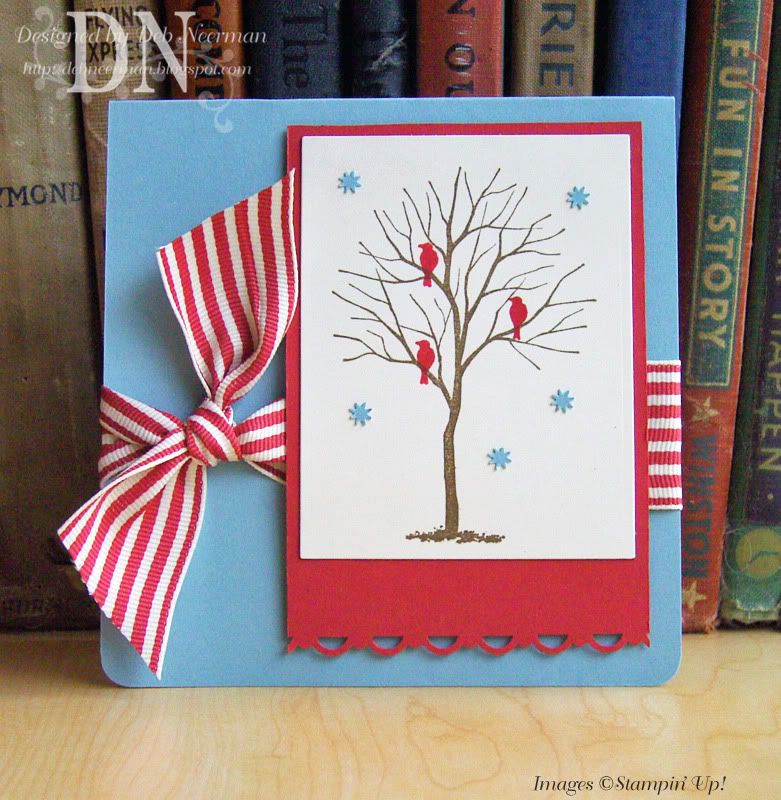
Today's card project was created for Pals Paper Arts' Sketch challenge, PPA24. For all the challenging deets, including a look-see at the sketch I followed, clicky HERE.

Unfortunately, I'm a day late in posting this project, but I thought it more important to post up the Craft Talk video (see post below), yesterday. For those who prefer to click your way through Blogdom, you can see the video by clicky-ing HERE.

As I was editing this photo I realized that a lot of the product I used on this card is retired Stampin' Up! Oh well, the Very Vanilla card stock, Soft Suede ink, and the uber-kewl Scroll Border Punch are still available from Stampin' Up. The thing is ... the border punch can't be purchased ... it's a Sale-a-bration freebie.

For all the a-mazing product info, check out the supply list, below.

Soooooooo, Sheila is checking out parochial schools in the area. She wants Reid-the-Wild-Child to have a more "pious educational experience." No, I don't make this stuff up. Frankly, who could?

So, naturally, Sheila is visiting these schools during regular class hours to check things out. Yesterday, she wanted company and so, naturally, I was dragged along, too. Not that I had anything useful to add to the conversation, with the possible exception of saying: "Good Lord, why am I here" repeatedly.

We parked the car and were heading for the school when we passed the School/Church rectory. It was then that we noticed a elderly Priest tending a flower garden.

Sheila, sensing a brown-nose-moment, had to stop and ask after the flowers.

"Father," she cooed, "these flowers are absolutely gorgeous! They look as though the cold hasn't bothered them one bit!"

"Why, thank you. Yes, they seem to be doing okay with the chilly weather," said the Priest, "but sadly, they suffer from a disease known as the 'Black Death.'"

"Oh, my, sounds serious. Just what exactly is that, Father?" Sheila asked.

"Nuns with scissors."

Which shall be the name of my new craft/religion blog ...

Thanks so much for swinging by today. Hope your day is ... heavenly!

~Hugs,

  • Card Stock: Baja Breeze (Retired), Riding Hood Red (Retired), and Very Vanilla Card Stocks by Stampin' Up
  • Stamps: Bare Tree and Bird Images from "Branch Out" Stamp Set (Retired), by Stampin' Up
  • Ink: Riding Hood Red (Retired), and Soft Suede Dye Inks by Stampin' Up
  • Accessories: 1 1/4" Grosgrain Ribbon (Retired), by Stampin' Up
  • Tools: Scroll Border Punch by Stampin' Up (Available as a Sale-A-Bration Gift - FREE with a $50 Purchase); Corner Rounder Punch by Stampin' Up; Perfect Layers Tool (Retired), by Stampin' Up; 1/8" Star Punch; Stampin' Dimensionals; SNAIL Adhesive
  • Finished Size: 5" x 5"

Friday, October 17, 2008

Yay! It's "Gaudy Day" ... Do I Win?!?

Pin It


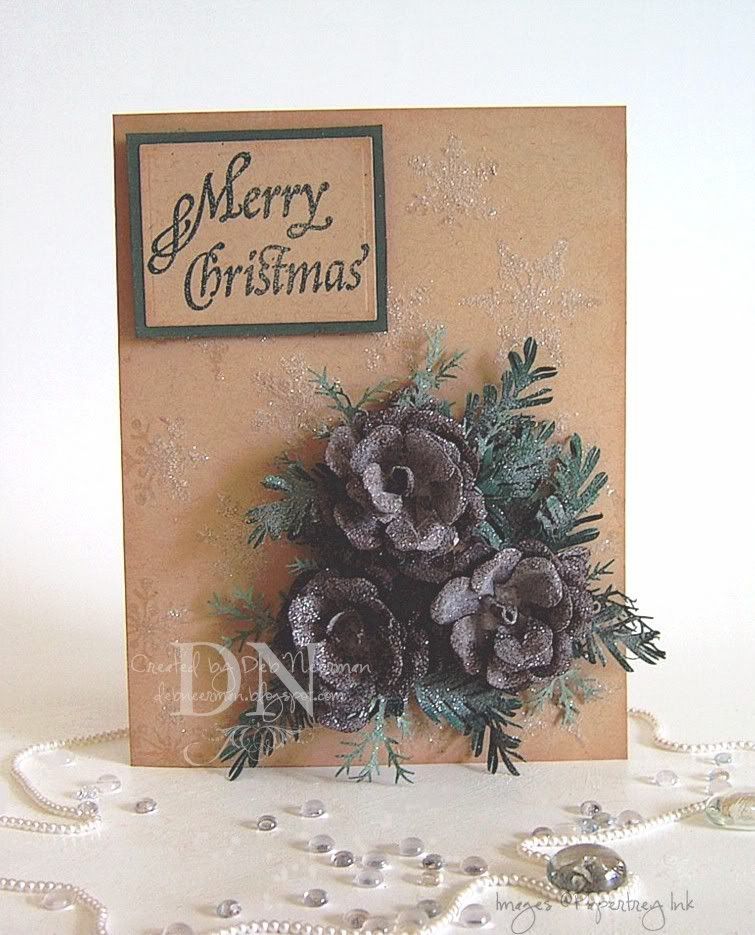
Wooohooo, it's "Gaudy Day!!!" This ^ card is my official entry ... prolly could be gaudier, but it's a damn fine start, wouldn't you say?

ONward H-C-M~s:

Today's card project was created for Allison's "Suggestive Sunday" blog challenge. This week, Allison's challenge required the creative use of punches ... or something like that. I read punches and kinda zoned out from that point forward.

My pine cones (yup, that's what they're supposed to be), were created with a pear punch ... and fern and pine bough punches. 'Course I haven't used the fern and pine bough punches in a particularly creative manner ... I just clipped into the fern fronds to try to create the appearance of needles. The only truly "creative" punch-use was creating the cones using the pear punch. But you can't have pine cones without branches and whatnot, sooooo ... there they are.

I stamped my snowflakes on my card base using glue then poured sprinkled Crystal Snow over ... umm, everything. ALL of the snowflakes are glittery but the ones on the left-hand side of the card look bare. IRL, they're sooooooo stinkin' glittery, I almost can't stand it. Just a light thing, KWIM? But those pine cones? They're buried in Crystal Snow! But first, I sprayed them with Artists Spray Mount Adhesive.

TIP: Man, don't ever spray Artists Spray Mount Adhesive anywhere indoors! You know those non-stick craft sheets? Yeah, it's not non-stick when it comes to Spray Mount Adhesive ... honestly boy and girls, it took me longer to clean up the spray adhesive mess than to make the pine cones, make the card, photograph the card, or edit my photos ... and it's still stuck to my hands. {Sigh} Good times!

The sentiment, maker unknown, was stamped in Versamark, heat embossed with "Moonlit Forest Glitz" powder, and mounted on dimensionals. And that's all folks!

So, yesterday Sheila came over all agitated and asked me to go to Publix-Where-Shopping-Is-A-Pleasure with her.

"What's wrong, Kiddo?" I asked.

She thrust a box of animal crackers at me and said, "See this? I bought this box of animal crackers and look! It says right on it, "Do not eat if seal is broken."

She reached into the box and sure enough ...

Seriously.

~Hugs,

  • Card Stock: Bazzill Basics
  • Designer Paper: None (AGAIN! Why do I hoard this stuff? Why?!?)
  • Stamps: Snowflakes from "Snowflake Serenade" by Papertrey Ink; Sentiment, Unknown
  • Ink: Versamark; "Creamy Brown" Fluid Chalk Ink by Clearsnap
  • Accessories: "Crystal Snow" by Stampendous!; "Moonlit Forest Glitz" EP by Comotion
  • Tools: Die-Cut Machine; Spellbinder's Die; Pear Craft Punch by Punch Bunch; Pine Bough Craft Punch by McGill; Large Fern Craft Punch by Punch Bunch; Golden Heavy Gel Medium; "Palette" Glue Stamp Pad by Stewart Superior; Black Dimensionals; The Ultimate Craft Glue by Api; Artists Spray Mount Adhesive by 3M

Friday, September 26, 2008

Let it Snow, Let it Snow, Let it Snow ... at Your House

Pin It


I'm sending lots of snowy wishes your way ... 'cuz I know how much you Northerners l-o-v-e snow. But that's not the only reason. The other reason is that today is "National Good Neighbor Day," and I'm just tryin' to be a good neighbor!

ONward H-C-M's:

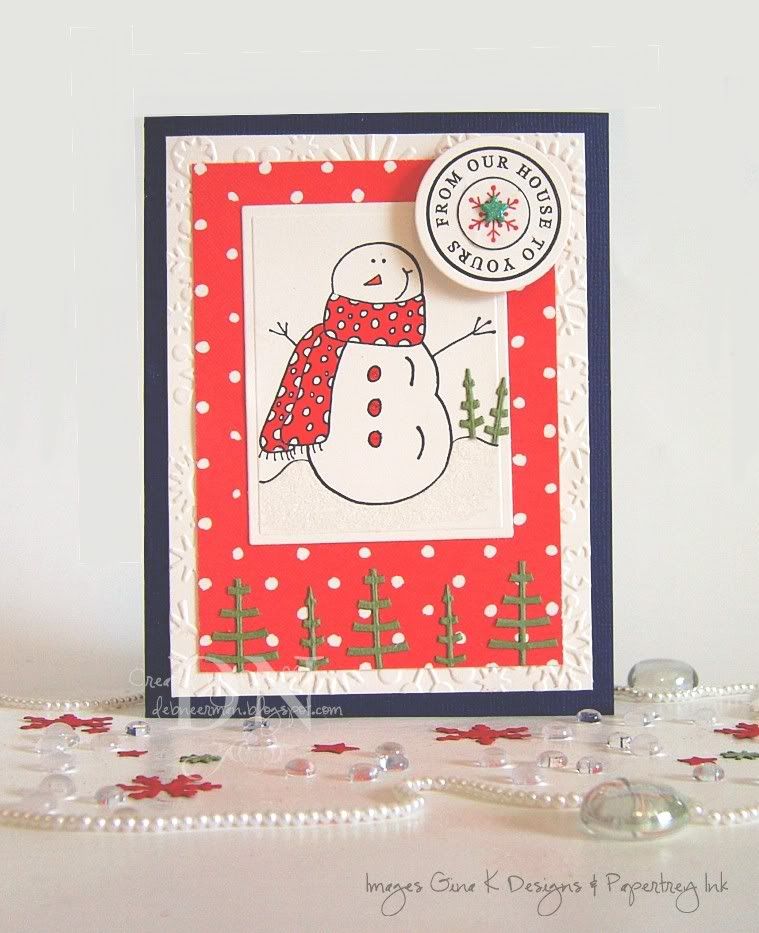
Today's card project was created for Allison's "Suggestive Sunday" blog challenge. This week, Allison challenged us to create a paper project using a snowman. I'll bet you didn't see that coming, huh?

I stamped my image on Vintage Cream card stock, and colored Mr. Snowman in with Copic markers. Notice my intricate and subtle shading here ... LOL! Right; the Copic's and I are barely speakin' these days.

I embossed my background card stock, added some red Stickles to his buttons and drew a horizon line with a black pen. The red patterned paper is actually half of an A•Muse "Kitchen" note card and I die cut some funky green 'trees' to embellish the note card paper.

There is a ton of super-fine snow glitter on this card and no matter how many different photos I took, I could NOT get it to show up ... nor the Copic W1 shadow under the snowman ... just let's pretend you see 'em, okeedokee?!?

Easy-peasy-snowman-easy!

So, the DH is building a hurricane-shutter-storage-box-thingie and asked me if I wanted to run down to the local Home Depot with him. Never one to miss an opportunity to get free paint sample cards and Formica chips, I agreed.

While the DH was talking boards with the nice man in the orange apron, a guy walked up and said, "S'cuse me, but I need some four-by-twos."

The clerk said, "You mean two-by-fours, don't you?"

The guy said, "I'll go check," and walked away. He returned a few minutes later and said, "Yeah, I meant two-by-fours."

"Alright. How long do you need them?"

The man paused, then said, "A long time. We're gonna build a house."

Seriously; I was there! Completely true ... the unadulterated truth. Hey, I can't help it if funny things happen all around me ... all the time ... can I? It must be a funny-karma thing ... plus my name, Deb, means "she who causes laughter everywhere she goes," in ... some other language ... I think.

~Hugs,

  • Card Stock: Bazzill Basics; Papertrey Ink
  • Patterned Paper: A Muse Kitchen Note Cards
  • Stamps: Snowman by Gina K. Designs; Sentiment by Papertrey Ink
  • Ink: Black, Archival by Ranger; Cranberry, Close to My Heart
  • Accessories: Copic Markers; American Craft Pen; Shimmer Brad by Making Memories; Stickles by Ranger; Super-Fine Glitter by Stampendous
  • Tools: Die-Cut Machine; Cuttlebug A2 Embossing Folder; Spellbinder's Dies; Cuttlebug Die; Dimensionals; Scrap Fusion PA

Monday, January 7, 2008

"Long and Low" ... a Challenging Card Challenge

Pin It

This 4" x 8 1/2" card was created for Sharon's 'Long and Low' blog challenge.

This really was challenging for me as I usually don't make cards in this orientation ... I discovered that all that blank space, just sitting there staring at me, was a bit intimidating.

The base of the card is Image Plus card stock; I used digital patterned paper in place of my usual designer paper. I added a length of 3/8" olive green grosgrain ribbon along the seam using double-sided adhesive; I also looped a bit behind the chipboard heart.

Next, I painted a chipboard heart with acrylic paint and, when dry, added two Maya Road velvet flowers mounted on a dimensional. I used a raspberry colored brad for the flower's center and added three more to the seam ribbon.

Finally, I stamped my sentiment and the tiny brackets with chalk ink.

I didn't start out intending to create a Valentine's Day card but this certainly could be used as one!

And yes, I know that it's always good to move out of your comfort zone but I'm still not sure how I feel about this card. I love the color combination but I still feel like I should be adding something. Oh well, maybe less IS more.

Thanks for visiting today!

Ingredients:
Card stock: Image Plus
Patterned Paper: Digitally created using photo editing software
Acrylic Stamps: 'Faux Ribbon' and 'My Punny Valentine Add-On' collections (Nichole Heady for Papertrey Ink)
Color Medium: Memories Chalk-a-Lots! ink in Black Raspberry (Stewart Superior); Craft Smart Acrylic Paint in Cherry Cobbler (Plaid)
Ribbon: Olive grosgrain (May Arts)
Brads: Raspberry (American Crafts)
Velvet Flowers: 'Air' Velvet Collection (Maya Road)
Chipboard: Unknown (for storage purposes, I always remove the packaging)

Thursday, January 3, 2008

15 Minute Card Project ... Pretties in Less Than 1/4 of an Hour

Pin It


Yes, I know, Christmas is over and practically no one is interested in Christmas cards now. 'Cept for me; I could look at Christmas card designs every day!

This 4 1/4" x 5 1/2" holiday card is quick to make and can be used to send joy (and when I say joy, I mean cash), to someone all winter long.

The base is Bazzill card stock; the three circles are punched from scraps of the same card stock. The snowflakes are stamped in white on Bazzill Kraft card stock; the sentiment was over-stamped with olive green Staz-on. I used my Crop-A-Dial to set the metal snowflake eyelets.

Finally, I used my paper piercer to punch dozens of itty-bitty, teeny-weeny holes on the edges of the stamped Kraft card stock. The sentiment was mounted on the card with dimensionals. Easy peasy and ready in less than fifteen minutes!

This card is goin' into my stash ... I'm thinking that it would be nice for a winter wedding, a christening, or a bridal shower ... but what do I know.

Ingredients:

Cardstock: Bazzill "Monochromatic" Green, Kraft
Stamps: All stamps by Nichole Heady, Papertrey Ink, "Snowflake Serenade" collection
Ink: White ink: 'New Canvas' Palette Hybrid; Olive green ink: Staz-On
Tools: 1" circle punch, (McGill); paper piercer, (Making Memories); Crop-A-Dial, (We R Memory Keepers); snowflake eyelets (unknown)

As threatened, I'll be posting that ugly pink and green Valentine's Day card soon!

Stay warm* and thanks for droppin' by today!

*FYI: It is freezin' down here!!!! It's gray and damp here today and the temperature is about 55 degrees with a wind-chill making it feel like it's about 45 degrees. Yes, I hear you laffing and pointing at me but I'm not used to being cold! I'll stop whining now ...