Showing posts with label Easter. Show all posts

Thursday, April 1, 2010

Nature Abhors a Vacuum ... and I Don't Like 'Em Much Either

Pin It


Happy Thursday, race fans!

Well, this will be the last Easter card for this year ... I promise! Now it's time to move on to my spring birthdays. Hope you don't mind looking at birthday cards 'cuz I have a ton of spring birthdays coming up.

Today's card project was created at the very last minute using this cute l'il digi-stamp from Digi Kitty. This latest image is the current progressive challenge freebie ... as long as I keep playing, I'll keep getting free digi-stamps.

I colored the image with Copic markers, added some vintage 3/16" Easter egg eyelets, a sentiment, some DP, and finis. So easy, even I could do it! For the ginormous view of my card, clicky on the photo ... for all of the egg-citing product info, check out the Card Recipe, below.

Soooooooo, last night, the DH and I went over to Sheila's for "Game Night." Yeah, I just made that up ... we went over to borrow stuff and ended up staying to play Trivial Pursuit. I'm still not sure how we made THAT leap, but somehow, we did.

And since her certifiably insane delightful sister, Jill, was there, she had got to play, too.

On Jill's very first turn, she drew "Science and Nature." Her question was, "If you are in a vacuum and someone calls your name, can you hear it?"

Jill thought for a minute and then asked, "Is it on or off?"

Thanks so much for spending part of your busy day with me!

~Hugs,


Today's Challenges:

Card Recipe:
  • Card Stock: "Not Quite Navy" and "Whisper White" Card Stock by Stampin' Up
  • Designer Paper: Cosmo Cricket; Pink Paislee
  • Digital Image: DigiKitty
  • Stamp: Sentiment by CTMH
  • Ink: "Basic Black" Dye Ink by Stampin' Up
  • Color Medium: Copic Markers
  • Accessories: Flat-Back Pearls; 3/16" Easter Egg Eyelets
  • Tools: Die-Cut Machine; Rectangle Brads; Butterfly Punch; Crop-a-Dile; White Pen; Stampin' Dimensionals and SNAIL Adhesive by Stampin' Up
  • Finished Size: 5 1/2" x 4 1/4"
Shop for Stampin' Up products online ... 24/7 ... HERE

Tuesday, March 30, 2010

Happy Easter L'il Tulip Bunny

Pin It


Happy Tuesday, Crafty Stampers!

I simply cannot believe that Easter is this weekend ... how did we get through March so quickly?!? Dang, time flies whether you're having fun or not!

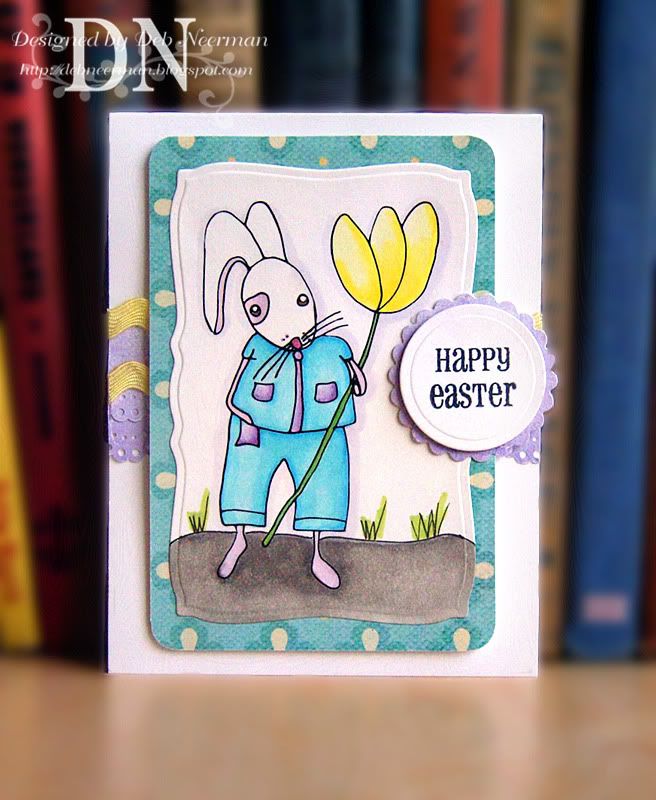
Today's Easter card project was created with a cute digital image by Digi Kitty and some digital patterned paper files:

Isn't this l'il guy just adorable?!?

I stamped the sentiment using Basic Black dye ink, colored my bunny image with Copic markers, added some yellow rick-rick, and a doily-punched border. Easy-peasy-Easter-please-y!

For the ginormous view of my card, clicky on the photo; for all the egg-citing product info, check out the Card Recipe, below.

Sooooo, yesterday Sheila and I went out with her certifiably insane fun sister, Jill. While we were out and about, Jill's car died on us.

We got the car towed to her service station and settled in for a long wait.

After a bit, the mechanic comes out and tells us that the car's fine, purrin' like a kitten, and we're all set to go.

Sheila, not trusting Jill's mechanic for one minute asks, "So, what's the story?'

Bill, the Trust-Worthy Auto Technician replies, "Just crap in the carburetor."

So Jill asks, "Oh my, how often do I have to do that?!?"

Thanks so much for spending part of your busy day with me!

~Hugs,


Today's Challenges:

Card Recipe:
  • Card Stock: "Whisper White" Card Stock by Stampin' Up
  • Patterned Paper: Digital Files by The DigiChick
  • Digital Image: "A Tulip For You Bunny" by The DigiKitty
  • Stamp: Sentiment by CTMH
  • Ink: "Basic Black" Dye Ink by Stampin' Up
  • Color Medium: Copic Markers; Spica Pens
  • Accessories: Yellow Rick-Rack
  • Tools: Die-Cut Machine; Circle Dies; Large Label Die; Doily Lace Border Punch; Stampin' Dimensionals and SNAIL Adhesive by Stampin' Up
  • Finished Size: 4 1/4" x 5 1/2"
Sale-a-bration Ends Tomorrow! Don't Miss Out: Shop for Stampin' Up products online ... 24/7 ... HERE

Friday, March 26, 2010

Simply Easter ...

Pin It


TGIF, Crafty Stampers!

Today's card project was created for this week's "Stamp Simply" challenge. This week, our challenge is to create Easter-themed projects. These could be projects that are specific to the Christian celebration of Easter itself ... or, more generically, to spring and the new birth of flowers, grasses, and fresh new life.

This challenge is not limited to cards -- anything goes -- so have fun!

To play along, and we certainly hope that you will, clicky HERE to go to Sharon's blog for all the challenging deets ... and for a look at her fabulous Easter project!

After you've posted your Easter project, be sure to leave a link on Sharon's Mr. Linky, located HERE. If you upload your project to an online gallery, such as Splitcoast Stampers, please be sure to use keyword: "ssnotime132."

I decided to create a simple Easter card:

To offset my very simple focal point, I used lots of layers in my card ... five of 'em ... and added some beautiful satin ribbon for some shine.

My crocus image is a FREE! digital file from The Paper Garden, printed out on HP Laser Photo Paper and colored with Copic markers. I stamped my sentiment, matted it, and adhered it to my focal frame. Easy-peasy-Easter-pleasey!

Be sure to check out the beautiful projects created by the rest of the "Stamp Simply" team:

Barbara Anders: Paper Pursuits;

Jennifer Buck: The Buck Stamps Here;

Jenny Gropp: One Krafty Kat;

Tammy Hershberger: Stamp Happy;

Janine Orchard: 2BKrafty;

AJ Otto: The Willow Garden;

Deb Saaranen: Dream In Color;

Barb Schram: Explore. Dream. Discover.; and,

Marlene Bender: Heart-Spring, March Guest Designer.

For the ginormous view of my card, you can clicky on the photo ... and for all of the egg-citing product info, check out the Card Recipe, below.

Soooooooo, if you follow my blog ... you don't?!? ... you know that Sheila teaches Sunday school at our Church. Periodically, the Diocese sends out literature ... in the form of brochures ... to all of the religion teachers.

Yesterday, while hangin' out at Sheila's, I noticed the current brochure on her counter. I picked it up and read:

"Coming up—Theological Open House. We discuss thought-provoking topics. Your opinions are hardly welcome."

Thanks so much for spending part of your busy day with me ... hope your weekend is long and fabulous!

~Hugs,


Today's Challenges:

Card Recipe:
  • Card Stock: Stampin' Up
  • Textured Card Stock: Bazzill
  • Lavender Mat: Digital File by The DigiChick
  • Crocus Image: The Paper Garden
  • Sentiment: CTMH
  • Ink: "Basic Black" Dye Ink by Stampin' Up
  • Color Medium: Copic Markers
  • Accessories: Satin Ribbon
  • Tools: Die-Cut Machine; Rectangle Dies; Stampin' Dimensionals and SNAIL Adhesive by Stampin' Up
  • Finished Size: 4 1/4" x 5 1/2"
Sale-a-bration Ends in Just Five Days! Don't Miss Out! Shop for Stampin' Up products online ... 24/7 ... HERE

Wednesday, March 24, 2010

Easter Holiday Wishes ...

Pin It


Happy Stump Day, Hampers! Hope your week is flyin' by!

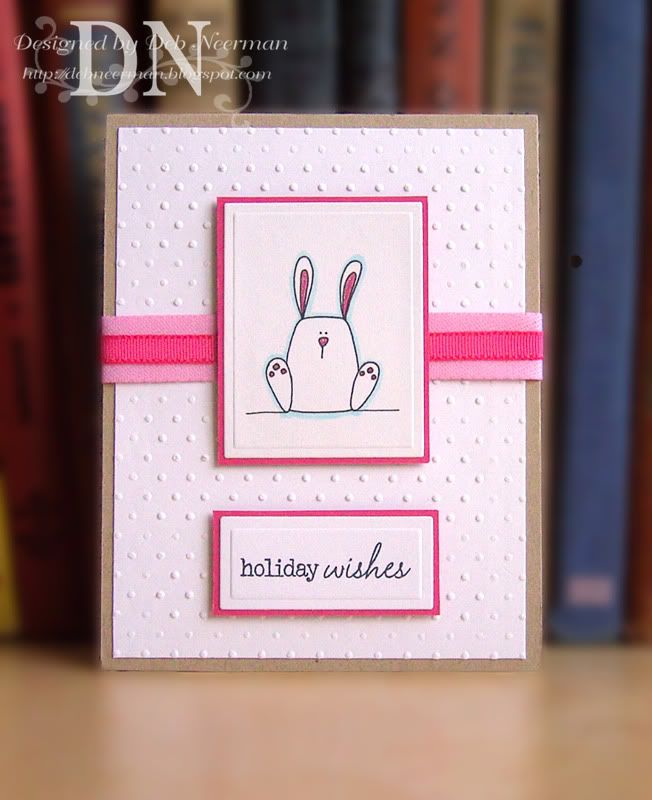
Today's Easter card project was created using a cute l'il digital Bunny image ... and not much else.

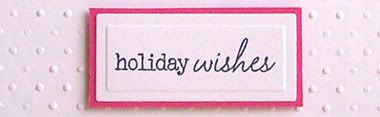
You do 'get' that it's an Easter card ... what with the "holiday wishes" sentiment, yes? My DH caused me to way over think using this sentiment as it's traditionally a winter-holiday greeting. But I'm wild and crazy ... and stubborn ... so I've used it anyway:

The cute l'il digital image, from Bee Crafty, was lightly touched with color using Copic markers and Spica pens.

My card base is Kraft card stock and the white dotted background was created in an A2 embossing folder. The sentiment was stamped in "Basic Black" dye ink and both images were mounted on "Melon Mambo" card stock. So easy, even I could do it!

For all of the the fun-tastic product info, check out the Card Recipe, below.

Soooooooooo, Sheila's DH, Ken, is a Travel Team soccer coach here in West Palm ... and a good one. This season, he's having his best year ever: his team is undefeated and they've been invited to play in a ton of Invitational meets across the state.

So yesterday, while I was hangin' out at Sheila's, she took a phone call for Ken.

"Ken, phone! It's 'Sports Illustrated!'" Sheila called out.

Ken, figgering that his 15 Minutes had arrived, rushed down the stairs in his stocking feet to answer the phone. But because the stairs were slippery from a recent waxing, Ken fell halfway down.

"Omigosh," Sheila and I breathed, "are you okay?!?"

"Sure, sure, I'm fine. Where's the phone?"

"Well, still in the kitchen, Ken, I haven't had it moved." Sheila retorted.

"Good; outta my way please Deb. And you too Miss Smart-Mouth."

"Careful, the dishwasher is ........" Sheila started to say.

And crash! Sheila had left the dishwasher door open ... to air-dry the dishes ... and Ken fell over the open dishwasher, crashing to the floor.

"I'm alright, I'm okay." Ken panted, pulling himself up off the floor.

As he made his final approach to the phone, poor Ken took a huge flyin' leap off an area rug, launched himself into air, and landed flat on his butt.

Normally, after watching someone fall down the stairs AND crash over the open dishwasher door, Sheila and I would have been doubled over in hysterics. But it was KEN for goshsakes and that final flight in mid-air from the area rug launchpad wasn't exactly funny. Alright, a little funny ...

"Omigosh, Ken, are you okay?" Sheila cried, "Should I call an ambulance? Do you need a hot pad, or bandaging, or something?"

"No. I'm fine. Please just let me get to the phone in one piece to talk to the Sports Illustrated people." Ken pleaded.

As he reached for the phone, Ken mouthed, "This is gonna be huge! I'm puttin' it on speaker phone, okay ladies?"

Okay?!? Well, sure! Of course we wanted to hear his conversation with SPORTS ILLUSTRATED!!!

Ken puts the phone on speaker, and answers in his most professional, good sportsman like-voice, "Hello, this is Ken L. speaking."

And so we hear:

"Hello, Mr. L. This is Sports Illustrated calling to offer you a full YEAR of Sports Illustrated for the low, low price of just $1.00 per issue!"

And as he went to hang up, his sock got caught on a l'il nail head in the floor under the counter and he fell down ... again. But this time, on top of the cat ... who screamed like a banshee before clawing the be-jesus outta him. He's fine, really, a little sore and a lot embarrassed. But dang, where's a video camera when you need one?

Thanks so much for swingin' by ... hope your today is w-a-y less dangerous than Ken's yesterday was!

~Hugs,


Today's Challenges:

Card Recipe:
  • Card Stock: "Kraft," "Melon Mambo," and "Whisper White" Card Stock by Stampin' Up
  • Stamp: Sentiment by PTI
  • Digital Image: Bee Crafty
  • Ink: "Basic Black" Dye Ink by Stampin' Up
  • Color Medium: Copic Marker; Spica Glitter Pen
  • Accessories: Grosgrain Ribbon; Twill Ribbon
  • Tools: Die-Cut Machine; Rectangle Dies; Swiss Dots A2 Embossing Folder; Stampin' Dimensionals and SNAIL Adhesive by Stampin' Up
  • Finished Size: 4 1/4" x 5 1/2"
Sale-a-bration Ends in Just 7 Days!! Shop now for Stampin' Up products online ... 24/7 ... HERE

Wednesday, March 17, 2010

An Irish Easter Card ...

Pin It


Happy Stump Day, Hampers! And a very happy St. Patrick's Day to all ... especially my Irish *PSF's*!

Today's card project was created using a cute, free! digital image by DigiKitty. For all the challenging deets, including info on how you can get your own free image, clicky HERE.

Here's what I created using this fun image:

I colored my image using markers, added some St. Paddy's green DP, some vintage paper lace from my vintage paper lace stash, a satin bow, and a stamped sentiment. Easy-peasy and ready to serve in just 15 Minutes ... and that's no blarney!

For all of the exciting product info, check out the Card Recipe, below.

Soooooooooo, yesterday Sheila and I were hangin' out when her absolutely bonkers crazy sister, Jill, stopped by.

"Okay, girls, I have a problem," Jill said, "I'm on the road a lot, and my clients are complaining that they can never reach me."

"Don't you have a phone in your car?" I asked.

"No, that was too expensive .. so I did the next best thing. I put a mailbox in my car."

"A mailbox? Does that work?" Sheila asked with a straight face.

"Actually, I haven't gotten any letters yet." Jill replied.

"And why do you think that is?" Sheila asked.

Jill paused for a moment, then replied, "Well, maybe it's because when I'm driving around, my zip code keeps changing."

Thanks so much for spending part of your busy day with me ... and Erin Go Bragh, y'all!

~Hugs,


Today's Challenges:

Card Recipe:
  • Card Stock: "Whisper White" Card Stock by Stampin' Up
  • Designer Paper: Cosmo Cricket
  • Digital Image: Bunny Spring Flower by DigiKitty
  • Stamp: Sentiment by CTMH
  • Ink: "Basic Black" Dye Ink by Stampin' Up
  • Color Medium: Copic Markers
  • Accessories: 5/8" Satin Ribbon; Vintage Paper Lace
  • Tools: Die-Cut Machine; Rectangle and Circle Dies; Stampin' Dimensionals and SNAIL Adhesive by Stampin' Up
  • Finished Size: 5 1/2" x 4 1/4"
Shop for Stampin' Up products online ... 24/7 ... HERE

*Pretend Stampin' Friends*

Friday, March 12, 2010

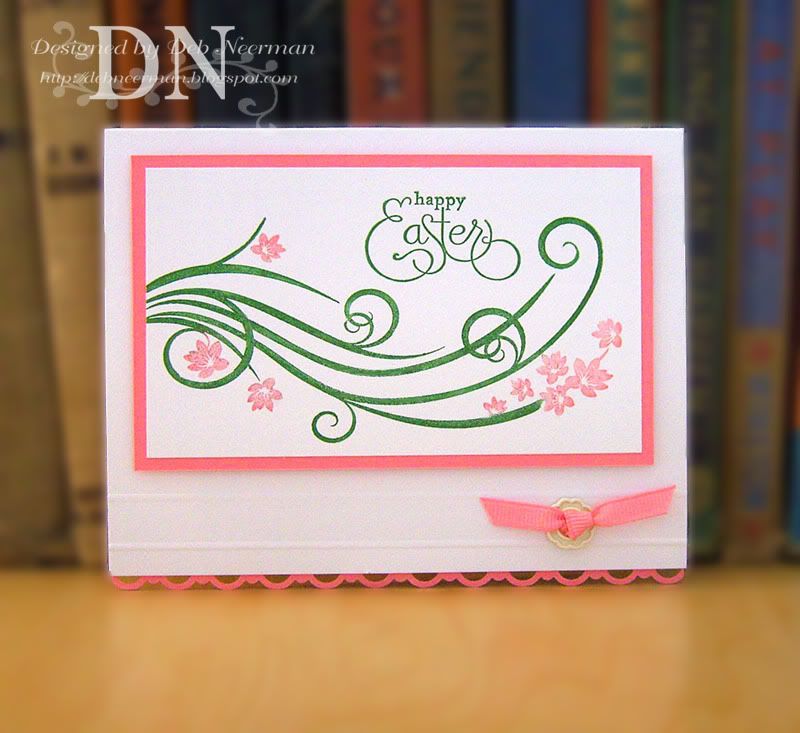
Simply Pink and Green ... in 15 Minutes!

Pin It


TGIF, Crafty Stampers!

It's another fabulous Friday and time for this week's "Stamp Simply" challenge! Since Sharon loves color, she asked us to create a project using one of her favorite color combinations: pink and green. Anything goes, as long as you use pink and green. And, as a bonus option, you can also add the color brown.

If you decide to play along, and we hope that you do, please link your project to Sharon's Mr. Linky, located HERE. If you upload your card to a public gallery, such as Splitcoast Stampers, please use keyword "ssnotime130" so we can find your entry.

We can't wait to see your pink and green ... and maybe brown ... projects!

I optioned out of the bonus option ... here's a look at my-pink-and-green-minus-brown creation:

Be sure to clicky HERE to see Sharon's gorgeous pink and green beauty ... and don't miss the rest of the beautiful projects created by the Stamp Simply team:

Barbara Anders: Paper Pursuits,

Jennifer Buck: The Buck Stamps Here,

Jenny Gropp: One Krafty Kat,

Tammy Hershberger: Stamp Happy,

Janine Orchard: 2bKrafty,

AJ Otto: The Willow Garden,

Deb Saaranen: Dream in Color,

Barb Schram: Explore. Dream. Discover., and,

Marlene Bender: Heart-Spring, our March Guest Designer.

This card couldn't have been simpler to create! I stamped my flourish using brush markers on Whisper White card stock, then stamped my font-a-licious sentiment on the same panel.

I created a 'path' using my Scor-It board, and adhered a ribbon slide tied with a pin grosgrain ribbon on the 'path', then punched a scalloped border using Stampin' Up's Scallop Trim border punch. So easy, even I could do it!

For all of the colorful product info, check out the Card Recipe, below.

Sooooooooo, I was hangin' out with Sheila yesterday when her 16-year-old nephew stopped by to share some good news with her.

"Aunt Sheila, I got a job! It's fantastic and I love it!" her nephew enthused.

"That's terrific, Ryan, I'm so glad to hear it." Sheila responded.

"Yeah, and I get two weeks paid vacation! I can't wait to find out where they send me!"

It must run in the family ...

Thanks so much for spending part of your busy day with me ... have a great weekend!

~Hugs,


Today's Challenges:

Card Recipe:
  • Card Stock: All Card Stock by Stampin' Up
  • Stamps: Flourish by Hero Arts; Sentiment by Stampin' Up
  • Color Medium: Brush Markers
  • Accessories: Pink Grosgrain Ribbon; Ribbon Slide from Hodgepodge Hardware Set by Stampin' Up
  • Tools: Scor-It Board; Scallop Trim Border Punch by Stampin' Up; Mini Glue Dots; Stampin' Dimensionals and SNAIL Adhesive by Stampin' Up
  • Finished Size: 5 1/2" x 4 1/4"
Shop for Stampin' Up products online ... 24/7 ... HERE

If you have any questions about Stampin' Up products or stamping techniques, feel free to contact me HERE.

Sunday, January 31, 2010

Hoppin' Right Past Valentine's Day:

Pin It


Is it Monday again already?!? Time sure flies whether you're havin' fun or not, huh?

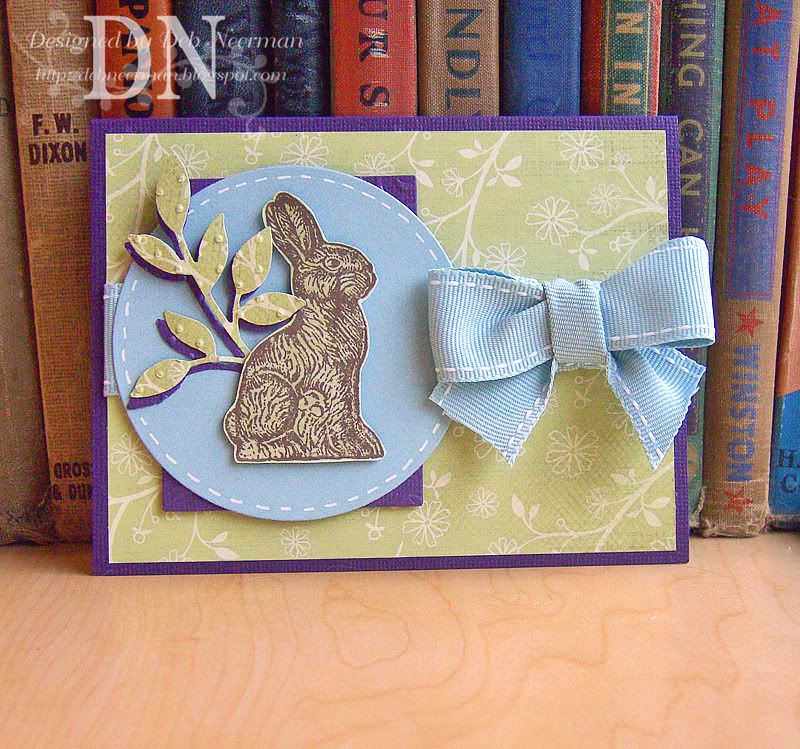
Today's card project was created for the Color Throwdown Challenge #77. For all the challenging deets, clicky HERE. For the ginormous view of my card, clicky on it.

This weeks color choices were Baja Breeze, Certainly Celery, and Elegant Eggplant ... I struggled with this all week and finally settled on this design. Not one of my favorites but I s'pose they can't all be.

This card is a kinda-sorta CASE of a card in SU's new Occasions Mini Catalog ... at least as far as the Chocolate Bunny stamp and the Little Leaves die. The rest, not so much.

For the rest of the certainly-elegant-breezy product info, check out the supply list below.

Sooooooooo, this weekend Reid-the-Wild-Child had his friend, Brittany, over for a play date. Sheila and I were hangin' out in the kitchen; she was baking cookies for the kidlettes and I was not helping.

"Those kids are awfully quite." I pointed out.

"Yeah, you wanna go and check on 'em for me? That is, if you're not too busy not helping me?" Sheila asked sarcastically.

So, off I go to eavesdrop on the l'il buggers. They were playing "wedding," and the wise-beyond-her-years Brittany was prattlin' off:

"Listen, Reid: you have the right to remain silent, anything you say will be turned around and used against you, and you have the right to have an attorney present. And you can't kiss the bride today, because she has a splittin' headache."

{*Sigh*} ... they grow up so fast, don't they?

Thanks for stopping by ... hope you have a great day! And if you have a minute, hop on over to my friend Anne's blog for a look at her absolutely brilliant portrait. Anne sportingly reposted it on her blog at my behest. An astounding representation ... truly breathtaking!

~Hugs,

  • Card Stock: Stampin' Up
  • Designer Paper: Unknown Scrap
  • Stamp: "Chocolate Bunny" by Stampin' Up
  • Ink: "Chocolate Chip" Dye Ink by Stampin' Up
  • Accessories: "Baja Breeze" Stitched Grosgrain Ribbon (Retired) by Stampin' Up; Sharpie Paint Pen
  • Tools: Die-Cut Machine; Rectangle and Circle Dies; "Little Leaves" Sizzlits Die by Stampin' Up; Swiss Dots A2 Embossing Folders; Stampin' Dimensionals and SNAIL Adhesive by Stampin' Up
  • Finished Size: 5 1/2" x 4 1/4"
Shop for Stampin' Up products online ... 24/7 ... HERE

If you have any questions about Stampin' Up products or stamping techniques, feel free to contact me HERE.

Monday, April 6, 2009

A-Tisket-A-Tasket, A Candy-Free Basket ...

Pin It


Happy Monday, race fans! And happy "Sorry Charlie" day! I don't know about you, but this means that I'll be making Tuna Casserole tonight. Sorry, DH.

ONward H-C-M's:

Today's card was created for a recent SCS sketch challenge ... which I completely forgot to post. Sorry, Charlie.

I used DP from DCWV and Cornish Heritage Farms on SU card stock, a couple of swiped paint sample cards from Lowe's, some blue metal photo corners, a scrap of satin ribbon, and three or five old buttons.

The Easter basket was stamped on "Stampers Select" card stock using "Indian Corn Blue" dye ink. I threaded the buttons with skinny strips of DP, and mounted the whole shebang on two die-cut paint sample cards. Easy-peasy!

So yesterday was Palm Sunday and, because he wasn't feeling well, I stayed home with Sheila's son, Reid-the-Wild-Child.

When Sheila finally returned home carrying palm branches, Reid asked what they were for.

"People held them over Jesus' head as he walked by," Sheila explained.

"Whaaaaat?!? The one Sunday I didn't go, He showed up!?!"

I. Kid. You. Not.

~Hugs,

  • Card Stock: "Stampers Select" by Papertrey Ink; "Kiwi Kiss" by Stampin' Up!
  • Designer Paper: "Nana's Nursery" Collection by DCWV; "MochaChica" by Cornish Heritage Farms
  • Stamp: Easter Basket from "Hoppy Easter" Set by Stampin' Up!
  • Ink: "Indian Corn Blue" Dye Ink by Close to My Heart
  • Accessories: Metal Photo Corners by Provo Craft; Paint Sample Cards; Vintage Buttons; Faux Rhinestone Sticker by Close to My Heart; 1/8" Satin Ribbon
  • Tools: Die-Cut Machine; Nestabilities Large Scallop Square Die by Spellbinder's; Foam Dimensional Tape; Scotch ATG 714 Adhesive; "The Ultimate" Glue by Api

Monday, March 30, 2009

A Color Combination Not Worth Repeating:

Pin It


Happy Monday ... and happy "I'm in Control" Day! Right. Hey, isn't that a brand of adult diapers? Well, maybe not ... but it should be!

ONward H-C-M's:

Today's card was created for SCS's weekly color combination challenge. This week's challenge, CC211, calls for Pretty in Pink, Baja Breeze, and Kiwi Kiss. While I really love these colors individually, I'm really not lovin' 'em together. And I prolly won't be pairing 'em up again anytime soon. Like never. Ever. I don't know, maybe it's just me, but they look kinda ... ummm ... terrible ... together. Guess that's why they call it a "challenge," huh?!?

For all the challenge-like deets, clicky HERE. To go straight to the challenge gallery, clicky HERE. For the ginormous view of my card, clicky on the photo.

The kooky layout is mine ... and I did a l'il bit of paper piecing on the flowers. {Yawn}. For all the colorful ingredients, check out the supply list, below.

So, this weekend I had the bad luck pleasure of taking care of Sheila's son, Reid-the-Wild-Child, for a few hours. I'm still recoverin' ...

"So, Reid," I said. "Has Mommy taught you all your numbers?"

"Yup!"

"Good for you! So tell me, what comes after three?" I asked.

"Four," Reid answered.

"What comes after six?"

"Seven!"

"That's fantastic, Reid! Mommy did a really good job teaching you your numbers," I said enthusiastically.

"So, what comes after ten?" I asked.

"A jack!"

I. Kid. You. Not!

And, if you don't mind, I must say, "Yay! men AND women UCONN hoopsters! Big East Rulzzz!" Thanks for lettin' me get that outta my system ...

~Hugs,

  • Card Stock: Stampin' Up
  • Designer Paper: Close to My Heart
  • Stamp: "Pattern Flowers" by Hero Arts; Sentiment by Close to My Heart
  • Ink: "Kiwi Kiss" Dye Ink by Stampin' Up
  • Accessories: Rhinestones by Me & My Big Ideas
  • Tools: Die-Cut Machine; Large Classic Rectangle Dies by Spellbinder's; Prismacolor Premier Colored Pencil; Gamsol OMS; Foam Dimensionals; Scotch ATG 714

Thursday, March 12, 2009

Spring Is Sprung, the Grass is Rizz ...

Pin It


I wonder where the butterflies birdies is?

Happy Thursday all and one ... and speakin' of birds, happy "Alfred Hitchcock Day!" If I were you, I'd be v-e-r-y careful today ... especially around birds.

ONward H-C-M's:

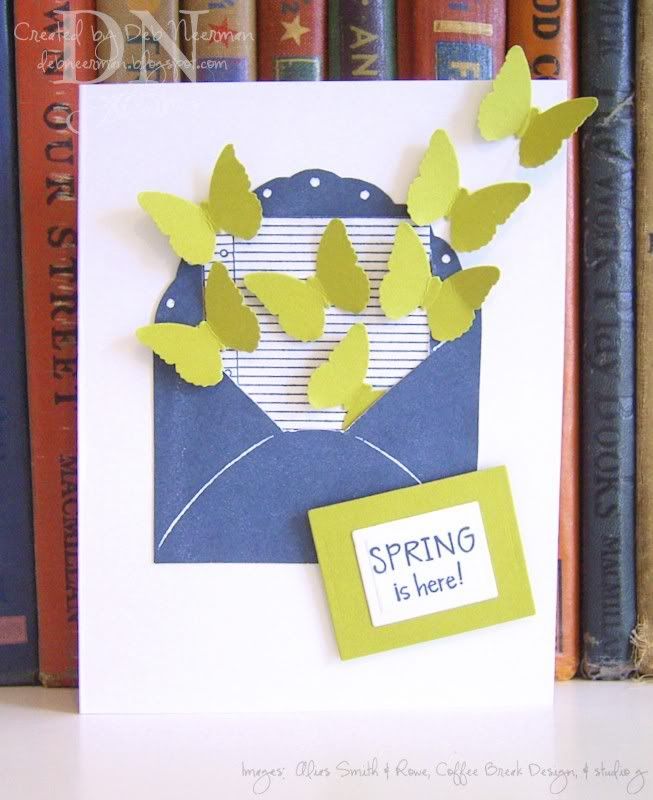
Today's card project was created for SCS's "Clean and Simple" challenge, CAS05. This time up, it's a color challenge: use blue and green in your clean and simple card creation. For all the challenge deets, clicky HERE. To go straight to the Clean and Simple card gallery, clicky HERE. To view the ginormous view of my card, clicky on the photo.

I stamped my notebook page and the envelope with Close to My Heart's "Outdoor Denim" dye ink (available HERE), cut them out, and adhered them to my card base.

My $1.00 sentiment stamp also came with images of grass and a bee, but I masked those out and stamped just the phrase.

I punched out and adhered seven l'il flutterbies, mounted my sentiment on dimensionals, and finis! So easy, even I a child could do it! Refer to my supply list, below, for additional product info.

So, last night, Sheila and I decided to do some (mostly), window shopping at the Wellington Green mall.

"May I try on that dress in the window?" Sheila asked the sales associate at a designer boutique.

"Go ahead," the clerk replied. "Maybe it'll attract some business."

She didn't. Dress in the window ... or buy the dress. Why? 'Cuz we're broke Recessionestas!

~Hugs,

  • Card Stock: "Stampers Select" by Papertrey Ink; "Kiwi Kiss" by Stampin' Up!
  • Stamps: "Large Bold Envelope" by Alias Smith & Rowe; "Notebook" by Coffee Break Designs; Sentiment by Katie & Co for Studio G
  • Ink: "Outdoor Denim" Dye Ink by Close to My Heart
  • Tools: Die-Cut Machine by Provo Craft; Nestabilties Die by Spellbinder's; Butterfly Punch by Martha Stewart Crafts; Dimensionals; "The Ultimate" Craft Glue by Api

Wednesday, March 4, 2009

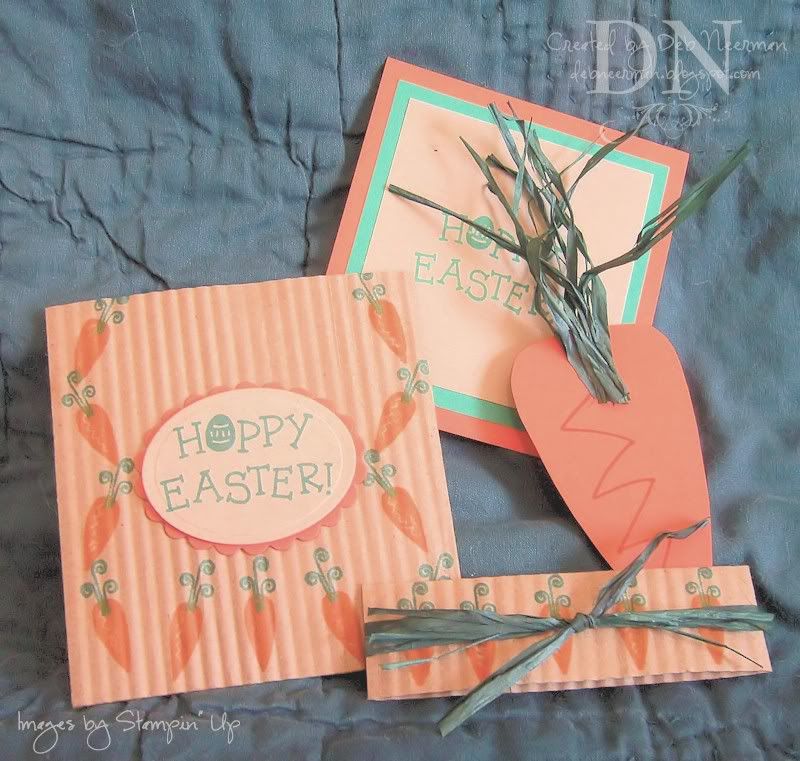
Crimped Pocket Envie ... Carrot Included

Pin It


There you are! So, today is "Holy Experiment Day" ... does this mean we're supposed to experiment with holy things or are we to experience feeling holy? Yikes, another religious controversy!

Today's paper project was created for SCS's "Technique Lovers" challenge, TLC 210, "Crimped Envelope Pocket Card." This really kewl technique was created by one of my very favorite stampin' peeps, Theresa at Crafting the Web. Yay, Theresa, you go!

To visit Splitcoast Stampers and see all the challenge deets, including the instructions for creating your own Crimped Envelope Pocket Card, clicky
HERE. To go straight to the SCS Crimped Envelope Pocket Card gallery, clicky HERE. To visit Theresa's blog ... and be prepared to be blown away by Theresa's gorgeous projects ... clicky HERE. For the ginormous view of my Crimped Envelope Pocket Card, clicky on the photo above. Phew, that's exhausting!

For my pocket envie, I used a 70# Kraft A2 envelope and also hand-drew a l'il paper carrot to tuck inside with the card. I must warn you though, that forcing a thick Kraft envelope through your crimper might cause it to explode. Yup it will ... and ummm, it did! But boy-oh-boy, is it ever cute when you pull the top off the pocket and all the carrot "leaves" jump out!

For product info, refer to the supply list, below.

And now something from the "You Know You're In Florida When ... " files. Yesterday, the DH and I went to look at carpeting. While we we're poking around, a cute 20-something flagged down a salesman and asked for help in choosing carpeting for her first apartment.

"Do you know how big the room is?" the nice-carpet-man asked.

"Yup," she said. "It's 22 flip-flops long by 18 flip-flops wide."

Seriously!

~Hugs,

  • Card Stock: "Tangerine Tango," "Glorious Green," and Kraft by Stampin' Up
  • Envelope: Kraft A2 "Brown Bag" Envelope by The Greengrocer
  • Stamps: "Hoppy Easter" Set by Stampin' Up
  • Ink: "Spiced Marmalade" and "Pine Needles" Distress Ink by Tim Holtz for Ranger Industries
  • Accessories: Green Raffia
  • Tools: Die Cut Machine by Provo Craft; Nestabilities Dies by Spellbinder's; Paper Crimper, Deceased, by Marvy-Uchida; Sharpie Marker; Glue Dots by Mini-Glue Dots; Scotch ATG 714; Guillotine Paper Cutter by Tonic Studios; Stamp-A-Ma-Jig by EK Success

Wednesday, February 18, 2009

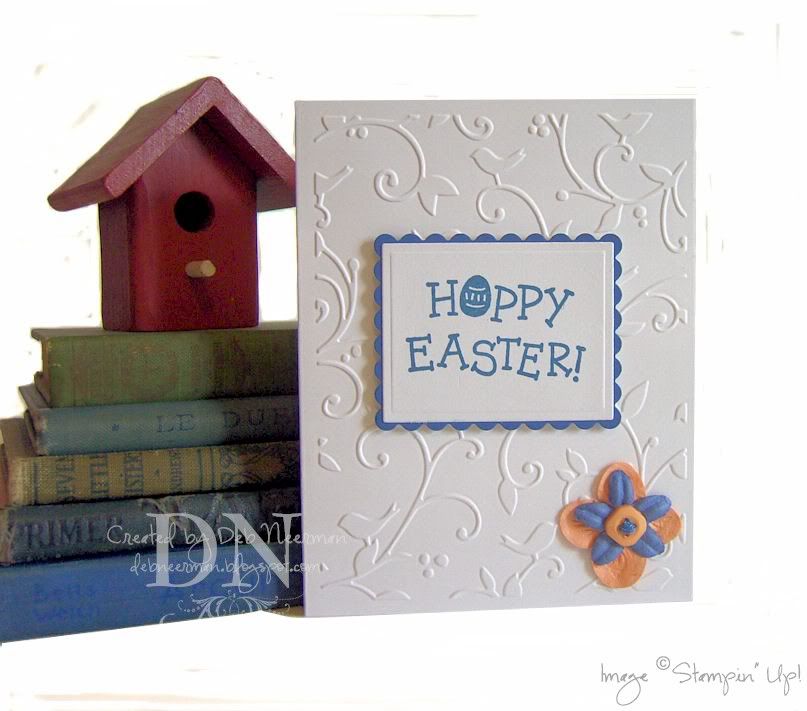
Hoppy Easter ... "Clean and Simple"

Pin It


Happy "National Battery Day!" So, I thought I'd tell you what my favorite battery operated gadget is: my hurricane-stash-itty-bitty color TV! All 3 inches of it! And you thought I was gonna say ... something else, didn't you?

Today's card was created for SCS's new "Clean and Simple" challenge. This week, the challenge called for the use of one button. Just one. Not two. One. For all the details of the challenge, clicky
HERE. And for the ginormous view of the card, you can clicky on the photo, above.

This simple l'il card needs no explanation but I did want to mention how much I love this old stamp set from Stampin' Up. The images are so fun and spring-like ... so I'm warnin' you, you're gonna be seein' more of this set. Oh. The set is l-o-n-g since retired, originally offered in 1998, and is called ... ready? "Hoppy Easter." Didn't see that comin', didcha?!? For the rest of the deets, check out the supply list, below.

Soooooo, on Sunday, the DH and I attended Church and after, decided to stop by Sheila's Sunday School class.

The cutest l'il girl was wearing a particularly pretty dress and, as she sat down, Sheila said, "That is a very pretty dress, Melissa. Is it your special Sunday dress?"

"Yes," Melissa answered, "and my Mom says it's a bitch to iron."

I. Kid. You. Not!!!

~Hugs,

  • Card Stock: "Stampers Select" by Papertrey Ink
  • Other: Blue Paint Sample Card from Lowe's
  • Stamp: "Hoppy Easter" by Stampin' Up!
  • Ink: "Indian Corn Blue" Dye Ink by Close to My Heart
  • Accessories: Prima Flowers; Vintage Button; DMC Embroidery Floss
  • Tools: Die-Cut Machine; Cuttlebug A2 Embossing Folder; Nestabilities Dies by Spellbinder; Dimensionals

Saturday, March 8, 2008

15 Minute Project ... and a "Fun Flap" Blog Challenge Entry

Pin It


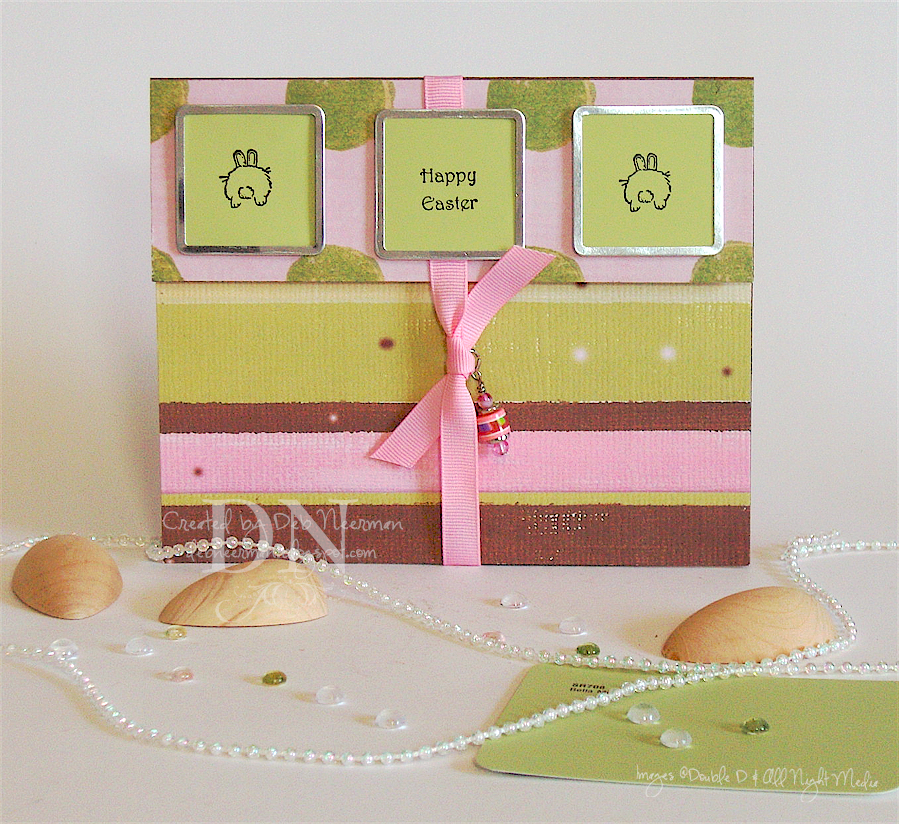
Today's 15 Minute Project was created for Sharon's "Fun Flap" blog challenge ... and, of course, to add to my Easter stash!

This card is so simple to create that it's almost embarrassing. Simply cut your card stock to 11" x 5" or so ... no need to be exact ... then fold one end down around the 2" mark and fold the bottom up to the flap. I like to create my second fold so that it lays neatly under the top flap.

I adhered coordinating patterned paper to both the top and the bottom sections, then tied the card closed with ribbon.

I stamped my bunny butts and sentiment on paint sample cards, cut them out, slipped them into tag frames, then mounted them to the top flap using dimensionals. I added a jump ring and a beaded dangle charm to the knot in the bow and called it done!

You can add a lot more embellishments and/or stamping to this project as there's a lot of real estate on the bottom section. I had planned on setting some olive green eyelets on the pink stripe, but my timer went off before I could do so. Next time ... for a 20 minute project!

Thanks so much for stopping by today!

~Hugs, Deb

Ingredients: Textured Card Stock, (Cut Card Stock); Patterned Paper, (Rusty Pickle); Stamps, Sentiment: Double D, Bunny Butts: All Night Media; Ink, Staz-On (Tsukineko); Paint Sample Cards (Loew's); Tag Frames (Making Memories); Grosgrain Ribbon (Unknown, obtained in a ribbon share); Dangly Charm (Unknown; found in Mt. Dangly Charms); Dimensionals, (Fiskars)

Friday, March 7, 2008

15 Minute Project ... Easter Pretties in Less Than 1/4 of an Hour ... and a "Spring" Blog Challenge Entry

Pin It


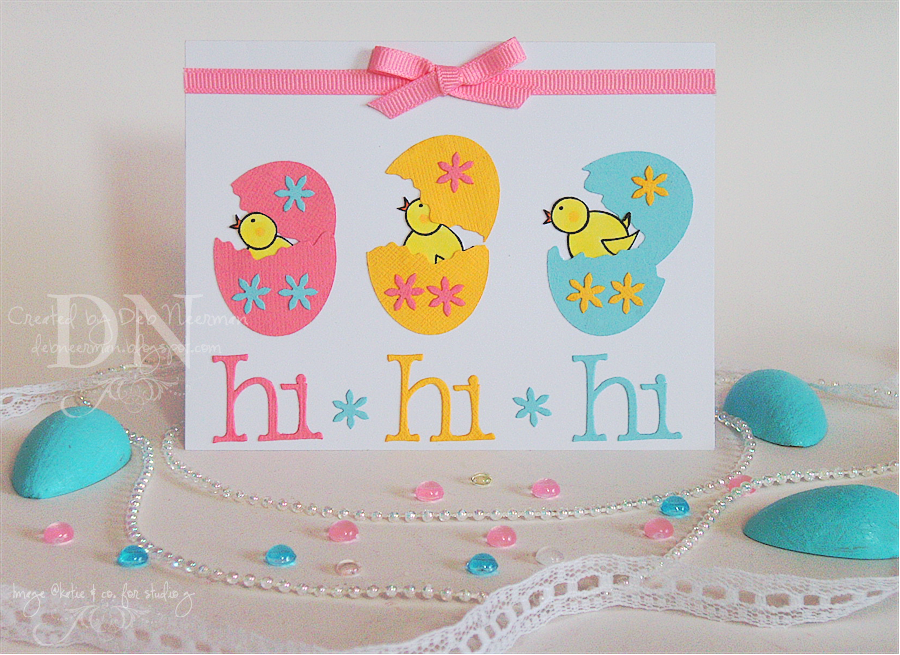
Today's "15 Minute" project was created super-fast using the Cuttlebug and Nestabilties dies! This spring-themed card will be submitted to the Arty Girlz for their current blog challenge; head on over to their blog and check out all the entries!

Using brightly colored card stock, I die cut 3 ovals to create "eggs." TIP: To minimize the embossing lines, cut your card stock on the "wrong" side. With scraps of the same card stock and dies from "Olivia" alphabet set, I created the words and the little star-flowers.

I stamped my chicks on Xerox 110# card stock and quickly colored them with Copic markers ... they're baby chicks, so there's not much ground to cover here! I cut them out, trimming closely, and set them aside.

Next, I used my decorative-edge scissors to turn the ovals into cracked eggs and stuck my baby chicks inside at varying heights.

After adding a grosgrain ribbon and a matching bow, this card was "done," "done," "done!"

Thanks for sharing part of your busy day with me; have a relaxing and creative weekend!

~Hugs, Deb

Ingredients: Textured Card Stock, (Bazzill); White Card Stock, (Xerox 110#); Stamp, (studio g, Michaels); Ink, Palette Hybrid (Stewart Superior); Color Medium, (Copic Markers); Grosgrain Ribbon (Unknown, obtained in a Ribbon Share); Die-Cut Machine (Provo Craft); Oval Die, (Spellbinder's); Word and Star/Flower Die, (Provo Craft); Decorative-Edge Scissors, (Fiskars)

Monday, March 3, 2008

15 Minute Project ... and a "Geometrics" & "Spring" Blog Challenge Entry

Pin It


Today's "15 Minute Project" was created for Allison's "Geometrics" blog challenge. If you've been wanting to participate in a challenge but wanted to start with something easy, this would be a good one for you to start with! I've also submitted this card to the kewl Arty Girlz "Spring" challenge.

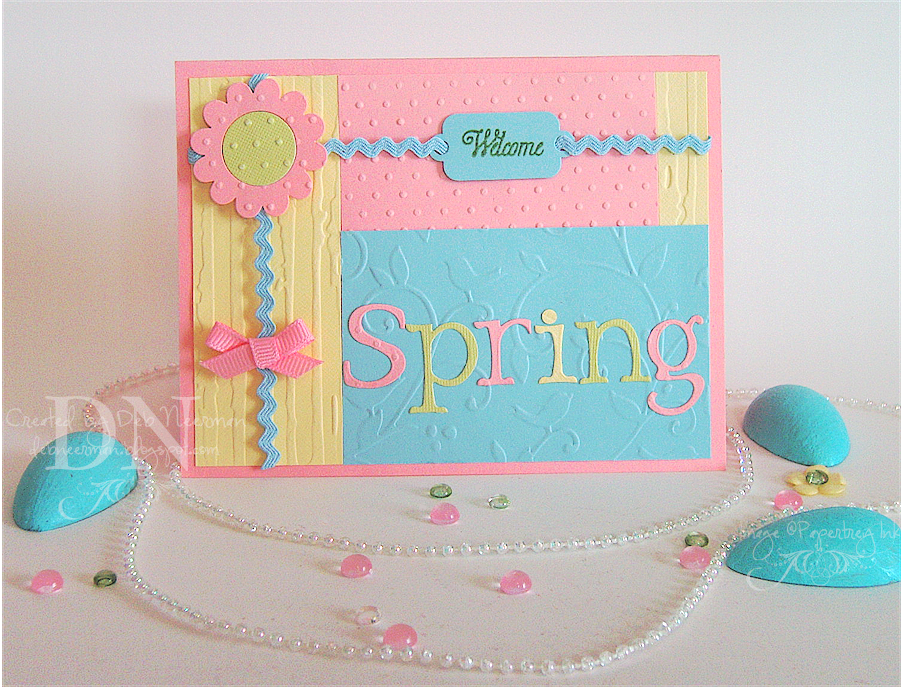
This 5 1/2" x 4 1/4" top-folded card was created using DCWV card stock throughout; all of the card stock was embossed and cut into rectangles, then pieced together.

Using some rick-rack, ribbon, and some die cut flower parts, I built a 'flower' ... then die-cut some letters, and stamped a small tag. The tag and the flower were mounted to the card using dimensionals. Easy-peasy and ready to serve in just 15 minutes!

Thanks so much for sharing part of your busy day with me!

~Hugs, Deb

Ingredients: Card Stock, (DCWV); Stamp, My Punny Valentine Add-On Collection (Papertrey Ink); Ink, Palette Hybrid (Stewart Superior); Adhesives, Dimensionals (Fiskars); Rick-rack and Grosgrain Ribbon (Unknown); Die-Cut Machine (Provo Craft); Alphabet, Tag, and Flower Dies (Provo Craft)

Wednesday, February 27, 2008

15 Minute Project: Recycle Your Magazines ... Into Pretties!

Pin It


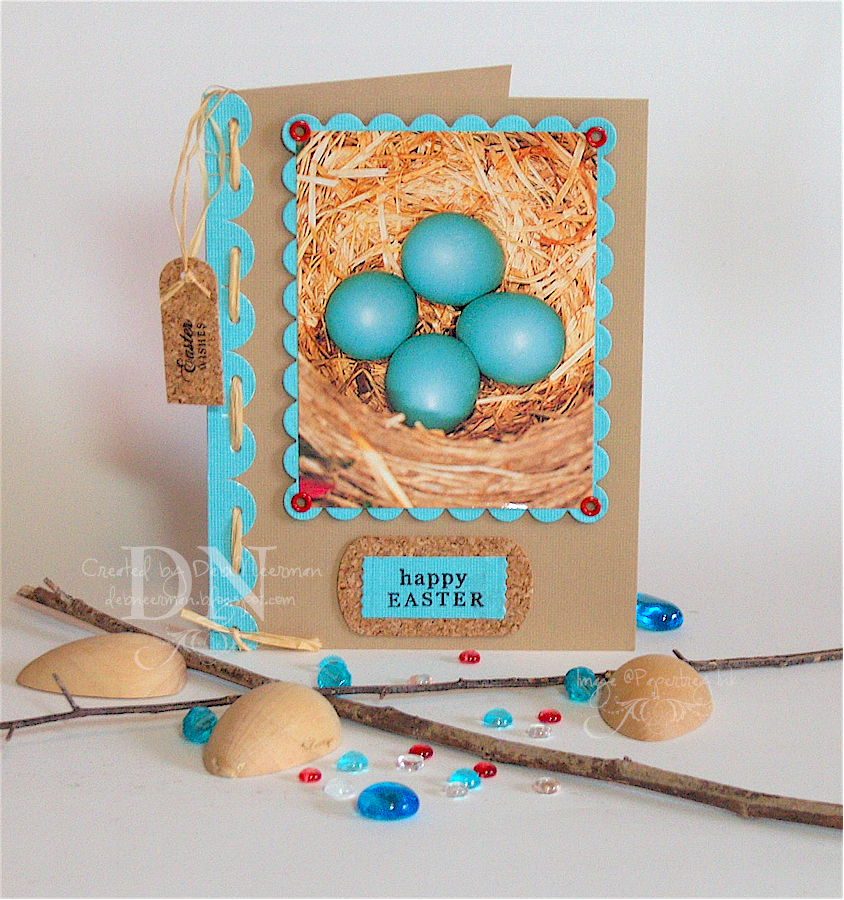
Today's card was created with an image I found in an old nature magazine. Always go through your old magazines before you toss 'em ... not only will you find some terrific photographs to use in your art work, you'll be livin' green ... and saving a tree or two!

I matted my recycled focal image onto a scalloped edge mat, and adhered some bright red eyelets. I created the large scallop border using my slit punch and wove some raffia through the holes I punched.

I used self-adhesive cork to create the tag and the mat for my sentiment. The tag was cut with a die from the Cuttlebug "Tiny Tags" set and the mat was punched with a key chain tag punch.

I stamped my sentiments using Staz-On ink, adhered 'em, and I was done!

Tip: To speed up your card making process, cut several mats or tags when die-cutting ... you'll have a stockpile to go to when you're in a rush.

Thanks so much for spending part of your busy day with me! And I hope you'll find a couple of minutes to create a card for Lois (see post below).

~Hugs, Deb

Ingredients: Textured Card Stock, (Bazzill Basics, DCWV); Self-Adhesive Cork, (Karen Foster); Stamps, "Unlimited Labels" and "Mixed Messages" collections (Papertrey Ink); Ink, Staz-On (Tsukineko); Raffia, (Unknown; I've had this for-evuh); Eyelets, (Unknown; found in Mt. Eyelet); Die Cut Machine and Tag Die (Provo Craft); Nestabilities (Spellbinder's); Key Chain Tag Punch, (Stampin' Up!); Slit Punch (Stampin' Up!)