Showing posts with label Just For Fun. Show all posts

Wednesday, August 13, 2008

Tag, You're It ... A "Faux Postage" Challenge

Pin It


Hey, why didn't you tell me that today is "Blame Someone Else" day?!? So, it's all your fault!

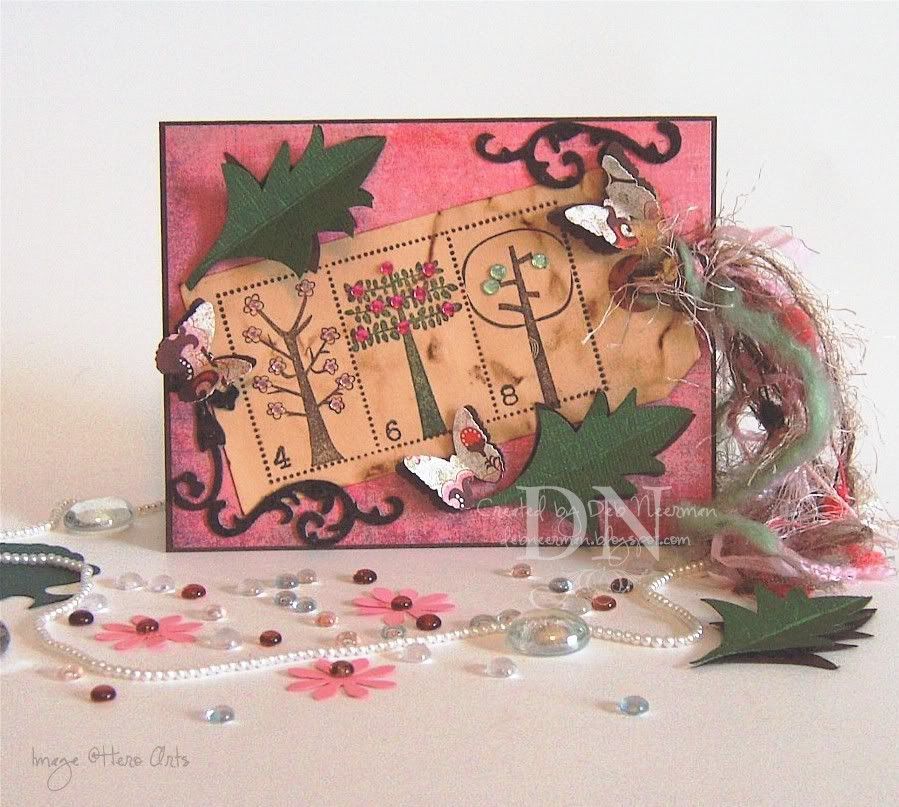
Today's card project was created for the "Tag You're It" blog challenge. This week, Anne and Sam's kewl tag challenge is the brainchild of featured guest designer, Penny. For her theme, Penny chose "Faux Postage." See, so it's all Penny's fault ...

I stamped my Faux Postage stamp using "Timber Brown" Staz-On ink on my distressed shipping tag. Then I masked off the postage-dot-thingies, and stamped my tree images. Using teeny-tiny number stamps, I added numbers to the lower-left hand corner of my "stamps."

Finally, I added some inked-up grungeboard, some punched butterflies, some leaves created with the negative space from a leaf die-cut, some bling, and lots of funky fibers.

Easy-peasy and not ready to serve in just 15 Minutes!

Is everyone/anyone watching the Olympics?!? My favorite moment so far is when the U.S. men's swim team defeated the heavily favored French men's swim team in the last few seconds of the four-man relay race. High fives, U.S. Men's Swim Team!

Which got me to thinking: last place must get awfully crowded at the Nice Guy Olympics ...

~Hugs,


Card Stock: Cut Card Stock, Bazzill Basics Card Stock
Designer Paper: "Infuse" Collection by BasicGrey
Stamps: "Faux Postage" by Just for Fun; "Sketch Trees" by Hero Arts; Alphabet: MaVinci
Ink: Staz-On by Tsukineko; Colorbox Fluid Chalk Ink by Clearsnap
Accessories: Bling by Hero Arts; Grungeboard, Tim Holtz for Ranger; Fibers: Various; Shipping Tag: Unknown; Walnut Ink by 7gypsies; Scrap Fusion PA by Ivy Scraps; Dimensionals: Unknown
Tools: Butterfly Punch by Martha Stewart; Cutter Bee Scissors

Saturday, July 5, 2008

15 Minute Project ... Using the "Glimmer Mist Resist" Technique

Pin It


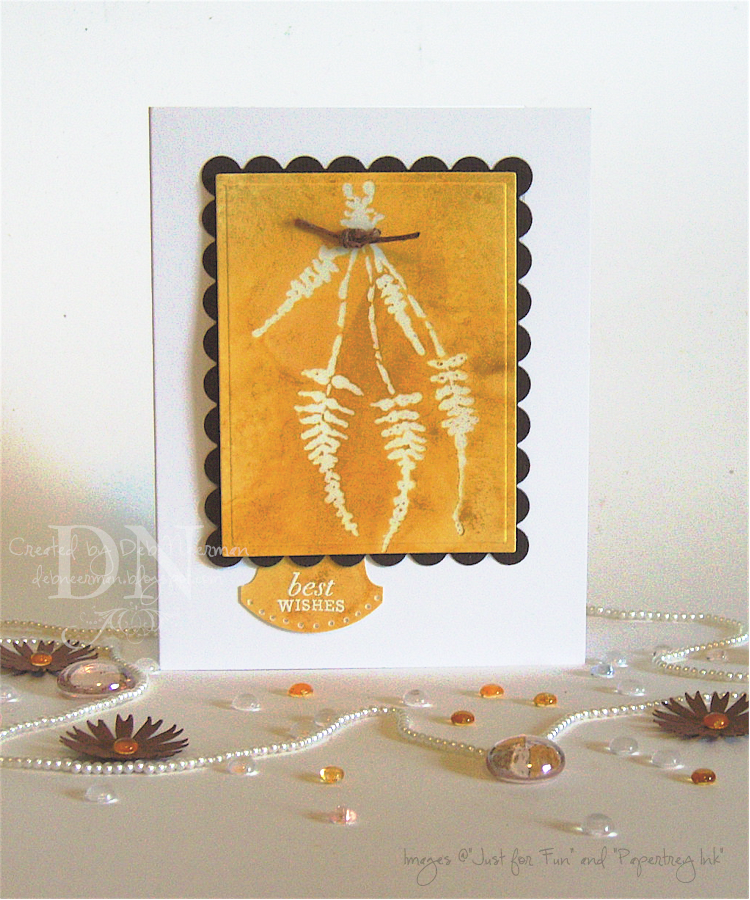
Today's "15 Minute" card project was created using clear embossing powder and gold Glimmer Mist by Tattered Angels. If you'd like a ginormous larger view, simply click on the photo.

I have several spray bottles of Glimmer Mist and never remember to use it ... sooooo, I decided to try to create a resist using the Mists with a clear embossed image. I know you have some Glimmer Mist in your studio too, so drag it out and let's create some kewl clear resist backgrounds!

First, I stamped my primitive herb image with Versamark on Xerox 110# card stock. I then placed the stamped image in a shoe box and sprayed heavily with gold Glimmer Mist. Really soak your card stock ... and allow the Glimmer Mist to pool up around the clear embossed image; doing so creates some really interesting patterns!

Allow the card stock to dry overnight ... then simply use a slightly damp rag to gently wipe the Glimmer Mist off the embossed image and voila!

Using a scrap of the Glimmer Mist(ed) card stock, I punched out a round file tab, then embossed my sentiment using white embossing powder. I used my piercing tool to punch little holes around the bottom edge of the file tab and went over the holes with a white Sharpie paint pen.

I punched two tiny holes on either side of the herb swag and, using wax linen thread, tied a square knot.

Finally, I cut my image out using Nesties in the Cuttlebug, then mounted it using black dimensionals on a dark brown scallop edge mat. TIP: Try mounting your card stock mats using black dimensionals; they "disappear" on your project.

I'd love to see what you create using the clear embossing resist technique with Glimmer Mists. Link up your creation in the comments so everyone can check out your creation!

Hope you're having a relaxin' and creative weekend; thanks for sharing part of it with me!

~Hugs,


Card Stock: Xerox 110#, Bazzill; Stamps: "Herb Swag" ... I made that up; I don't know what the name of this stamp is, but it's manufactured by Just for Fun ... Sentiment stamp by Papertrey Ink; Versamark Watermark Ink; Gold Glimmer Mist by Tattered Angels; Sharpie Paint Pen; Clear Embossing Powder: Unknown, I store all my clear emobossing powder in a covered plastic box ); White Embossing Powder by Powder Keg; Waxed Linen Thread by 7gypsies; Piercing Tool by Making Memories; Round File Tab Punch by Stampin' Up!; Large Classic Square Rectangle Die and Large Scallop Rectangle Die by Spellbinder's; Die-Cut Machine by Provo Craft; Adhesive: Scotch ATG 714; Black Dimensionals: Unknown, Obtained in a Sticky Share


Friday, June 6, 2008

OH, No She Didn't ... OH, Yes She Did!

Pin It


Happy Friday boys and girls, and welcome to your weekend!

I think you know (you know) how much all of you mean to me ... and how much I rely on you for honest advice, friendship, and moral support. We're all just one big happy stampin' family, right? Well, one of you had better come down here right now and slap me or something ... 'cuz I can't stop using the Walnut Ink Resist technique!

I'm sure I'm not the only one who love this technique ... although I'm prolly the only stamper you know who can't stop using it. I think it has to do with the almost magical process of clear embossing ... and the added wonder of how the ink will react to it. I can't wait to get to my studio the next morning to see how the ink dried. Perhaps I need more than a slap, yes?!? LOL!

This time I used the technique with this kewl old stamp from Just for Fun. I love the primitive look of the stamped image and it goes so well with the grungy/grubby/shabby look created by this technique. If you don't know how already, or if just like reading my blog entries, you can check out my instructions, HERE, for the Walnut Ink Resist technique.

And I just discovered that this card qualifies for Sharon's "Stamp Simply" challenge! This week, Sharon's challenge called for creating a project using a bold, or silhouette, stamp. Well, lookie, here; finally, a challenge entry I created and posted in a reasonable time frame. Which was totally by accident as I made this card yesterday ... w-a-y before I saw Sharon's blog post!

To create the little tie around the bunch of herbs ... or ferns, I punched a small hole on either side of the "bunch" and tied some white waxed linen through and into a knot. I added a smidgen of fluid chalk ink to the ends of the thread so they looked grubby too ... it's important to make everything on a grubby/grungy piece grubby/grungy too. I think ...

The only other things worth mentioning are: I used a scrap of the walnut-inked card stock to punch a round file tab ... I stamped my sentiment with Versamark, embossed with white powder, and pierced some itty-bitty holes around the edge. Oh. And I dotted the holes with a Sharpie Paint Pen.

Tomorrow, I'll post up a photo of my newly fruited banana tree! See how the excitement just never ends?!?!? I don't know how I stand it ...

Thanks so much for sharing part of your busy Friday with me ~ have a great weekend!

~Hugs,

Card Stock: Xerox 110#, Bazzill; Stamps: Herb Swag (I just made that up; I don't know it's name) by Just For Fun, Sentiment Stamp by Papertrey Ink; Ink: Versamark; Fluid Chalk Ink: Clearsnap; Walnut Ink: 7gypsies; Embossing Powder: Powder Keg; Sharpie Paint Pen; Fiber: Waxed Linen Thread by 7gypsies; Die Cut Machine by Provocraft; Dies by Spellbinder's; Punch by Stampin' Up!; Piercing Tool by Making Memories; My New-and-I'm-In-Love-Black-Hexagon Dimensionals: Unknown, Obtained in a Sticky Share; Adhesive: ATG 714