Showing posts with label Hero Arts. Show all posts

Monday, August 17, 2009

Because ..... I Said So!

Pin It


Happy Monday, all and one!

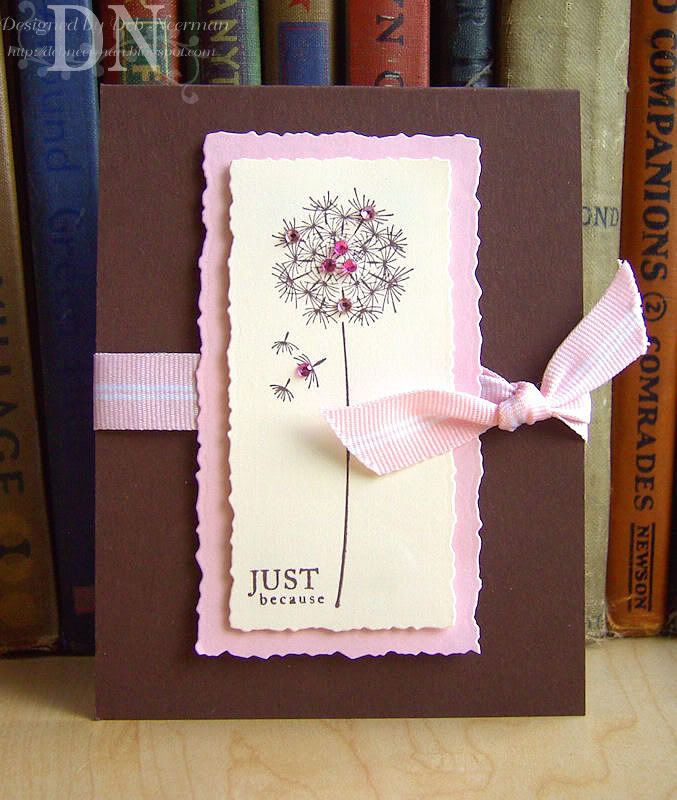
Today's card project was created for last week's SCS's "Clean and Simple" challenge, CAS27, to use some bling on your clean and simple card. For all the challenging deets, clicky HERE. To go straight to the CAS27 card gallery, clicky HERE. For the ginormous view of my card, clicky on the photo.

I lurve this dandelion stamp; isn't it purty?!? I stamped the purty dandelion with dye ink and added some self-adhesive faux gemstones and cut it out using a deckle-edged die. I added the sentiment, matted my image, and tied a ribbon around my card base. Easy peasy!

For the rest of the mind-boggling product info, check out the supply list, below.

Sooooo, this weekend Sheila's Dad took Reid-the-Wild-Child to the Palm Beach Zoo.

After a few blessed hours of quiet, Reid and his grandfather came home.

"Did you thank your grandfather for taking you to the Zoo?" Sheila asked.

Reid didn't answer.

She asked again, "Reid, did you thank Gramps for taking you to the Zoo?"

Still no answer.

Then Sheila kinda lost it: "You answer me right now, young man! DID YOU THANK YOUR GRANDFATHER?!?"

"Yes," Reid whispered.

"Well, why didn't you say so?"

"Because he told me not to mention it!"

I've been listing stuff in my eBay store like a crazy-woman. For a look-see without goin' all the way to eBay, check out my eBay store widget on the right sidebar! What won't they thin' up next?!?

~Hugs,

  • Card Stock: "Dark Chocolate" Card Stock by Papertrey Ink; "Very Vanilla" and "Pink Pirouette" Card Stock by Stampin' Up!
  • Stamps: Dandelion by Hero Arts; Sentiment by Papertrey Ink
  • Ink: Chocolate Chip Dye Ink by Stampin' Up!
  • Accessories: Faux Gemstones by Hero Arts; Pink Pirouette Ribbon by Stampin' Up!
  • Tools: Die-Cut Machine; Nestabilities Deckle-Edge Dies; Foam Tape
  • Finished Size: 4 1/4" x 5 1/2"
Monday, March 30, 2009

A Color Combination Not Worth Repeating:

Pin It


Happy Monday ... and happy "I'm in Control" Day! Right. Hey, isn't that a brand of adult diapers? Well, maybe not ... but it should be!

ONward H-C-M's:

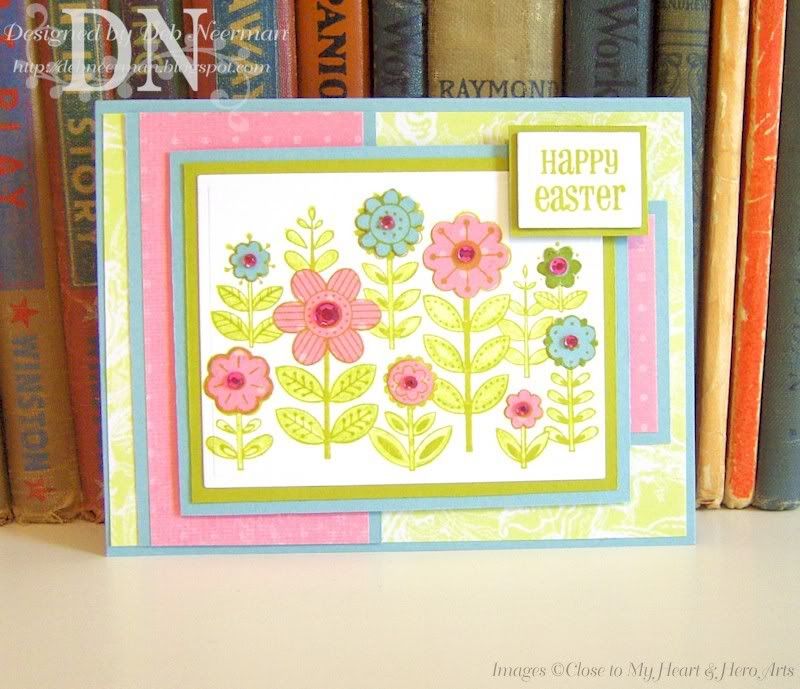
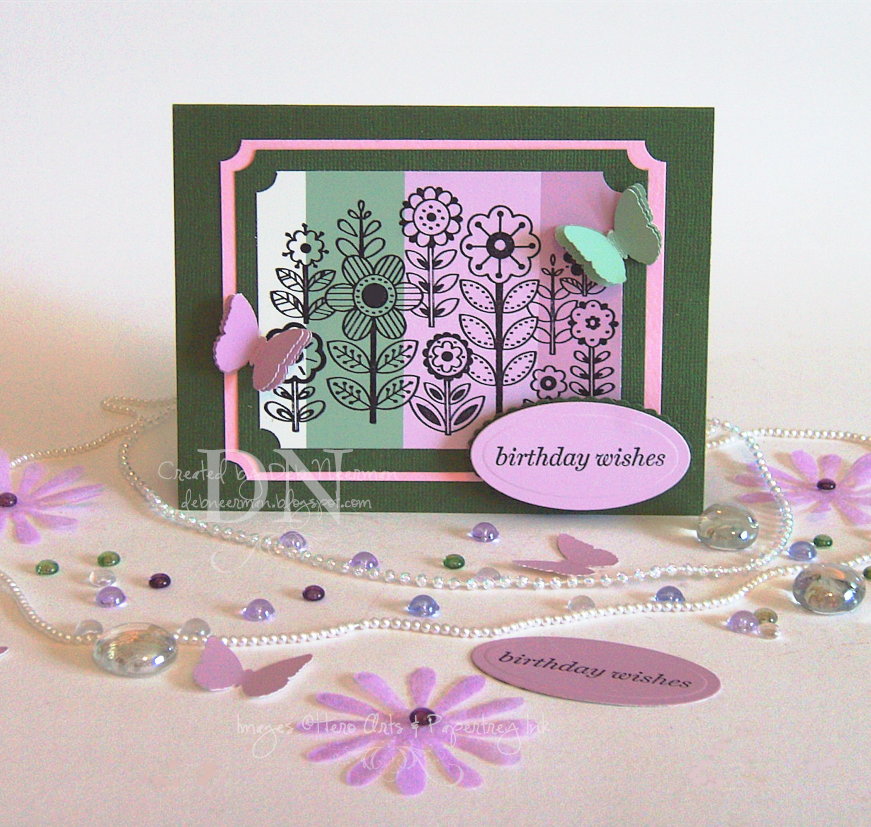
Today's card was created for SCS's weekly color combination challenge. This week's challenge, CC211, calls for Pretty in Pink, Baja Breeze, and Kiwi Kiss. While I really love these colors individually, I'm really not lovin' 'em together. And I prolly won't be pairing 'em up again anytime soon. Like never. Ever. I don't know, maybe it's just me, but they look kinda ... ummm ... terrible ... together. Guess that's why they call it a "challenge," huh?!?

For all the challenge-like deets, clicky HERE. To go straight to the challenge gallery, clicky HERE. For the ginormous view of my card, clicky on the photo.

The kooky layout is mine ... and I did a l'il bit of paper piecing on the flowers. {Yawn}. For all the colorful ingredients, check out the supply list, below.

So, this weekend I had the bad luck pleasure of taking care of Sheila's son, Reid-the-Wild-Child, for a few hours. I'm still recoverin' ...

"So, Reid," I said. "Has Mommy taught you all your numbers?"

"Yup!"

"Good for you! So tell me, what comes after three?" I asked.

"Four," Reid answered.

"What comes after six?"

"Seven!"

"That's fantastic, Reid! Mommy did a really good job teaching you your numbers," I said enthusiastically.

"So, what comes after ten?" I asked.

"A jack!"

I. Kid. You. Not!

And, if you don't mind, I must say, "Yay! men AND women UCONN hoopsters! Big East Rulzzz!" Thanks for lettin' me get that outta my system ...

~Hugs,

  • Card Stock: Stampin' Up
  • Designer Paper: Close to My Heart
  • Stamp: "Pattern Flowers" by Hero Arts; Sentiment by Close to My Heart
  • Ink: "Kiwi Kiss" Dye Ink by Stampin' Up
  • Accessories: Rhinestones by Me & My Big Ideas
  • Tools: Die-Cut Machine; Large Classic Rectangle Dies by Spellbinder's; Prismacolor Premier Colored Pencil; Gamsol OMS; Foam Dimensionals; Scotch ATG 714

Thursday, March 5, 2009

A Tiskit, A Tasket, Some Tulips in a Basket ...

Pin It


Hey, race fans, happy Thursday. And speaking of racing, this is gonna be a fast post ... I'm running out of hours in the day and have about 73 projects spread out on my work table. And what's worse, the hurrier I go, the behinder I get ...

Today's super-simple card project was created for Splitcoast's color challenge, CC208. This week, the challenge called for a card created using Pink Passion, Kiwi Kiss, and Chocolate Chip. For all the challenge deets, clicky HERE. For the ginormous view of my card, clicky on the photo.

So, yesterday afternoon Sheila and I decided to splurge and treat ourselves to lunch at our favorite restaurant. Just doing our part to help the local economy, you know ...

After the waitress took our order, we headed to the Ladies Room. After washing our hands, we placed our wet hands under one of those hot air hand dryers.

Someone had taped a handwritten sign over the dryers: "Please push button and listen for a short message from Florida's Governor Charlie Crist."

Have a great day ... and be sure to check for a message from your state's governor in a ladies room near you!

~cHeERs!
  • Card Stock: Stampin' Up
  • Stamp: Hero Arts
  • Ink: Chocolate Chip Dye Ink by Stampin' Up
  • Color Medium: Copic Markers
  • Accessories: 3/16" Eyelets
  • Tools: Border Punch by Martha Stewart Crafts; Crop-A-Dile; Perfect Layers; Dimensionals

Thursday, October 16, 2008

Can't Help it I'm Fall-Fall-Fallin' ...

Pin It


Hey, there you are! And not a minute too soon 'cuz it's "Dictionary Day" and I wanted you to read my post and try to find all the misspelled words. Can you bare it?!?

ONward H-C-M:

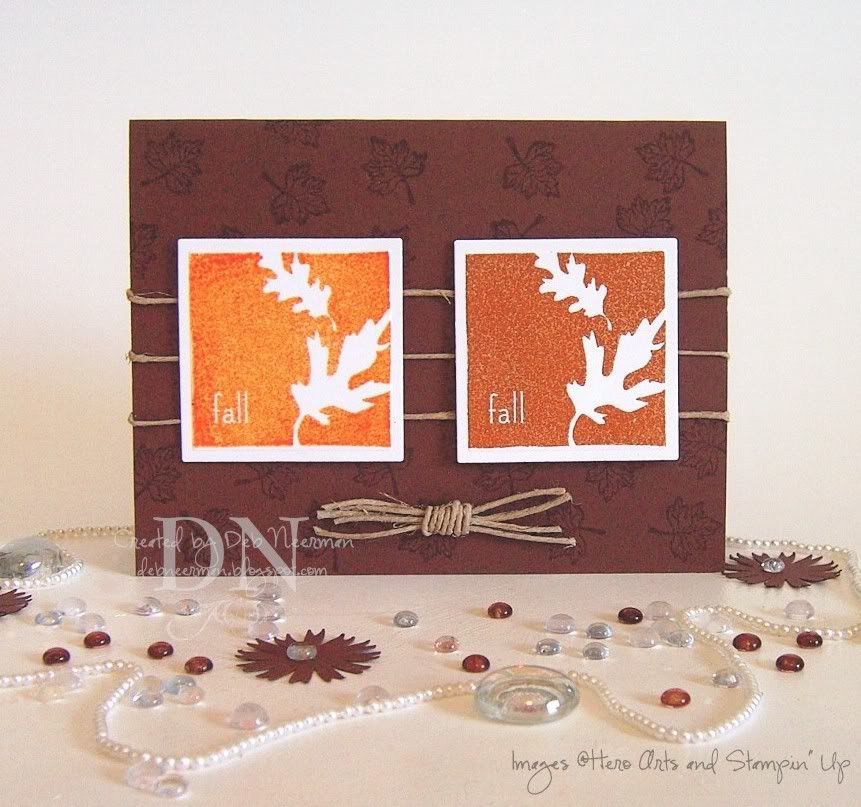
Today's card project was created for no good reason using one of my most favorite stamp sets. So, if you've seen it used before here, you're now officially excused. But go straight home.

I loaded my stamp with Versamark, then tapped on dye ink, and stamped my fall images. I sprinkled on clear embossing powder and heat set with my gun ... hey, did I ever tell you I won a quick-draw contest? Prolly not ... 'cuz I didn't.

Using Versamark, I randomly stamped my card stock with this cute l'il leaf image, tied on some natural jute twine, made a jute twine bow, and finis!

So, last night, I popped in for a quick visit with Sheila.

Her DH was sitting in 'his' chair reading The Palm Beach Post.

He turned to Sheila and said, "You know, honey, I think there might be some real merit to what this article says: that the intelligence of a father often proves a stumbling block to the son."

"Well, thank heaven," Sheila responded, "at least our son has nothing standing in his way."

Seriously.

~Hugs,


  • Card Stock: Papertrey Ink
  • Designer Paper: NONE (Shocking!)
  • Stamps: "Fall" Stamp from "The Seasons" Collection by Hero Arts; Small Leaf by Stampin' Up!
  • Ink: Versamark; "Spiced Marmalade" Distress Ink by Ranger; "Autumn Terracotta" Dye Ink by Close to My Heart
  • Accessories: Natural Jute Twine
  • Tools: Heat Gun; Clear Embossing Powder; Dimensionals

Tuesday, September 23, 2008

It's National Checker's Day!

Pin It


Say, do you have a Checkers restaurant near you? If so, get thy self down there and get a free meal today! It's not advertised but just do what I did ... order your meal, then when the cashier tells you how much you owe, tell them that today is National Checker's Day and that according to your attorney, all Checkers' meals are free for the askin' today. Yum, the only thing better than Checkers is free Checkers! And free checkin' ... that's pretty kewl too.

ONward Hoarding-Card-Makers:

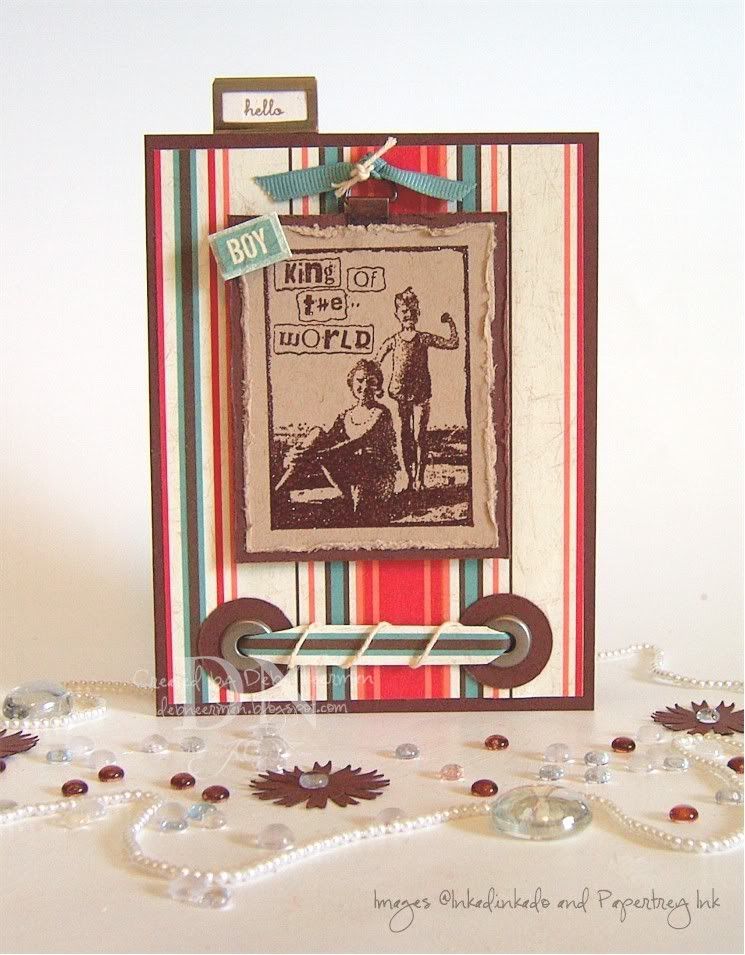
Today's card project was created for no good reason 'cept that I found this image on my work table all ready stamped, embossed, and distressed. Bein' that I never look a gift horse in the mouth (dangerously yucky), I assumed that the Goddess of Card Making wanted me to use it. So I did.

Isn't this DP gorgeous?!? I'm soooo in love with this new patterned paper from Close to My Heart! This is from the brand new "Perfect Day" collection and you can get it HERE. And you should ... 'cuz it's soooo pretty! I know you'll be thankin' me later for enabling you now.

For the rest of the deets on this card, check out my supply list, below.

So, my friend Sheila is helping out her uncle in his bakery this week. No, thank goodness, she doesn't bake, but she does know how to work the cash register.

Yesterday morning, a gunman burst in and demanded all the cash. As Sheila nervously handed over the cash, she noticed the rolls of coins in the back of the register.

"Do you want the rolls too?" she asked.

"No," said the robber, waving his gun. "Just the money."

Seriously.

~Hugs,

  • Card Stock: Bazzill Basics Kraft; Papertrey Ink
  • Designer Paper: Close to My Heart, "Perfect Day" Collection
  • Stamps: Hero Arts; Sentiment by Papertrey Ink
  • Ink: Clearsnap Dark Brown Fluid Chalk Ink; Versamark; Close to My Heart
  • Accessories: Grosgrain Ribbon; Vintage Cotton Twine; SU Jumbo Eyelets; Frame Hanger; Metal Index Holder: 7gypsies; Stacked Word Sentiment; Clear Embossing Powder; Distressing Tool
  • Tools: Crop-a-Dile; Heat Gun; Circle Punch; Dimensionals; Mini-Glue Dots

Tuesday, September 16, 2008

Grateful for Fall ... Who? Not Me!

Pin It


Why? 'Cuz Fall in South Florida means two things: tourists ... and hurricanes. I can't decide which is worse. LOLO, I kid, it's easy to decide which is worse: tourists.

ONward Hoarding-Card-Makers:

Today's card project was created using fall-like-ish images from Close to My Heart and Hero Arts.

I loaded my leaf image using Versamark, tapped on dye ink, then heat embossed with clear powder. Rinse, lather, and repeat. I stamped my sentiment in the same manner.

I embellished the card with silver hinges, brads, grosgrain ribbon, and a ribbon slide, and popped my sentiment up on black dimensionals. Easy-peasy-almost-too-easy!

Sooooooo, I went to the mall with my friend Sheila yesterday and as we were walking back to the car, I noticed a huge dog walking toward us.

"Wowza," I said, "look at that dog with one eye!"

Sheila covered one of her eyes and said, "Where?"

Seriously.

~Hugs,

  • Card Stock: Papertrey Ink
  • Stamps: "Fall" by Hero Arts; Sentiment by Close to My Heart
  • Ink: Versamark Watermark; Close to My Heart Dye Inks
  • Accessories: Clear Embossing Powder; Silver Hinges; Brads; Grosgrain Ribbon; Ribbon Slide
  • Tools: Heat Gun; Spellbinder's Dies; Scrap Fusion PA; Dimensionals

Tuesday, August 26, 2008

Take Time to Enjoy Your Day, 'Cuz No One Can Do it for You ...

Pin It


Hey, today is National Cherry Popsicle Day ... wanna know how cool this is ?!? Frozen!

I kill me ...

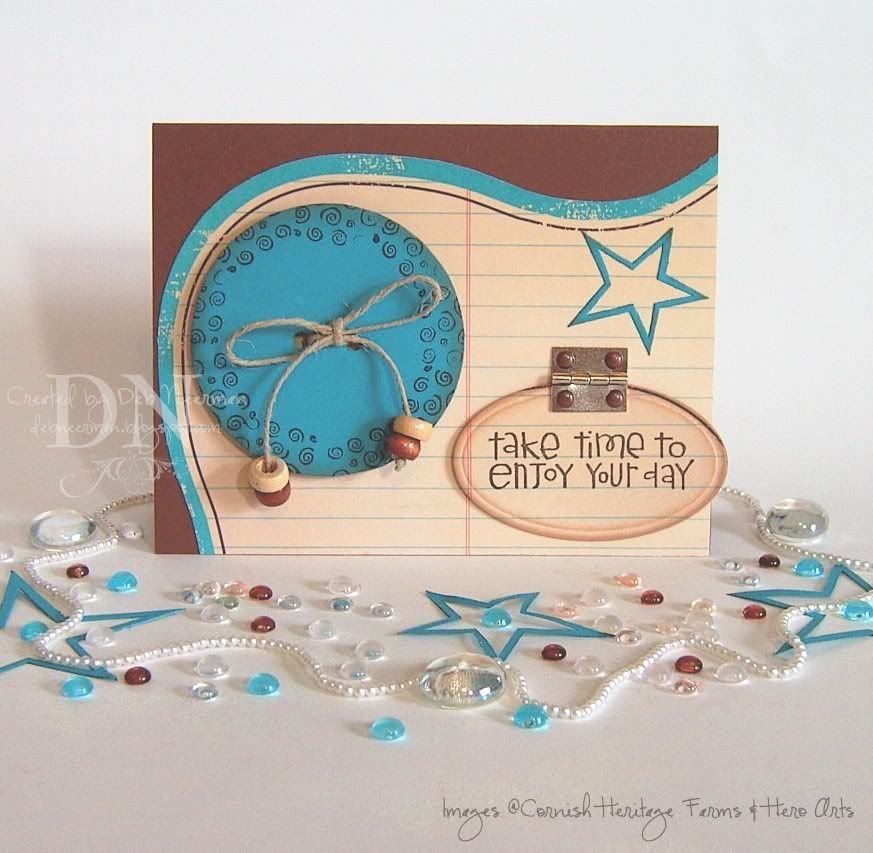
Hey, paper hoarders, today's card project was created just for the heck of it using DP from Making Memories, and a large chipboard button.

I covered the aforesaid large chipboard button with turquoise card stock, stamped a swirly border, tied on some natural jute twine embellished with wooden beads, and adhered the whole shebang to my card base.

I stamped my sentiment on a scrap of DP, cut it out using a small oval die, sponged on fluid chalk ink, then mounted it to the card base using a metal hinge. For fun, you can stamp a secret message or fun image under there ... or add a sticker, a charm, or whatever! I'd show you what I put under there, but it's a secret ...

Finally, I die cut a turquoise star using a Cuttlebug die, and finis!

Thanks so much for swingin' by! And be sure to recycle your cherry Popsicle stick for a future project. Then go stick out your tongue in front of a mirror ... kewl!

~Hugs,

  • Card Stock: Cut Card Stock; DCWV
  • Designer Paper: Making Memories
  • Stamps: Sentiment by Cornish Heritage Farms; Swirls by Hero Arts
  • Ink: Staz-On by Tsukineko; Colorbox by Clearsnap
  • Accessories: Chipboard Button; Natural Jute Twine; Wooden Beads; Metal Hinge; Brads
  • Tools: Die Cut Machine; Cuttlebug Star Die; Black Dimensionals; Scrap Fusion PA

Wednesday, August 13, 2008

Tag, You're It ... A "Faux Postage" Challenge

Pin It


Hey, why didn't you tell me that today is "Blame Someone Else" day?!? So, it's all your fault!

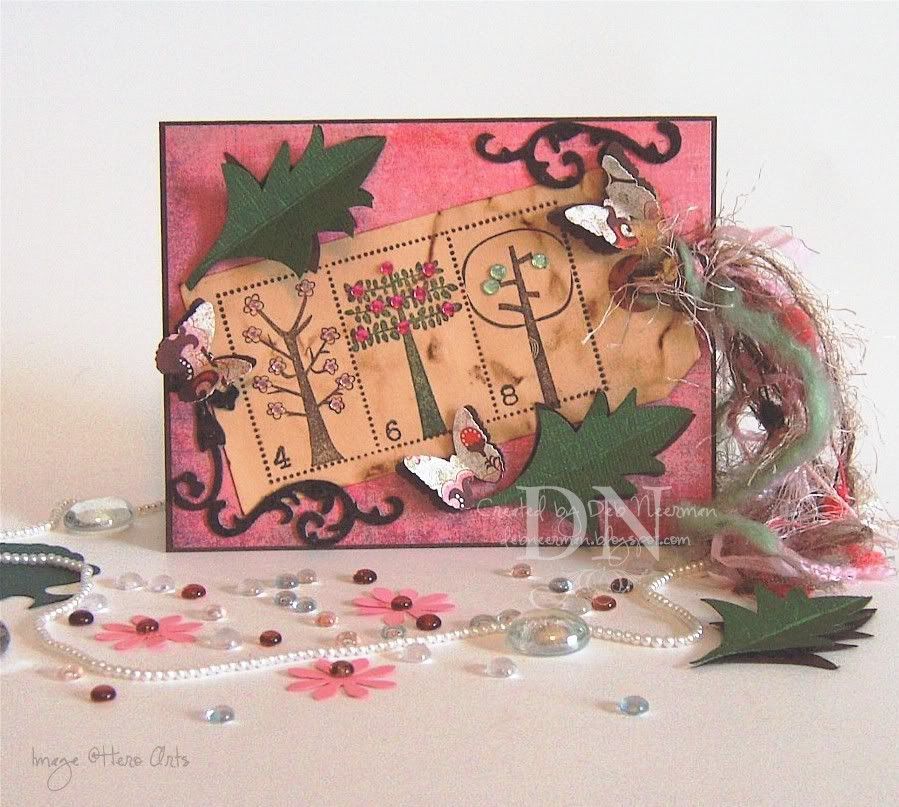
Today's card project was created for the "Tag You're It" blog challenge. This week, Anne and Sam's kewl tag challenge is the brainchild of featured guest designer, Penny. For her theme, Penny chose "Faux Postage." See, so it's all Penny's fault ...

I stamped my Faux Postage stamp using "Timber Brown" Staz-On ink on my distressed shipping tag. Then I masked off the postage-dot-thingies, and stamped my tree images. Using teeny-tiny number stamps, I added numbers to the lower-left hand corner of my "stamps."

Finally, I added some inked-up grungeboard, some punched butterflies, some leaves created with the negative space from a leaf die-cut, some bling, and lots of funky fibers.

Easy-peasy and not ready to serve in just 15 Minutes!

Is everyone/anyone watching the Olympics?!? My favorite moment so far is when the U.S. men's swim team defeated the heavily favored French men's swim team in the last few seconds of the four-man relay race. High fives, U.S. Men's Swim Team!

Which got me to thinking: last place must get awfully crowded at the Nice Guy Olympics ...

~Hugs,


Card Stock: Cut Card Stock, Bazzill Basics Card Stock
Designer Paper: "Infuse" Collection by BasicGrey
Stamps: "Faux Postage" by Just for Fun; "Sketch Trees" by Hero Arts; Alphabet: MaVinci
Ink: Staz-On by Tsukineko; Colorbox Fluid Chalk Ink by Clearsnap
Accessories: Bling by Hero Arts; Grungeboard, Tim Holtz for Ranger; Fibers: Various; Shipping Tag: Unknown; Walnut Ink by 7gypsies; Scrap Fusion PA by Ivy Scraps; Dimensionals: Unknown
Tools: Butterfly Punch by Martha Stewart; Cutter Bee Scissors

Friday, July 11, 2008

Enjoy Simple Pleasures ... A 15 Minute Project

Pin It


Happy Friday, everyone!

Today's "15 Minute" project was created in a flash using die cuts and an easy-to-color image from Hero Arts.

I stamped my image on Xerox 110# card stock, then colored it with Koh-I-Noor pencils, blending with Gamsol.

I matted the stamped image using black dimensionals on dark brown card stock cut with a Large Rectangle Die. I also die cut two brackets from the Cuttlebug "Olivia" alphabet set and used my slit punch to create a scalloped edge.

Finally, I applied two antique copper metal photo corners; to keep them from floppin' around on my card, I clipped the prongs off and glued them down to my card front.

Easy-peasy and ready to serve in just 15 Minutes!

Thanks so much for sharing part of your day with me; have a great weekend!

~Hugs,


Card Stock: Bazzill, Xerox 110#; Stamp by Hero Arts; Ink: "Black Soot" Distress Ink by Ranger; Color Medium: Koh-I-Noor Woodless Coloured Pencils; Gamsol by Gamblin; Paper Stump by Creative Mark; Dies: Large Classic Rectangle and Large Scallop Rectangle by Spellbinder's; Bracket Die: "Olivia" Alphabet Set by Provo Craft; Metal Photo Corners: Unknown, found in Mt. Photo Corner; Slit Punch: Stampin' Up!; Die Cut Machine by Provo Craft; Adhesives: Scotch ATG 714, Black Dimensionals, Scrap Fusion by Ivy Scraps, and "The Ultimate" by Api

Friday, May 16, 2008

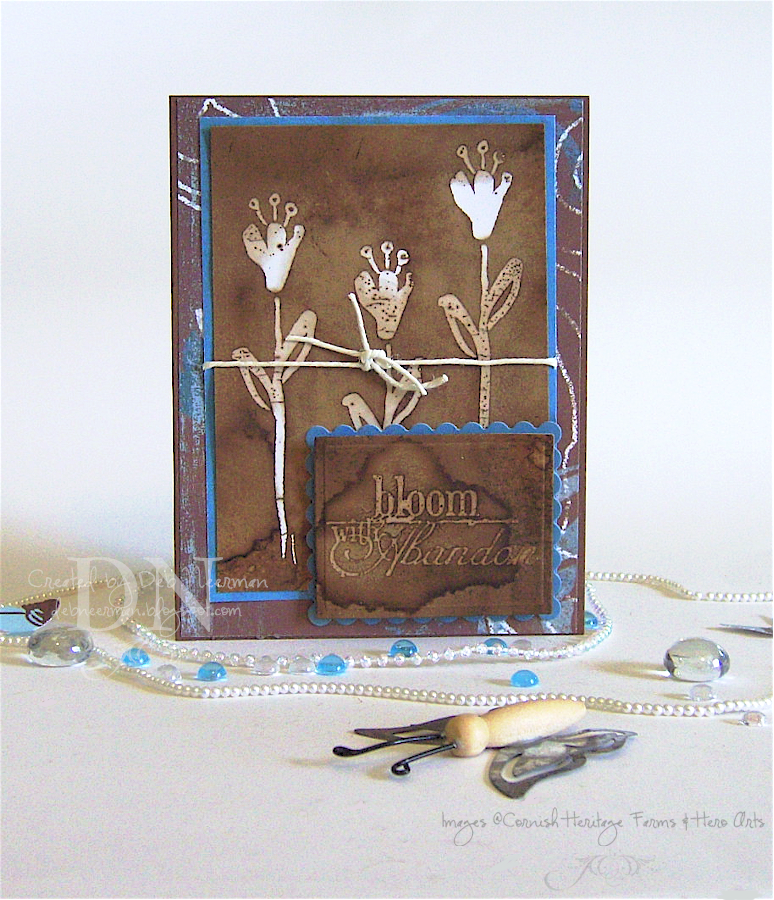
Bloom with Abandon ... Walnut Ink Resist Technique

Pin It


Happy Friday, boys and girls, and welcome to another edition of MACM! No, no, nothing like Kristina's Make a Card Monday. My version of MACM is "Making a Card ... Mess!"

With my art roots being in mixed media collage and assemblage, mess-making comes naturally to me! But with my "spray in a box" technique, this project really isn't all that messy ... and, if you're like me, you already have 20 gallons of walnut ink stashed somewhere in your studio. Today we're gonna put it to good use!

It's really very simple to achieve this look: you'll need white matte card stock, a bold stamp, watermark ink, clear embossing powder, a heat gun, walnut ink, an old shoe box, and a soft cloth or paper towels.

I stamped my "Long Stemmed Lily" stamp three times on Xerox 110# matte card stock using Versamark watermark ink. I covered my stamped images with clear embossing powder and embossed with my heat gun. I followed the same steps with my sentiment stamp.

Now for the messy fun part! Fill a spray bottle with walnut ink (follow package instructions, or ask me for mixing directions, if you're starting with walnut ink crystals). Place your stamped and embossed images in the empty shoe box and spray ... liberally ... with the walnut ink. Then spray again ... liberally. I like to cover the entire sheet of card stock with ink, encouraging lots of little puddles ... that's what makes the piece interesting! Using your hands, rotate the inked card stock, allowing the ink to puddle and pool. Once you're satisfied with the ink's coverage, you're done! Simply allow the card stock to dry naturally ... overnight is best.

When completely dry, simply wipe the embossed areas with a cloth or a paper towel. You might slightly dampen the cloth or paper towel for faster removal. Then use your uber-kewl, walnut-ink, clear-embossed-resist piece in your next project!

This technique is a great way to enhance a vintage-inspired project, but any stamp or style will work here ... with the possible exception of finely detailed stamps. Try it! I'd love to see what you create, so if you do use this technique please post a link in the comments.

Thanks so much for sharing part of your busy day with me; have a great weekend!

~Hugs,


Card Stock: Cut Card Stock, Xerox 110#; Designer Paper: My Mind's Eye "Bohemia" Collection; Stamps: "Long Stemmed Lily" by Hero Arts, "Bloom with Abandon" Cornish Heritage Farms; Ink: Versamark Watermark; Walnut Ink: 7gypsies; Waxed Linen: 7gypsies; Die-Cut Machine: Provo Craft; Dies: Nestabilities by Spellbinder's; Adhesive: ATG 714; Dimensionals: All Night Media

Wednesday, May 14, 2008

15 Minute Project ... and a Blog Challenge Entry

Pin It


Today's "15 Minute" card project was created for Allison's "Suggestive Sunday" blog challenge. This week, Allison's challenge required that you use a stamp that you would normally stamp, then color ... but don't. In other words, no coloring allowed!

I decided to stamp my image on a paint sample card ... allowing me to stay within the challenge guidelines and to add some color to my project ... pretty sneaky, huh?

I love using paint sample cards in my projects! Mostly because they're free but also because they're always so colorful ... usually featuring all the latest designer colors and, like this ^ paint sample card, some really kewl color combinations!

TIP: When stamping on paint sample cards, be sure to use a solvent ink, like Staz-On, to insure that the ink stays put. To prevent smudging your stamped image, lift your stamp straight up ... while holding the paint sample card down with the other hand.

Using scraps left over from the same paint sample card, I punched out some butterflies and cut an oval for my sentiment. Easy peasy and ready to serve in just 15 Minutes!

Thanks so much for sharing part of your busy day with me! And please feel free to ask me any question you might have about stamping in general or stamping on paint sample cards in particular, okeedokee?!?

Hugs,


Card Stock: Bazzill, Prism; Paint Sample Card: Lowe's Home Center; Flower Stamp: Hero Arts, "Pattern Flowers"; Sentiment Stamp: Papertrey Ink, "Simple Little Things" Limited Edition Anniversary Collection; Ink: Staz-On by Tsukineko; Die-Cut Machine: Provo Craft; Die: Spellbinder's Nestabilities "Petite Scallop Oval" Collection; Butterfly Punch: Martha Stewart Crafts; Ticket Corner Punch: Stampin' Up!; Adhesive: ATG 714; Dimensionals: All Night Media

Wednesday, April 16, 2008

An Awfully Bright and W-A-Y to Cheerful Sketch and "Glitter" Challenge Entry

Pin It


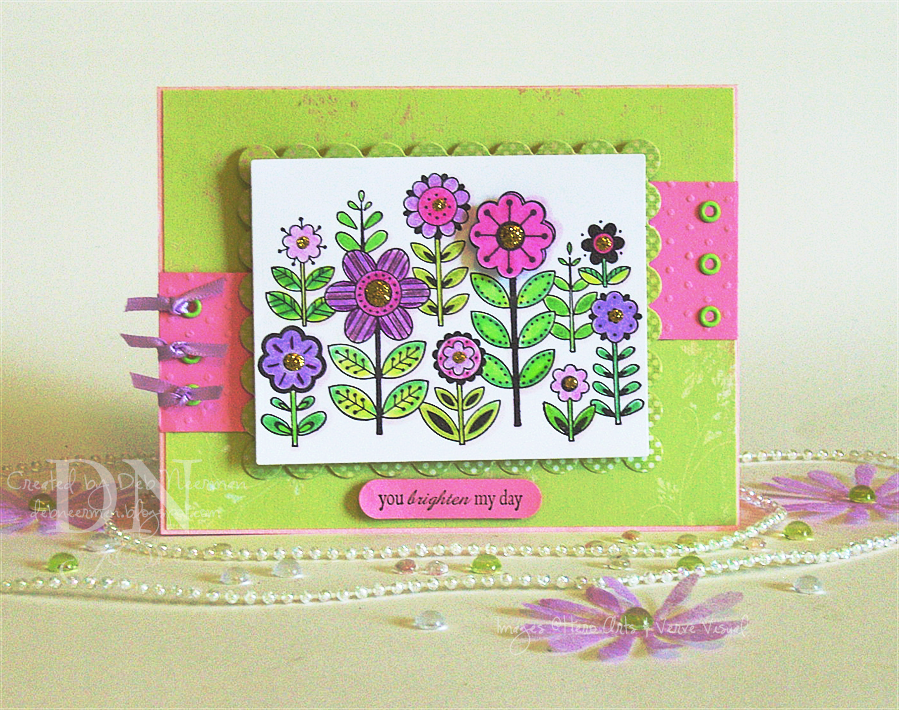
This wild-riot-of-color A2 card was created for Poetic Artistry's Mojo Monday sketch challenge. But ever since I won her Monthly Mojo Madness contest, I feel like, "omigosh, how am I ever gonna top that?" It's had an almost paralyzing effect on me: should I enter this card, shouldn't I, should I, is it good enough, no, it's not good enough, yes, it's good enough ... no, it isn't good enough, should I, shouldn't I, and on and on. But I put on my big-girl panties and am forging ahead; good, bad, or indifferent!

I just realized that this card also (barely) qualifies for Sharon's "Glitter" blog challenge! There's not a lot of it, but that's definitely glitter on the centers of those flowers. See, the thing is, I'm not much of a glitter-girl ... I love it when I see you do it, but me ... not so much.

This card would have qualified for a "15 Minute Project" ... except for the fact that I colored the stamped image with Prismacolor pencils, blending with Gamsol. The card itself; less than 15 Minutes.

I am head-over-heels in l-o-v-e with this new stamp from Hero Arts! I visit Michelle Rodgers' Stamper's Dream blog regularly and when I saw a card project she had done recently using this stamp, a compelling and irrestible force made me go immediately to her online store, Stamper's Dream, and buy it. Michelle shipped this baby to me at warp speed and I love it w-a-y more than any other stamp in my entire collection. Today. Tomorrow, next week ... maybe not so much. We stampers are a fickle lot, aren't we?

The sentiment stamp is from Verve Visual and is perfect to use with the SU word window punch ... so I did. I stamped my flower image twice and cut out one of the larger flowers, colored it, then popped it up on dimensionals over the first stamped image. The aforementioned glitter was sparingly applied to the flowers, I ran some pink card stock through the 'Bug in the Swiss Dots embossing folder, set some eyelets, tied on some ribbon, and was done! {breathe}

Oh. I also used a Copic marker (Pale Heath, V000), to create shadows around the right-hand side of all the flowers, but it doesn't show up very well in my photo. IRL, it looks kewl ... no, really! C'mon over, you'll see!

Thanks so much for spending part of your very busy day with me; you rock!

~Hugs,


Card Stock: Xerox 110#, Prism; Designer Paper: Memory Box; Stamps: Hero Arts, Verve Visual; Ink: Brilliance; Copic Marker: Prismacolor Premier Pigment Pencils; Gamsol: Gamblin; Ranger Stickles Glitter Glue; Cuttlebug Die Cut Machine; Swiss Dots Embossing Folder; Nestabilities, Large Square Classic Rectangle; Crop-a-Dile; Stampin' Up Word Window Punch; Eyelets, Unknown: Found in Mt. Eyelet; Ribbon, Darice; Dimensionals: Fiskars

PS: I'd also like to thank Julee of Poetic Artistry for honoring me with the "Arte y Pico" blog Award. Thanks so much, Julee!! Coming from you, this means a LOT to me!