Showing posts with label Cornish Heritage Farms. Show all posts

Friday, July 24, 2009

You're Somebirdy Special ...

Pin It


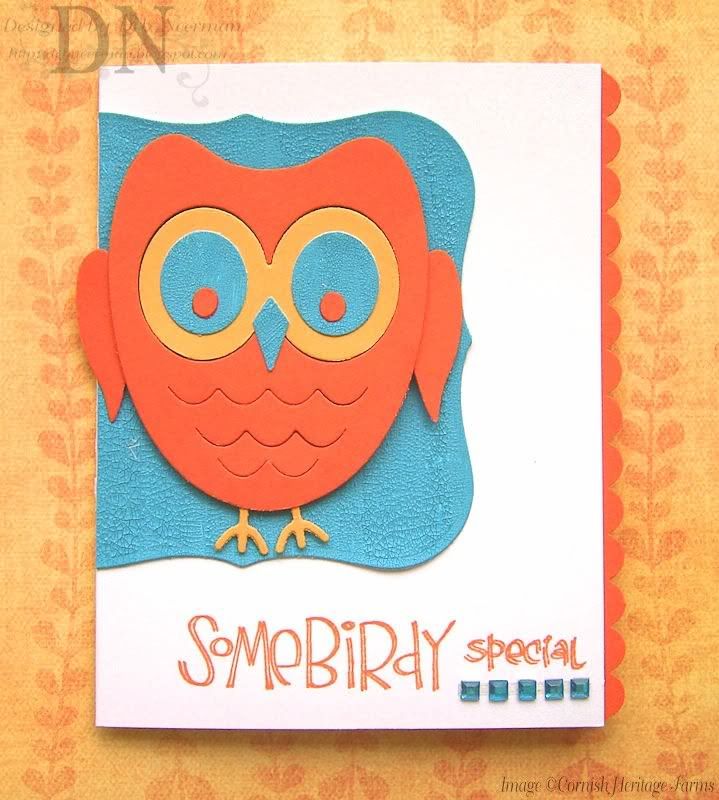
Happy Friday, Stampers! Tell me, is this card bright enough? LOL, I certainly hope so ...

Today's card project was created for SCS's "Clean and Simple" challenge. This week's CAS challenge, CAS24, is a color challenge: turquoise, orange, and yellow.

For all the challenging deets, clicky HERE. To go straight to the challenge card gallery, clicky HERE. For the ginormous view of my card, clicky right on the photo.

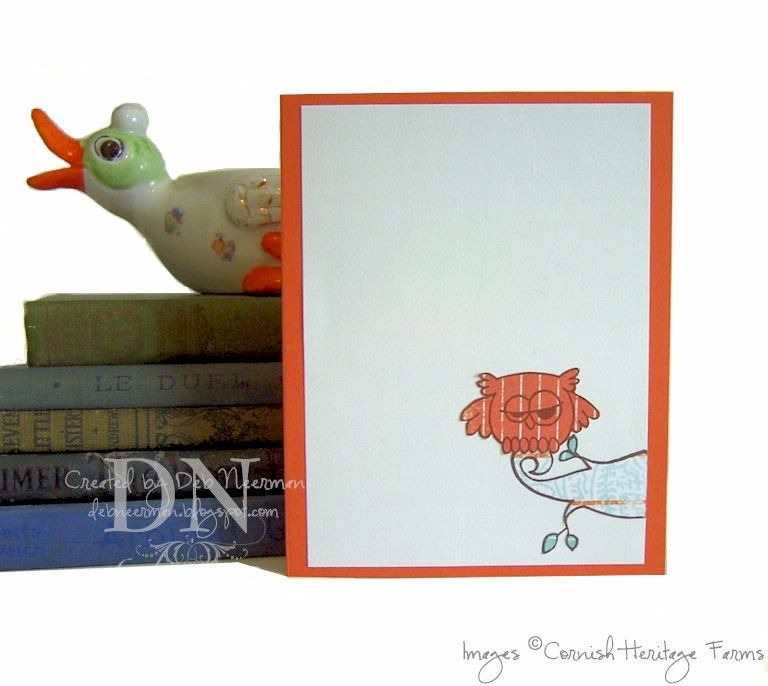
I die-cut a Curvy Label out of card stock painted with Distress Crackle paint, punched out a scalloped edge, then die-cut my owl using scraps of card stock and a die from Quickutz.

For some added interest, I double-stamped my sentiment, slightly offsetting the stamped images. Isn't that interesting?

For all the fabulous-ish product info, check out the supply list, below.

Soooooooooo, yesterday was a crazy, nerve-wracking in-a-medical-way day for me, and I was just exhausted. So, I did what every red-blooded American woman does when she's stressed and exhausted: insist on being taken out to dinner. The DH agreed and even let me choose the restaurant.

Shortly after we were seated and given menus to study, our waitress arrived to take our orders.

"About the salmon entrée, is that a steak or a fillet?" I asked.

"Neither," she said. "It's a fish."

Duh.

Have a great weekend, my ISF's!

~Hugs,

  • Card Stock: Stampers Select White Card Stock and Summer Sunrise Card Stock by Papertrey Ink; Tangerine Tango Card Stock by Stampin' Up!
  • Stamp: Sentiment from Pretty Birds Set by Cornish Heritage Farms
  • Ink: Tangerine Tango Dye Ink by Stampin' Up!
  • Paint: Broken China Distress Crackle Paint by Ranger
  • Accessories: Glitz Designs "Frosting"
  • Tools: Die-Cut Machine by Provo Craft; Curvy Label Die by Spellbinders; Owl Die by Quickutz; Scallop Border Punch by Stampin' Up!; SAMJ by EK Success; Scotch ATG 714 Adhesive
  • Finished Size: 4 1/4" x 5 1/2"
Friday, April 24, 2009

New Digs for the Birds!

Pin It


T
GiF, girls and boy!

Seriously, I hope that whatever is wrong with Blogger clears up over the weekend. So, if this post looks te
rrible ... some parts bold, some not; some text in black, some in blue; some sections underlined, some not; some text in one font, other text in another font ... it's 'cuz Blogger is having issues, okeedokee? I've struggled with this for hours and I'm finally saying "uncle." I give up ... and I do apologize for the mess, but I can't fix it.

Anyway, as threatened promised here's another project created with this uber-kewl craft stamp from Stamps Happen. Click
HERE to take a look at this fun and versatile craft stamp from Janlynn.

I stamped the image on red and blue card stock and cut out all the l'il birdies. I created a "house" from textured paint sample cards, added some "windows," and stamped my sentiment.

For the rest of the provocative products I used in this project, refer to the Supply List, below.

So, yesterday I had Jury Duty. I would love to be chosen for a Jury, but my legal background always gets me excused. Drat the luck!

A lady seated next to me, one of the prospective jurors, was surprised by the definition of voluntary manslaughter: an intentional killing that occurs while the defendant is under the immediate influence of sudden passion arising from an adequate cause, such as when a spouse's mate is found in a "compromising position."

"See, I have a problem with that passion business," she said. "During my first marriage, I came home and found my husband in bed with my next-door neighbor. All I did was divorce him. I had no idea that I could have shot him!" She didn't get picked either ...

Have a great weekend my imaginary friends!

~Hugs,

  • Card Stock: Bazzill Basics; Papertrey Ink; Stampin' Up!
  • Designer Paper: Close to My Heart
  • Craft Stamps: "The Birds and The Bees" by Stamps Happen by Janlynn; Sentiment by Cornish Heritage Farms
  • Ink: "Tuxedo Black" Memento Dye Ink by Tsukineko; "Outdoor Denim" by Close to My Heart
  • Accessories: Textured Paint Sample Cards from Lowe's
  • Tools: Foam Dimensional Tape; Scotch ATG 714 Adhesive

Monday, March 16, 2009

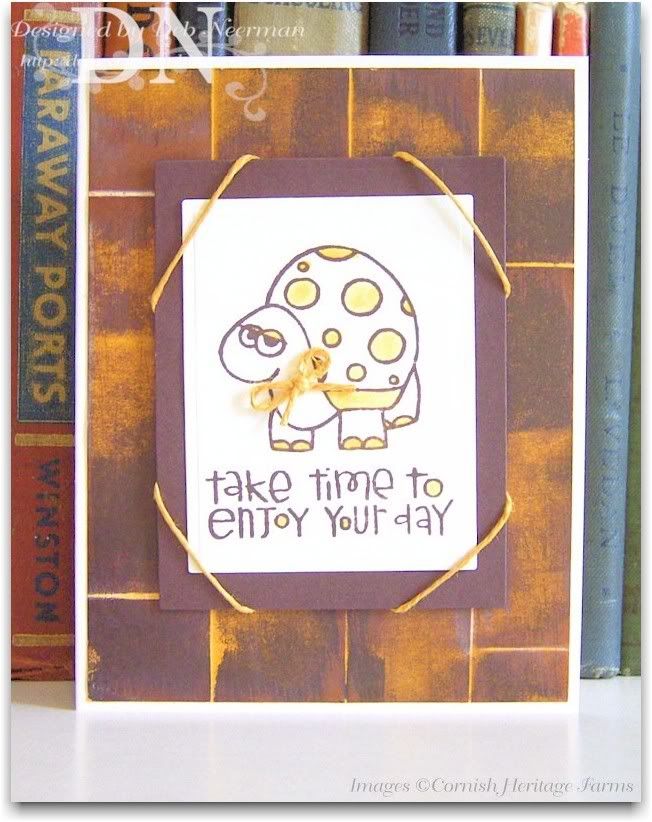
Don't Fear the Talkin' Turtle ...

Pin It


Hey, there you are! Happy Monday!

So, since today is "Everything You Do is Right" Day, this card was created perfectly! And seriously, how could you go wrong when you follow the perfect directions Gina K. posted on StampTV?!? I love this adorable lady and you'll love StampTV. Gina has posted several card-making and technique videos ... for the directions for this fun "woodgrain" background, clicky HERE.

My super-simple take on this fun technique was created with card stock, my Scor-It board, and two ink pads.

I stamped my images, by Cornish Heritage Farms, using dye ink and colored the talkin' turtle in with dye ink and a blender brush. For the complete list of supplies I used, please see the supply list, below.


So, this weekend Sheila and I were hangin' out together and I happened to mention: "I never want to live in a vegetative state where my life becomes dependent on a machine and my only sustenance comes in the forms of fluids. If, God forbid, that ever happens ... and I'm a total vegetable, promise me you'll pull the plug."

She got up, unplugged my computer, and threw away my wine.

Witch ...


~Hugs,

  • Card Stock: Papertrey Ink; Stampin' Up!
  • Instructional Video: Gina K. Designs, "StampTV"
  • Stamps: April 2008, Stamp of the Month, Cornish Heritage Farms
  • Ink: "Sunflower" Dye Ink by Close to My Heart; "Vintage Cream" Hybrid by Papertrey Ink; "Dark Brown" ColorBox Fluid Chalk Ink by Clearsnap; "Chocolate Chip" Dye Ink by Stampin' Up!
  • Accessories: Hemp Jewelry Cord by The Beadery
  • Tools: Scor-It Board by Hammond; Die-Cut Machine; Nestabilities Dies by Spellbinder's; Dimensionals; Scotch ATG 714; Blender Pen by Dove

Monday, March 9, 2009

It's a Bird! It's a Plane! It's an ATC!

Pin It


So, happy Monday! And happy "Panic Day" too. I don't know about you, but everyday is "Panic Day" for me ... 'cuz around here, it's always something.

ONward H-C-M's:

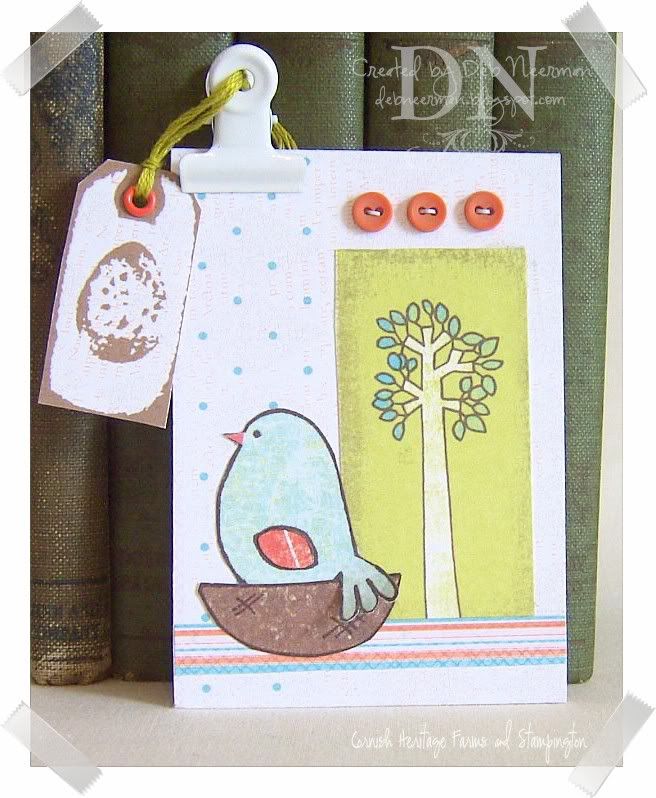
Today's project was created for SCS's "Ways to Use It" challenge, WT208, create an ATC ... also known as an "Artists Trading Card." Anything goes with ATC's except that they must measure 2 1/2" x 3 1/2" ... no bigger, no smaller. But otherwise, it's an artistic free-for-all!

For all the challenge deets, clicky HERE. To go straight to the SCS WT208 gallery, clicky HERE. To see the ginormous view of my ATC, clicky on the photo.

I created my ATC on sturdy mat board, hoarded from my altered art/mixed media days. These babies will hold a small building! I added some patterned paper, some stamped (and paper-pieced), images, clip art, three itsy-bitsy buttons that I threaded with super-thin (jess like me .... hah!), paper strips, a clip, and attached a stamped tag with embroidery floss.

For some dimension, I didn't glue down the l'il birdies tail. And that's it, girls and boy. It doesn't get any easier than this!

So, this weekend Sheila and I went to an arts and crafts fair. We had to take the Reid-the-Wild-Child with us, but he actually behaved pretty well ... for a Wild-Child.

Reid lurves dinosaurs so we had to stop for a week minute and admire an adorable dinosaur project.

The artist leaned across the table and said to Reid, "Hi there! My name is Cassandra. Can you say "Cassandra?"

"Cassandra," answered Reid. "Can you say pachycephalosaurus?"

Yikes!

~Hugs,

  • ATC Base: Mat Board
  • Designer Paper: "Mocha Chica" Collection by Kim Hughes for Cornish Heritage Farms
  • Stamps: "Pretty Birds" Set by Kim Hughes for Cornish Heritage Farms; "Egg Tag" by Stampington & Company
  • Ink: "Chocolate Chip" Dye Ink by Stampin' Up
  • Accessories: Binder Clip by Making Memories; DMC Embroidery Floss; Mini Buttons; 1/8" Eyelet
  • Tools: Crop-A-Dile

Friday, March 6, 2009

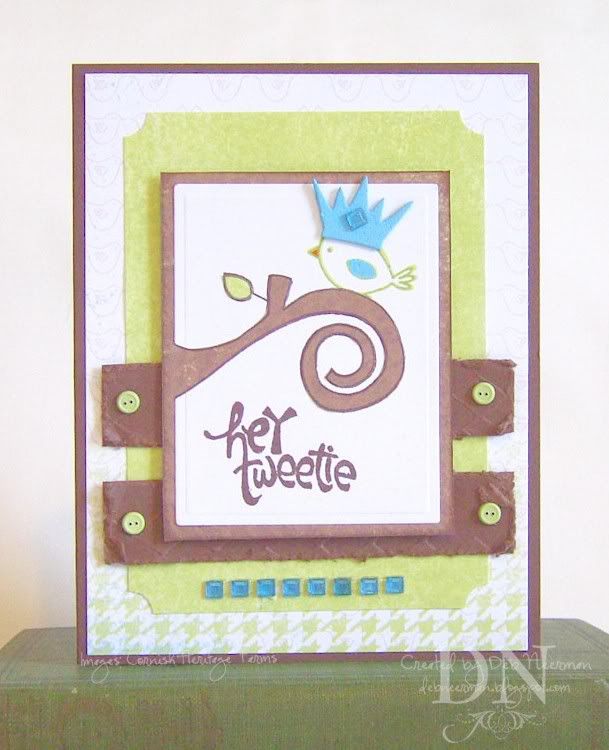
Hey, Tweetie, Nice Crown!

Pin It


So today is "National Frozen Food" day! In honor of the day, I'll be preparing a lovely frozen pizza for our dinner. Unless I can talk the DH into going out ... then the heck with National Frozen Food day!

ONward H-C-M's:

Today's card project was created for this weeks SCS's Sketch Challenge, SC218. For the challenge deets, or to look at the sketch I followed, clicky HERE. For a look at the SC218 Challenge Gallery, clicky HERE. For the ginormous view of my card, clicky on the photo.

I've also linked this card to the Cardvaarks "Critter Caard" challenge. For all the critter-like challenge deets, clicky HERE.

A couple of things: I paper-pieced the tree branch, crowned the l'il birdie with a GrungeBoard crown, and add some sparkly Glitz Frosting. For the complete product list, see the supply list, below.

So last night, Sheila and I dragged the DH's out to a seminar on marriage, "Keeping Your Love Alive." Oh, yeah, it was real easy getting the DH's to go ...

At one point, the instructor declared, "It is essential that husbands and wives know the things that are important to each other."

He addressed the men, "Can you name and describe your wife's favorite flower?"

Ken leaned over, touched Sheila's arm gently, and whispered,"Gold Medal-All-Purpose, right?"

I. Kid. You. Not!

~Hugs,


  • Card Stock: "Dark Chocolate" by Papertrey Ink
  • Designer Paper: "Mocha Chica" Collection by Kim Hughes for Cornish Heritage Farms
  • Stamps: "Pretty Bird" Collection by Kim Hughes for Cornish Heritage Farms
  • Inks: "Chocolate Chip" Dye Ink by Stampin' Up; "Lime Pastel," and "Chestnut Roan" Fluid Chalk Inks by Clearsnap; "Landscape" Palette Hybrid by Stewart Superior
  • Other Color Mediums: "Cobalt Teal," "Titanium White" Fluid Acrylic Paints by Golden; Sharpie Markers by Sanford
  • Accessories: Button Brads by Making Memories; Bling by Glitz Frosting; GrungeBoard Crown by Tim Holtz Idea-ology
  • Tools: Die-Cut Machine by Provo Craft; Nestabilities Large Classic Rectangular Dies by Spellbinder's; "Diamonds in the Rough" Cuttlebug A2 Embossing Folder; Ticket Corner Punch by Stampin' Up; "Stamp-A-Ma-Jig" by EK Success; Perfect Layers Tool by Stampin' Up; Scotch ATG 714; Dimensionals

Monday, February 23, 2009

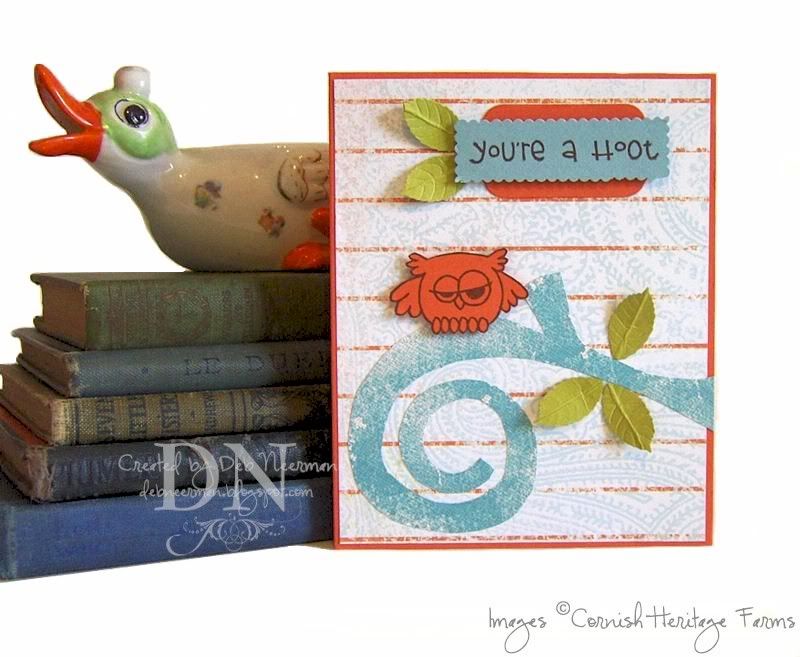
You're a Hoot ...

Pin It


Hey, there you are! Happy "International Dog Biscuit Appreciation Day!" In honor of the day, I tried a dog biscuit and you know, they're surprisingly delicious ... and nutritious!

Today's card project was created for SCS's "Way to Use It" challenge. This week, you had to use stripes in your card. So I did. For all the challenge deets, clicky
HERE. For the ginormous view of this project, click on the photo.

A few details: the tree branch was fussy-cut from DP, the owl and the sentiment are mounted on dimensionals, and the leaves were glued down at their bases only.

For a change, I took a photograph of the interior of this card:

Inside, the branch and leaves were paper-pieced on Image Plus 110# card stock.

This weekend, Sheila and I teamed up to run errands and stuff. I was kinda surprised when I saw her dog, Trixie, in the car but whatever.

We were barely out of the neighborhood when we were pulled over by a Palm Beach County Sheriff.

When Sheila asked the officer why we had been stopped, the Sheriff pointed to Trixie.

"Ma'am, does your dog have a license?" he asked.

"No way, Officer," Sheila said, "Trixie isn't allowed to drive!"

~Hugs,

  • Card Stock: "Tango Tangerine," "Baja Breeze," and "Kiwi Kiss" by Stampin' Up; Image Plus, 110#
  • Designer Paper: "Mocha Chica" Collection by Kim Hughes for Cornish Heritage Farms
  • Stamps: "Pretty Birds" Collection by Kim Hughes for Cornish Heritage Farms
  • Ink: "Chocolate Chip" by Stampin' Up
  • Tools: Decorative Edge Scissors by Fiskars; Key Tag Punch by Stampin' Up; Leaf Punch by Martha Stewart; Stylus by Fiskars; Dimensionals

Wednesday, September 17, 2008

All the Good Blog Post Titles Were Taken ...

Pin It


So, hey, happy "Stay Away From Seattle Day!" Strange ... I thought all the lunatics were in Washington, DC.

ONward Hoarding-Card-Makers:

Today's card project was created for Allison's "Suggestive Sunday" blog challenge. This week, Allison challenged us to use silhouette stamps on a card. And in so doing, I discovered something startling: I have w-a-y too many silhouette stamps!

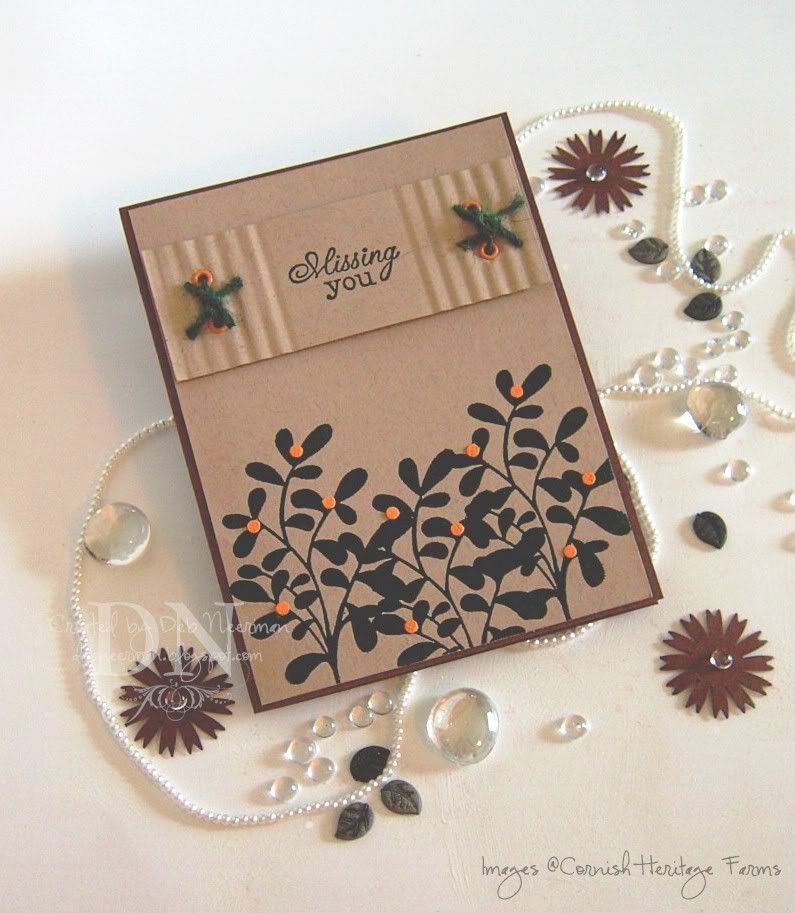
After the dust settled, I chose to use this silhouette stamp ... stamping my image and sentiment on Kraft card stock with Versamark. I heat embossed with an ancient jar of "Topiary" embossing powder ... which I "discovered" around the same time as I realized how many silhouette stamps I had. Does this kinda thing happen to anyone else?!?

I ran the stamped and embossed sentiment partially through a paper crimper, added some eyelets, and knotted some dark green twine through the openings. I added the sentiment piece to my card base using dimensionals for ... ummmm ... dimension!

I punched out some l'il tiny circles and adhered them to my stamped and embossed foliage and finis! Easy-peasy and ready to serve in just 15 Minutes!

TRUE Story Alert!

My friend Sheila invited the DH and I over for dinner last night. While the guys went out to the garage to ooohhh and ahhhhh over power tools, I went inside to help Sheila prepare dinner.

In the kitchen, Sheila had a huge pot of cold water on the stove and was busy chopping veggies for a salad.

"Would you like me to start the pasta water, " I asked.

"Oh, no, not yet," she responded, "Not 'til I'm done with the salad."

"Oh, okay," I said.

"But just as soon as I finish the salad, we can start the water and leave the kitchen," she continued.

"Ummm, o-KAY, Sheila ... but why leave? Isn't that kinda dangerous?"

"Duh, Deb, everyone knows a watched pot never boils!"

Seriously.

~Hugs,

  • Card Stock: Bazzill; Papertrey Ink
  • Stamps: Cornish Heritage Farms
  • Ink: Versamark
  • Accessories: Embossing Powder; Eyelets; Twine
  • Tools: Heat Gun; Crop-a-Dile; Paper Crimper ; Circle Punch; Black Dimensionals

Tuesday, August 26, 2008

Take Time to Enjoy Your Day, 'Cuz No One Can Do it for You ...

Pin It


Hey, today is National Cherry Popsicle Day ... wanna know how cool this is ?!? Frozen!

I kill me ...

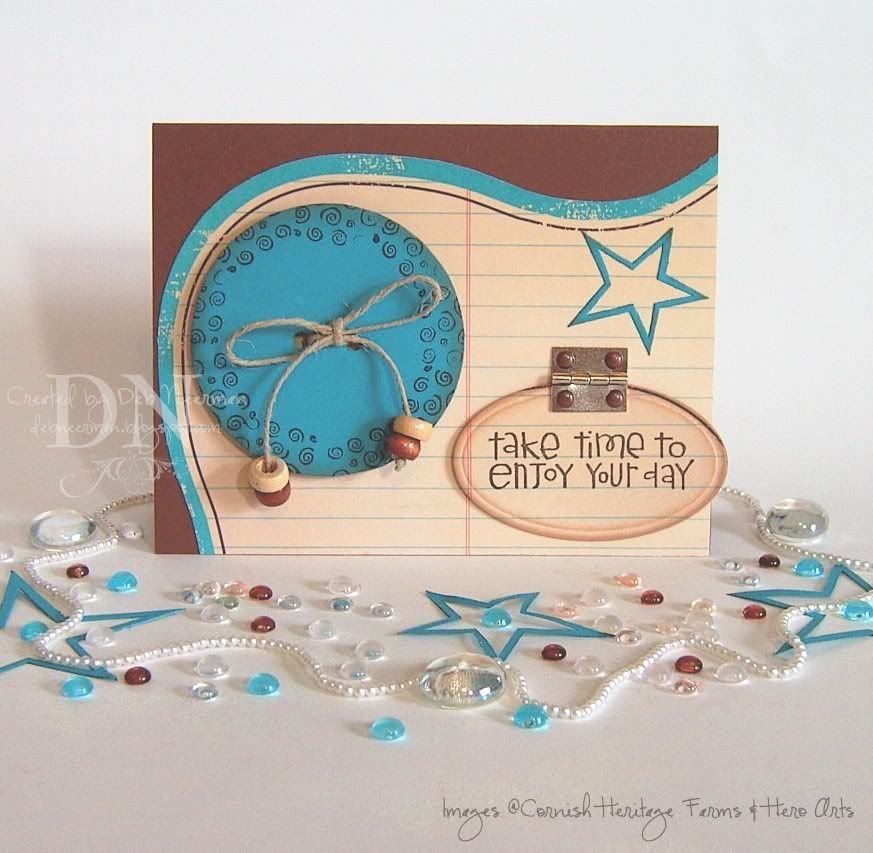
Hey, paper hoarders, today's card project was created just for the heck of it using DP from Making Memories, and a large chipboard button.

I covered the aforesaid large chipboard button with turquoise card stock, stamped a swirly border, tied on some natural jute twine embellished with wooden beads, and adhered the whole shebang to my card base.

I stamped my sentiment on a scrap of DP, cut it out using a small oval die, sponged on fluid chalk ink, then mounted it to the card base using a metal hinge. For fun, you can stamp a secret message or fun image under there ... or add a sticker, a charm, or whatever! I'd show you what I put under there, but it's a secret ...

Finally, I die cut a turquoise star using a Cuttlebug die, and finis!

Thanks so much for swingin' by! And be sure to recycle your cherry Popsicle stick for a future project. Then go stick out your tongue in front of a mirror ... kewl!

~Hugs,

  • Card Stock: Cut Card Stock; DCWV
  • Designer Paper: Making Memories
  • Stamps: Sentiment by Cornish Heritage Farms; Swirls by Hero Arts
  • Ink: Staz-On by Tsukineko; Colorbox by Clearsnap
  • Accessories: Chipboard Button; Natural Jute Twine; Wooden Beads; Metal Hinge; Brads
  • Tools: Die Cut Machine; Cuttlebug Star Die; Black Dimensionals; Scrap Fusion PA

Wednesday, July 23, 2008

Just Because ... I Wanted To

Pin It


Happy Wednesday, K-Mart shoppers! Sorry; I don't know where that came from ...

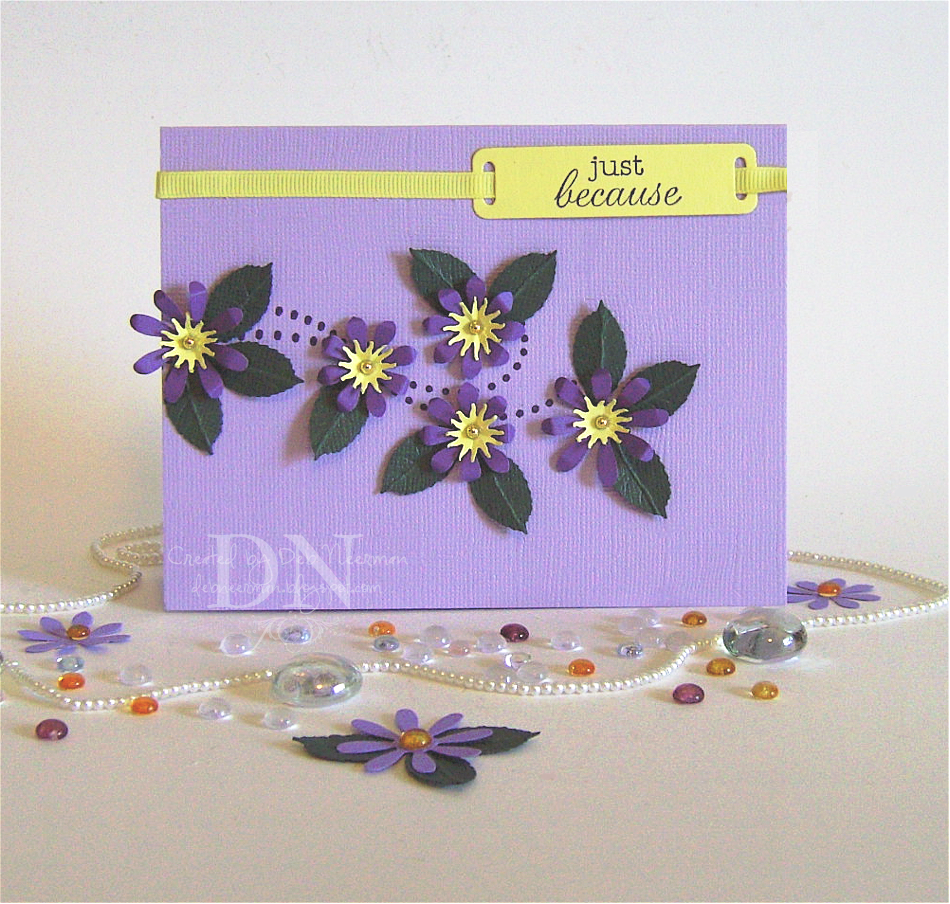
Today's card project was created 'just because' I felt like it ... no, I kid! This card was created for Sharon's "Stamp Simply" challenge. This week, Sharon challenged us to create a card using 1.) a flower; and, b.) the color purple. And so I did. Both.

I stamped my flourish, from Pink Cat Studio, on my card stock base using "Royal Purple" Staz-On ink, then created some flowers using card stock and craft punches. I added some gold rhinestone-like thingies for the centers.

My sentiment was also stamped in royal purple ink on DCWV card stock, then cut in the 'Bug using a die from Spellbinder's Shapeabilities "Ribbon Trio Tags." I added some yellow grosgrain ribbon, and tah dah!

Normally, I credit the various stamp manufacturers right on my image, but for some crazy reason, my image editing program won't allow me to today. I'm hoping this is just a temporary thang, but who knows ... and I don't want to reinstall 'cuz I'll lose dozens of really kewl plug-ins. Anyway, the stamps I used in this project are copyright to Pink Cat Studio (the flourish), and Cornish Heritage Farms (the sentiment).

Thanks so much for sharing part of your busy day with me!

~Hugs,


Monday, July 21, 2008

Hey Tweetie ...

Pin It


Happy Monday, boys and girls!

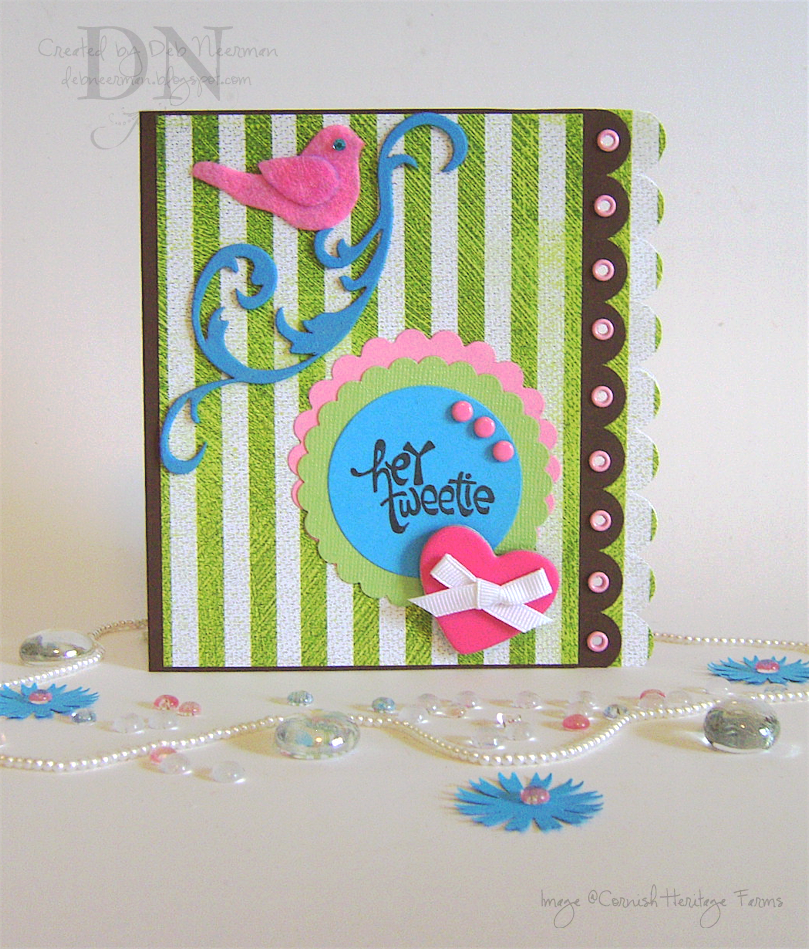
Today's card project was created using designer paper from Daisy D's, a Grungeboard flourish, a felt bird, and a chipboard heart.

This is one of those projects that started out to be one thing and totally turned out to be something else! Don't ask, it's a long story ...

I added some DP from Daisy D's "Girlfriends" collection to my card stock base, added some embellies, applied two scalloped edges (created with my slit punch), and attached nine pink eyelets using a Crop-a-Dile.

I applied some Colorbox Brush Pigment ink to the grungeboard ... I'm not sure how I feel about this product yet. While it did take the ink beautifully, I'm not sure it's something you have to have. Chipboard would be a good substitute I guess. But since I have three packages of this stuff, I better start using, and hopefully, liking this product.

My sentiment, from Cornish Heritage Farms, was stamped using "Timber Brown" Staz-On solvent ink. I added some brads, a bit of ribbon, and a tiny felt bird, and finis!

Thanks so much for spending part of your busy day with me; you rock!

~Hugs,


Card Stock: Bazzill and DCWV; Designer Paper by Daisy D's; Stamp: "Pretty Bird" Cornish Heritage Farms; Inks: Colorbox Pigment Brush Ink by Clearsnap, Staz-On by Tsukineko; Grungeboard: Tim Holtz Ideology; Felt Bird by Maya Road; Brads and Eyelets: Unknown; Grosgrain Ribbon: Unknown; Tiny Gemstone by Hero Arts; Adhesive: ATG 714, The Ultimate by Api, and Scrap Fusion by Ivy Fusion; Tools: Crop-a-Dile by We Are Memory Keepers; Slit Punch: Stampin' Up!; Dies: Nestabilities by Spellbinder's; Die-Cut Machine: Provo Craft

Monday, July 7, 2008

Happy Birthday, Allison!

Pin It


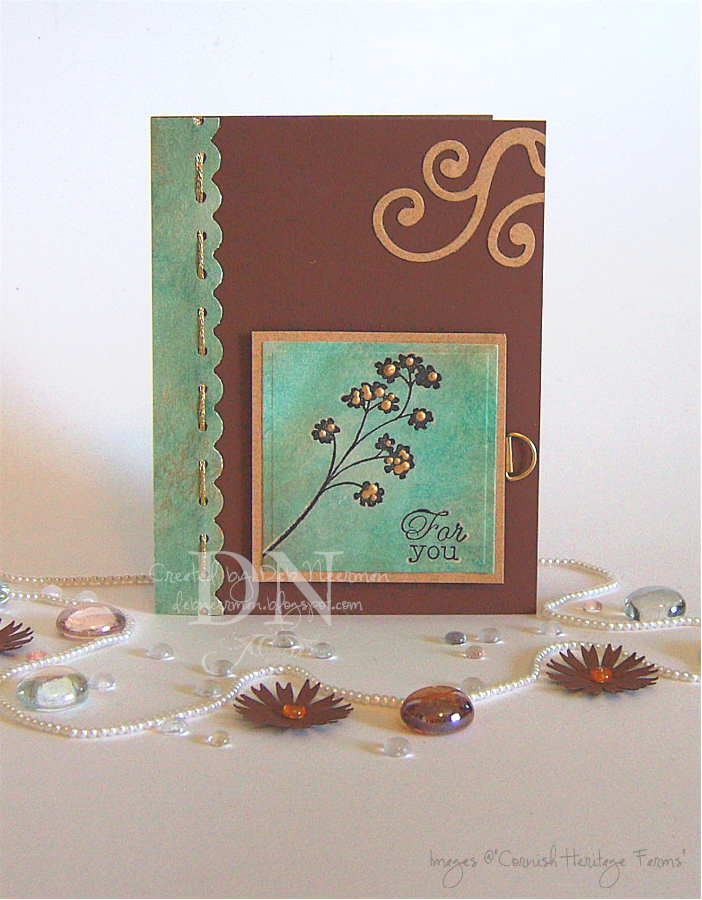
Today's card project was created for the 7th anniversary of Allison's 29th birthday! Soooo, Allison, this card's for you!!

I created the focal images by loading my stamps with Versamark watermark ink, followed by black Distress ink, then stamping on Xerox 110# card stock. Next, I embossed the images with clear embossing powder.

When cool, I sponged on Water Lily Green and Orangerie hybrid ink, then gently rubbed the inks off the embossed portions. I did the same on a large scrap piece of card stock to create the matching scalloped edge.

I wove gold metallic floss through the holes in the scalloped border and cut a flourish and a matching mat.

Finally, I added some gold Liquid Pearls to the blossoms and attached a gold frame hanger and finis!

BTW, several of us schemed to wish Allison a happy birthday today. If you'd like to check out the cards created by the other bloggers who participated, click on the following links:

Anna;
Theresa;
Smriti;
Jackie;
Mel;
Tina;
Monica;
Zarna; and,
Risa

Thanks so much for sharing part of your busy day with me ... and many happy returns of the day, Allison!!

~Hugs,


Card Stock: Xerox 110#, Bazzill, and CutCardStock; Stamps: "Nature Silhouettes" by Cornish Heritage Farms; Inks: Versamark Watermark Ink, "Black Soot" Distress Ink by Ranger, and Palette Hybrid; "Gold Pearls" Liquid Pearls by Ranger; Clear Embossing Powder: Unknown; Gold Metallic Embroidery Thread by DMC; Gold Frame Hanger: Unknown; "Threading Water" Border Punch by Fiskars; "Swirls" Die by Sizzix; Large Classic Square Die by Spellbinder's; Die-Cut Machine by Provo Craft; Adhesive: Scotch ATG 714 and Scrap Fusion by Ivy Hollow; Dimensionals: Unknown, Obtained in a Sticky Share


Friday, May 23, 2008

It's a Tag! It's a Card! It's a Tag Card!!

Pin It


Happy Friday ... and welcome to a long, holiday weekend! Hope you have lots of fun stuff planned with your family and friends.

Larry & I will be hangin' out with family at a lakeside picnic, complete with angry fire ants, parakeet-size mosquitos, and dangerous explosives. Should be fun!

Oh yes, fireworks are legal here in sunny Florida and everyone (well, not everyone, but it sure sounds like everyone), takes full advantage of that fact. "Lookie here, Ma! Paw jess blew his dang thumb clear off!" {Sigh ... good times}.

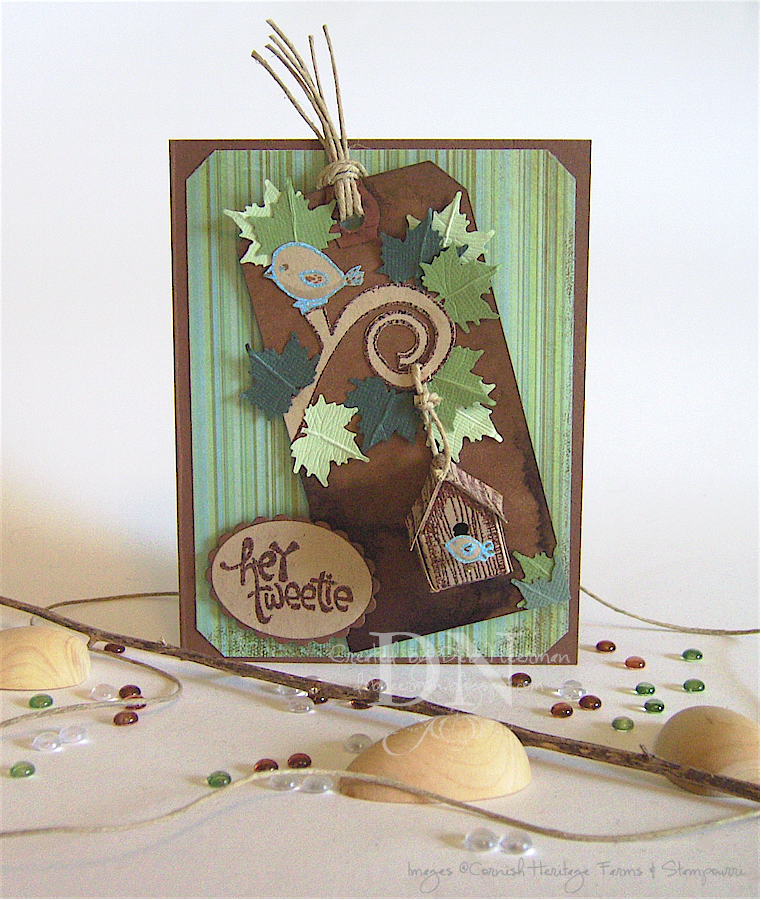
Today's card project was created for the Caardvarks tag challenge. The challenge required that you create a tag project inspired by a month of the year. Which I totally didn't know until just now creating the link-up, lol! Apparently, I read 'tag,' and immediately thereafter zoned out ... I'll blame it on being blonde ... again. Guess I'll say this card was inspired by the month of Spring. Think that'll fly? (hey, a joke!) I can always say "May" ... as in "May I please be allowed to play?!"

I created this cute little birdhouse using an ancient stamp from Stampourri ... I will never leave this stamp 'cuz I love it so. The sentiment, the branch, and the bird images are all from Cornish Heritage Farms, stamped on Kraft card stock and heat embossed with embossing powder that is so old the label has worn away. However, the brown embossing powder used here is still youthful enough that I know who made it: Comotion, "Java Jolt."

Here's a closer look at the birdhouse:


Yes, Veronica, it was a BEAR gluing that teeny-tiny perch on to that teeny-tiny birdhouse ... not to mention gluing that teeny-tiny bird to that teeny-tiny perch! As always, you can click on the photos for a ginormous photo ... um, don't say I didn't warn you!

My leaves were created with punches, my tag was heavily distressed with walnut ink, and the whole shebang is mounted on squishy, (as opposed to not-squishy), dimensionals.

Hurray! Another card that will cost me $4.80 to mail!!! Just one more example of a greeting card that truly IS the gift!

Have a wonderful, safe, and creative weekend ... and please watch out for fire ants, mosquitos, and dangerous incendiary devices.

~Hugs,


Card Stock: Cut Card Stock, Bazzill; Designer Paper: Memory Box; Stamps: "Pretty Birds" Collection by Kim Hughes for Cornish Heritage Farms, Stampourri; Ink: Versamark; Embossing Powder: Blue, Unknown ... prolly older than dirt, "Java Jolt" by Comotion; Fiber: Natural Jute Thread, 7gypsies; Adhesive: VAST quantities of super-strong glue, "The Ultimate," by Api; Scotch ATG 714; Squishy Dimensionals: Scotch Foam Thingies; Various Craft Punches; Die-Cut Machine by Provo Craft; Die, "Nestabilities Large Oval" Collections by Spellbinder's

Friday, May 16, 2008

Bloom with Abandon ... Walnut Ink Resist Technique

Pin It


Happy Friday, boys and girls, and welcome to another edition of MACM! No, no, nothing like Kristina's Make a Card Monday. My version of MACM is "Making a Card ... Mess!"

With my art roots being in mixed media collage and assemblage, mess-making comes naturally to me! But with my "spray in a box" technique, this project really isn't all that messy ... and, if you're like me, you already have 20 gallons of walnut ink stashed somewhere in your studio. Today we're gonna put it to good use!

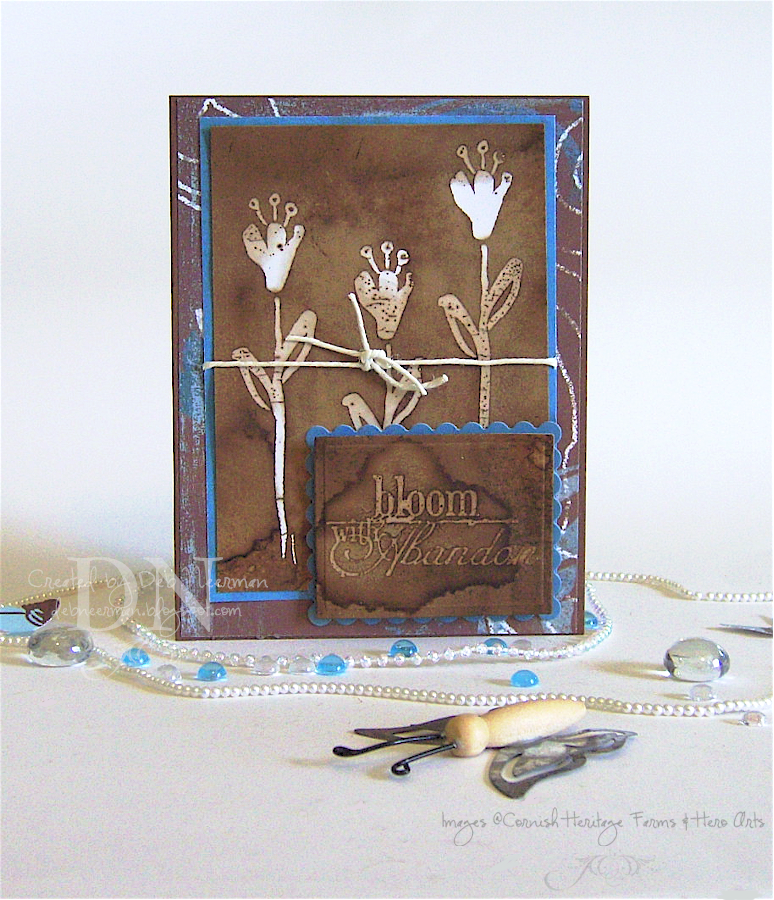
It's really very simple to achieve this look: you'll need white matte card stock, a bold stamp, watermark ink, clear embossing powder, a heat gun, walnut ink, an old shoe box, and a soft cloth or paper towels.

I stamped my "Long Stemmed Lily" stamp three times on Xerox 110# matte card stock using Versamark watermark ink. I covered my stamped images with clear embossing powder and embossed with my heat gun. I followed the same steps with my sentiment stamp.

Now for the messy fun part! Fill a spray bottle with walnut ink (follow package instructions, or ask me for mixing directions, if you're starting with walnut ink crystals). Place your stamped and embossed images in the empty shoe box and spray ... liberally ... with the walnut ink. Then spray again ... liberally. I like to cover the entire sheet of card stock with ink, encouraging lots of little puddles ... that's what makes the piece interesting! Using your hands, rotate the inked card stock, allowing the ink to puddle and pool. Once you're satisfied with the ink's coverage, you're done! Simply allow the card stock to dry naturally ... overnight is best.

When completely dry, simply wipe the embossed areas with a cloth or a paper towel. You might slightly dampen the cloth or paper towel for faster removal. Then use your uber-kewl, walnut-ink, clear-embossed-resist piece in your next project!

This technique is a great way to enhance a vintage-inspired project, but any stamp or style will work here ... with the possible exception of finely detailed stamps. Try it! I'd love to see what you create, so if you do use this technique please post a link in the comments.

Thanks so much for sharing part of your busy day with me; have a great weekend!

~Hugs,


Card Stock: Cut Card Stock, Xerox 110#; Designer Paper: My Mind's Eye "Bohemia" Collection; Stamps: "Long Stemmed Lily" by Hero Arts, "Bloom with Abandon" Cornish Heritage Farms; Ink: Versamark Watermark; Walnut Ink: 7gypsies; Waxed Linen: 7gypsies; Die-Cut Machine: Provo Craft; Dies: Nestabilities by Spellbinder's; Adhesive: ATG 714; Dimensionals: All Night Media