Friday, March 19, 2010

Simply Textured ...

Pin It


TGIF, Crafty Stampers!

Today's card project was created for this week's "Stamp Simply" challenge. This time around, Sharon asked that we create a project with lots of texture. Texture can come in any form, such as embossing, distressing, adding embellishments for dimension -- whatever you like -- to create some fun texture in your creation.

To play along, and we hope that you will, clicky HERE to go to Sharon's post for all the challenging deets ... and to view her simply amazing textured project.

After you've posted your textured project to your blog, add a direct link to your project using Sharon's Mr. Linky, located HERE. If you upload your project to a public gallery, such as Splitcoast Stampers, please use keyword: "ssnotime131."

Here's a look at my card:
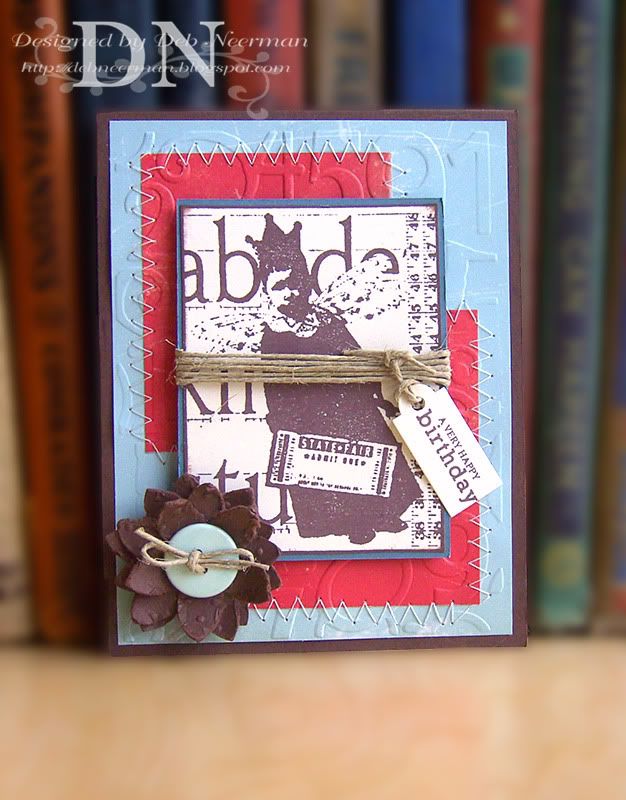
This card is a lot simpler than it looks: my vintage-inspired collage stamp has done most of the work for me! All that was left for me to do was to create some texture.

I created most of the texture using A2 embossing folders; once on my background DP, and again on my distressed flower. I added a bit of machine stitching, a vintage button, and lots of recycled natural jute twine. Easy-peasy!

For the ginormous view of my card, clicky on the photo. For all of the lumpy product info, check out the Card Recipe, below.

Now, prepare to be wowed by the projects created by the rest of the Stamp Simply team:

Barbara Anders: Paper Pursuits;

Jennifer Buck: The Buck Stamps Here;

Jenny Gropp: One Krafty Kat;

Tammy Hershberger: Stamp Happy;

Janine Orchard: 2BKrafty;

AJ Otto: The Willow Garden;

Deb Saaranen: Dream in Color;

Barb Schram: Explore. Dream. Discover.; and,

Marlene Bender: Heart-Spring, our March Guest Designer.

FYI: Barb is feeling poorly today and will be taking tonight off. Hopefully, she'll be feeling better soon and will be able to join in. Get well soon, Barb!

Soooooooo, yesterday I was hangin' out with Sheila and since we both received our Census forms, we simply had to talk that up.

"Whaddya think about all those prison questions on the form?" I asked Sheila.

"I wonder. You'd think the government would know how many people they have in their prisons. Or maybe they know something we don't. Or, maybe they don't know something and hope we do!" Sheila responded.

Uh. Oh. That can't be good ...

Thanks so much for stopping by ... hope you have a fantabulous weekend!

~Hugs,


Today's Challenges:

Card Recipe:
  • Card Stock: "Blue Bayou" (Retired) and "Chocolate Chip" Card Stock by Stampin' Up
  • Designer Paper: Cosmo Cricket
  • Stamp: Vintage Collage by Diva Impressions (Out of Business); Sentiment by PTI
  • Ink: Chocolate Chip Dye Ink by Stampin' Up; Fluid Chalk Ink by Clearsnap
  • Accessories: White Quilting Thread; Vintage Button; Natural Jute Twine
  • Tools: Sewing Machine; Die-Cut Machine; Tag Die; Flower Punch by Stampin' Up; Numbers A2 Embossing Folder; Dots A2 Embossing Folder; Distressing Tool by Tim Holtz; Stampin' Dimensionals and SNAIL Adhesive by Stampin' Up
  • Finished Size: 4 1/4" x 5 1/2"
Shop for Stampin' Up products online ... 24/7 ... HERE

Thursday, March 18, 2010

Congrats; You Survived St Paddy's Day!

Pin It


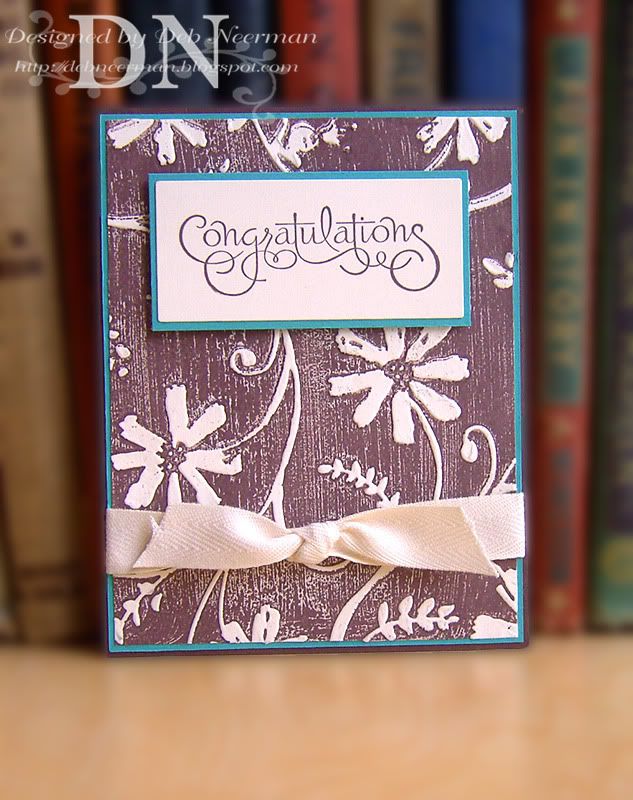
Well, it appears we both survived all of the St. Paddy's Day festivities: and by "festivities," I mean green beer ... or Guinness ... or Newcastle Ale ... or all of the above. So, congratulations!

Today's card project features a super-simple technique called the "Letterpress technique." It's easy, fast, fun, and creates a really unique background:

To create this background, I inked up the inside (ink the top flap - the side with the printing), of an A2 embossing folder with "Chocolate Chip" dye ink. Use the direct-to-paper/folder technique to ink up your folder, and try to get the ink down as evenly as possible on the folder.

Then, simply insert your card stock, run it through your die-cut machine and voila! Just be sure to clean your inky folder as soon as possible with warm, soapy water ... or a cool, wet baby wipe.

An easy, fun, and interesting background created with something you already own ... all of this AND ready in just 15 Minutes!

For the ginormous view of my card, clicky on the photo; for the rest of the cool, easy, and interesting product info, check out the Card Recipe, below.

Sooooooooo, I wanted to mention that my email address was hijacked yesterday and everyone in my address book got a link to some truly glorious spam. I didn't send this ... and I certainly wouldn't ... but I'm issuing the blanket apology here to any of you who may have received this l'il treasure from me.

Well, not me-me, but some-spammer-who-pretended-to-be-me. I believe I've stopped the spammer ... 'til the next time someone decides to hijack my email addy. But, hey! Wanna know how many zero-spam-tolerant group lists I was tossed off yesterday?!? All of 'em ... so, there you have it: every cloud DOES have a silver lining!

Thanks so much for swingin' by today ... especially with that awful headache you've got!

~Hugs,


Today's Challenges:

Card Recipe:
  • Card Stock: "Bermuda Bay," "Chocolate Chip," and "Very Vanilla" Card Stock by Stampin' Up
  • Designer Paper: None
  • Stamp: Sentiment from "Well-Scripted" Stamp Set by Stampin' Up
  • Ink: "Chocolate Chip" Dye Ink by Stampin' Up
  • Accessories: Twill Tape Ribbon by Stampin' Up
  • Tools: Die-Cut Machine; Rectangle Die; Cuttlebug A2 Embossing Folder; Stampin' Dimensionals and SNAIL Adhesive by Stampin' Up
  • Finished Size: 4 1/4" x 5 1/2"
Shop for Stampin' Up products online ... 24/7 ... HERE

Wednesday, March 17, 2010

An Irish Easter Card ...

Pin It


Happy Stump Day, Hampers! And a very happy St. Patrick's Day to all ... especially my Irish *PSF's*!

Today's card project was created using a cute, free! digital image by DigiKitty. For all the challenging deets, including info on how you can get your own free image, clicky HERE.

Here's what I created using this fun image:

I colored my image using markers, added some St. Paddy's green DP, some vintage paper lace from my vintage paper lace stash, a satin bow, and a stamped sentiment. Easy-peasy and ready to serve in just 15 Minutes ... and that's no blarney!

For all of the exciting product info, check out the Card Recipe, below.

Soooooooooo, yesterday Sheila and I were hangin' out when her absolutely bonkers crazy sister, Jill, stopped by.

"Okay, girls, I have a problem," Jill said, "I'm on the road a lot, and my clients are complaining that they can never reach me."

"Don't you have a phone in your car?" I asked.

"No, that was too expensive .. so I did the next best thing. I put a mailbox in my car."

"A mailbox? Does that work?" Sheila asked with a straight face.

"Actually, I haven't gotten any letters yet." Jill replied.

"And why do you think that is?" Sheila asked.

Jill paused for a moment, then replied, "Well, maybe it's because when I'm driving around, my zip code keeps changing."

Thanks so much for spending part of your busy day with me ... and Erin Go Bragh, y'all!

~Hugs,


Today's Challenges:

Card Recipe:
  • Card Stock: "Whisper White" Card Stock by Stampin' Up
  • Designer Paper: Cosmo Cricket
  • Digital Image: Bunny Spring Flower by DigiKitty
  • Stamp: Sentiment by CTMH
  • Ink: "Basic Black" Dye Ink by Stampin' Up
  • Color Medium: Copic Markers
  • Accessories: 5/8" Satin Ribbon; Vintage Paper Lace
  • Tools: Die-Cut Machine; Rectangle and Circle Dies; Stampin' Dimensionals and SNAIL Adhesive by Stampin' Up
  • Finished Size: 5 1/2" x 4 1/4"
Shop for Stampin' Up products online ... 24/7 ... HERE

*Pretend Stampin' Friends*

Tuesday, March 16, 2010

Twisted Cheshire Cat

Pin It


Happy Tuesday, Crafty Stampers!

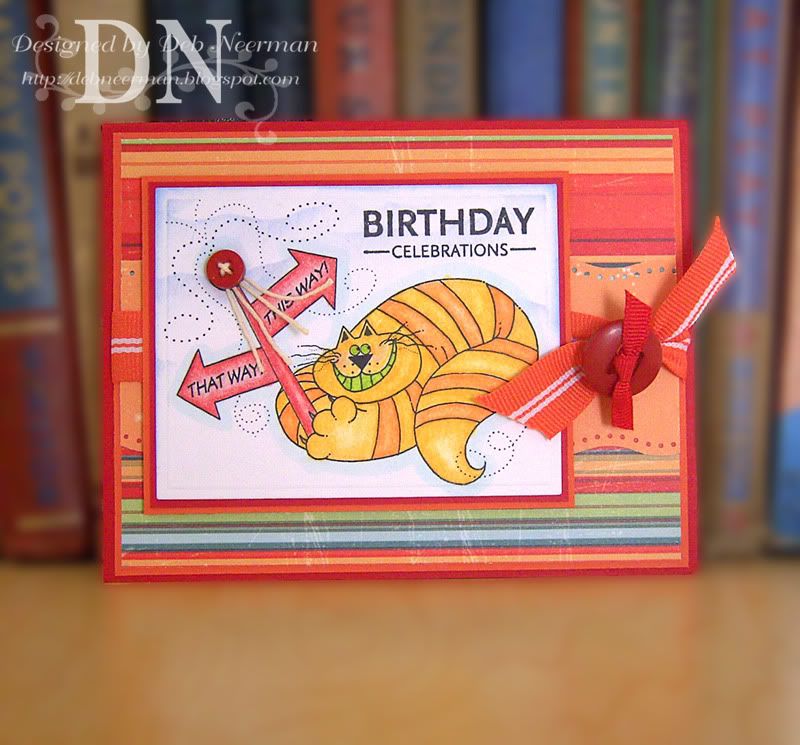
Today's card project was created for the current S2G challenge, Twisted Thursday, Cheshire Cat:

I followed their optional sketch, and used the optional stripes in my creation. For all the challenging deets, a look at the sketch I followed, AND a free download of this very same image, clicky HERE.

I colored my Cheshire Cat using Prisma's blended with Gamsol, added some DP, a couple of buttons, and some ribbon. I stamped my birthday sentiment on the same panel and finis! Easy-peasy-kitty-squeezy!

For all of the absolutely fabulous product info, check out the Card Recipe, below.

*Bawdy Alert:

Soooooooo, yesterday I stopped by Sheila's for a minute and found her certifiably insane crazy sister, Jill, babysitting Reid-the-Wild-Child.

I wasn't there five minutes when Reid burst through the kitchen door and asked, "Aunt Jill, what's that called when two people sleep in the same room and one is on top of the other?"

"Oh, well, that's called 'sexual intercourse' Reid." Jill answered ... before I could stick a dishcloth down her throat.

"Oh. Okay." Reid said, and ran back out to play.

Not three minutes later, the kitchen door burst open, and here comes the Wild-Child once again.

"Aunt Jill, it isn't called 'sexual intercourse' ... it's called 'bunk beds.' And Sean's Mom wants to talk to you. Right now."

Thanks so much for visiting ... hope your day is fantabulous!

~Hugs,


Today's Challenges:

Card Recipe
  • Card Stock: "Real Red" and "Tangerine Tango" (Retired), Card Stock by Stampin' Up
  • Designer Paper: Cosmo Cricket
  • Stamp: Sentiment from "Upsy Daisy" Stamp Set by Stampin' Up
  • Digital Stamp: "Cheshire Cat" by Shirley's 2 Girls
  • Ink: "Basic Black" Dye Ink by Stampin' Up; Sky Blue Fluid Chalk Ink
  • Color Medium: Prismacolor 'Premier' Pencils
  • Accessories: "Tangerine Tango" (Retired) Ribbon by Stampin' Up; Grosgrain Ribbon; Vintage Buttons; Vintage Bakery String
  • Tools: Die-Cut Machine; Rectangle Die; Dotted Wave Border Punch; Gamsol Odorless Mineral Spirits; Blending Stump; Gamsol Odorless Mineral Spirits; Acetate Cloud Template; Stampin' Dimensionals and SNAIL Adhesive by Stampin' Up
  • Finished Size: 5 1/2" x 4 1/4"
Shop for Stampin' Up products online ... 24/7 ...HERE

If you have any questions about Stampin' Up products or stamping techniques, feel free to contact me HERE.

Monday, March 15, 2010

Playin' with Paint Sample Cards

Pin It


Monday already?!? WowZa, this weekend flew by!!

Today's card project was created for The Play Date Cafe color inspiration challenge, PDCC20. For all of the challenging deets, or a look at the gorgeous inspiration photo, clicky HERE.

Here's the card I created for this challenge:

I stamped my bird collage image on a paint sample card using Staz-On solvent ink. I added some DP, a punched border, some ribbon, and a cute l'il threaded button. Easy-peasy; this stamp did all the work for me!

One thing to note when using paint sample cards for stamping: only solvent ink will ever truly 'dry' on these slippery things. Set your stamped paint sample card aside to dry ... preferably overnight ... or, blast it with your heat gun for a minute or twenty.

TIP
: a quick way to determine if your it-looks-like-its-dry paint sample card image is dry, is to stamp a duplicate image, or part of the image, using the same ink on a similar paint sample card and periodically check it. With your finger ... or, someone else's finger. If you're fingerless, a Q-Tip works too.

For all of the heart-pounding product info, check out the Card Recipe, below.

And while we're on the "heart-pounding" subject, we've been havin' a TON of rain here in So. Florida ... 12 inches to be exact, and when it finally stopped late on Sunday, Sheila and I decided to swim run out to do some grocery shopping.

As we were leaving the store, we noticed that a thick fog had rolled in. We couldn't see a thing a foot in front of us and we both noticed it was eerily quiet. Kinda spooky, kwim?

We gave each other a "well, this is weird" look and then headed over to where we thought we had parked the car. After loading the groceries in the trunk, I started the car and put it in gear. Nothing. The car didn't budge. Okay. So, I put it in park again and then in drive and ... nothing. Weird. I tried again. Still nothing.

Suddenly, I began to recall John Carpenter's, "The Fog," and Stephen King's "The Mist." My mind filled with images of murderous undead pirates, deadly giant insects, and scary monsters from some bizarre dimension that man was not meant to discover.

I hate to admit it, but I began to panic. With my heart-pounding, I think, "omigosh, we're trapped for-evuh in the Twilight Zone!"

It was right about then that Sheila said, "Deb, you're an idiot: you've got it in neutral."

Thanks so much for spending part of your busy day with me!

~Hugs,


Today's Challenges:

Card Recipe:
  • Card Stock: Bazzill
  • Designer Paper: Unknown Scrap
  • Other: Paint Sample Card from Lowe's
  • Stamp: Bird Collage by Oxford Impressions
  • Ink: "Jet Black" Staz-On Solvent Ink
  • Accessories: Grosgrain Ribbon; Mini Button
  • Tools: Heat Gun; Arch Lattice Border Punch by MS; Stampin' Dimensionals and SNAIL Adhesive by Stampin' Up
  • Finished Size: 5 1/2" x 4 1/4"
Shop for Stampin' Up products online ... 24/7 ... HERE

If you have any questions about Stampin' Up products or stamping techniques, feel free to contact me HERE.

Friday, March 12, 2010

Simply Pink and Green ... in 15 Minutes!

Pin It


TGIF, Crafty Stampers!

It's another fabulous Friday and time for this week's "Stamp Simply" challenge! Since Sharon loves color, she asked us to create a project using one of her favorite color combinations: pink and green. Anything goes, as long as you use pink and green. And, as a bonus option, you can also add the color brown.

If you decide to play along, and we hope that you do, please link your project to Sharon's Mr. Linky, located HERE. If you upload your card to a public gallery, such as Splitcoast Stampers, please use keyword "ssnotime130" so we can find your entry.

We can't wait to see your pink and green ... and maybe brown ... projects!

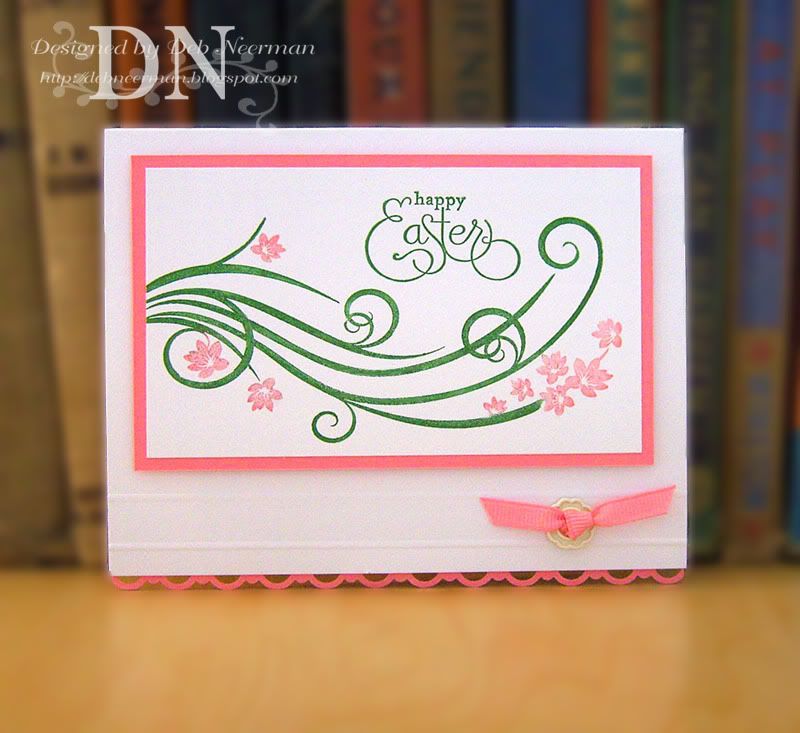
I optioned out of the bonus option ... here's a look at my-pink-and-green-minus-brown creation:

Be sure to clicky HERE to see Sharon's gorgeous pink and green beauty ... and don't miss the rest of the beautiful projects created by the Stamp Simply team:

Barbara Anders: Paper Pursuits,

Jennifer Buck: The Buck Stamps Here,

Jenny Gropp: One Krafty Kat,

Tammy Hershberger: Stamp Happy,

Janine Orchard: 2bKrafty,

AJ Otto: The Willow Garden,

Deb Saaranen: Dream in Color,

Barb Schram: Explore. Dream. Discover., and,

Marlene Bender: Heart-Spring, our March Guest Designer.

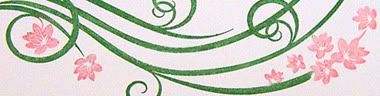
This card couldn't have been simpler to create! I stamped my flourish using brush markers on Whisper White card stock, then stamped my font-a-licious sentiment on the same panel.

I created a 'path' using my Scor-It board, and adhered a ribbon slide tied with a pin grosgrain ribbon on the 'path', then punched a scalloped border using Stampin' Up's Scallop Trim border punch. So easy, even I could do it!

For all of the colorful product info, check out the Card Recipe, below.

Sooooooooo, I was hangin' out with Sheila yesterday when her 16-year-old nephew stopped by to share some good news with her.

"Aunt Sheila, I got a job! It's fantastic and I love it!" her nephew enthused.

"That's terrific, Ryan, I'm so glad to hear it." Sheila responded.

"Yeah, and I get two weeks paid vacation! I can't wait to find out where they send me!"

It must run in the family ...

Thanks so much for spending part of your busy day with me ... have a great weekend!

~Hugs,


Today's Challenges:

Card Recipe:
  • Card Stock: All Card Stock by Stampin' Up
  • Stamps: Flourish by Hero Arts; Sentiment by Stampin' Up
  • Color Medium: Brush Markers
  • Accessories: Pink Grosgrain Ribbon; Ribbon Slide from Hodgepodge Hardware Set by Stampin' Up
  • Tools: Scor-It Board; Scallop Trim Border Punch by Stampin' Up; Mini Glue Dots; Stampin' Dimensionals and SNAIL Adhesive by Stampin' Up
  • Finished Size: 5 1/2" x 4 1/4"
Shop for Stampin' Up products online ... 24/7 ... HERE

If you have any questions about Stampin' Up products or stamping techniques, feel free to contact me HERE.

Wednesday, March 10, 2010

You Brighten My Day ...

Pin It


Happy Stump Day, Hampers! And thank you for always brightening my day. Yes, you!

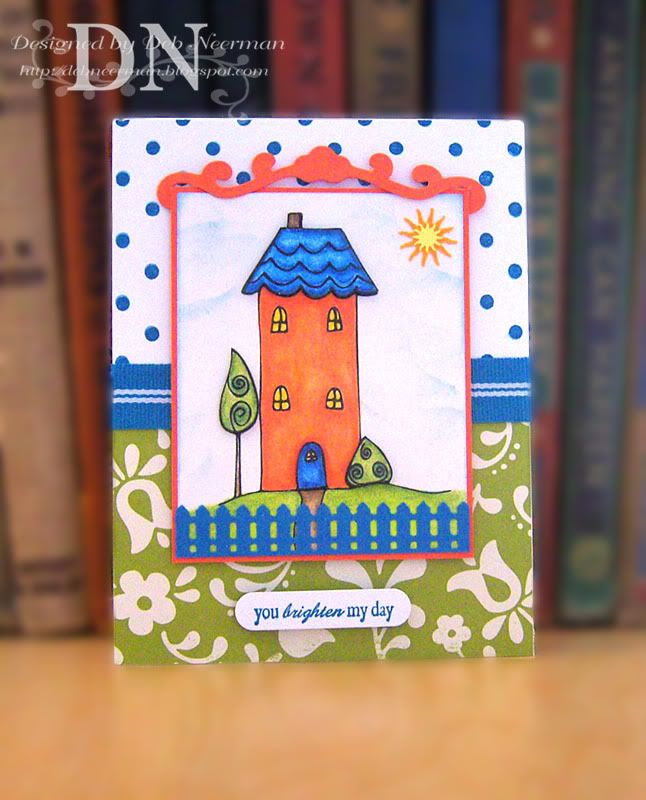
Today's card project was created using this adorable digital image and a v-e-r-y bright color palette:

This 'cute-with-a-capital-Q' image, created by the DigiKitty, was printed out twice, then colored with Prismacolor pencils blended with OMS. After coloring, I layered the second images (the roof, the door, and the two trees), over the first using foam dimensionals. Lottsa dimension on this one ... which, unfortunately, I failed to capture in my photo.

I used an old Stampin' Up background stamp, Decorative Dots, on my card base, added a bit of DP from October Afternoon, some retired SU ribbon, and a die-cut and some punchies.

I stamped my Verve Visual sentiment in dye ink, and cut it out with SU's "Word Window" punch, then popped it up on my card front using double-mounted dimensionals. For the rest of the deliriously bright product info, check out the Card Recipe, below.

Soooooooo, yesterday afternoon while I was out havin' the time of my life on Jury Duty, Sheila TiVo'ed the "Dr. Oz" show. Our l'il Acreage Cancer Cluster issue was being discussed on the show and we wanted to watch it together last night. And just 'cuz she can't stand being left out of anything, Sheila's crazy sister Jill wanted to watch it, too.

After watching the segment and a quick chat about what we'd seen, Jill suggested that we switch over to watch a program that she was interested in. Which in itself is pretty surprising ...

"Please? It's on Discovery. I'd really like to see this show with you guys."

"Really? Okay. What channel?" Sheila asked, equally surprised.

"25. No. Wait. Yeah, 25." Jill guessed.

"Ya know what?" Sheila said. "I think the Discovery Channel should be on a different channel everyday."

Give it a minute ... it'll grow on ya. Unless you're Jill; she still hasn't 'gotten' it ...

Thanks so much for spending part of your busy day with me! Oh, and you too, Jill!

~Hugs,


Today's Challenges:

Card Recipe:
  • Card Stock: "Pacific Point" (Retired), "Tangerine Tango" (Retired), and "Whisper White" Card Stock by Stampin' Up
  • Designer Paper: October Afternoon
  • Digital Image: Primitive Saltbox by DigiKitty
  • Stamps: "Decorative Dots" (Retired) Background Stamp by Stampin' Up; Sentiment by Verve Visual
  • Ink: "Pacific Point" (Retired) Dye Ink by Stampin' Up; "Sky Blue" Fluid Chalk Ink
  • Color Medium: Prismacolor "Premier" Pencils by Sanford
  • Accessories: "Pacific Point" (Retired) Ribbon by Stampin' Up
  • Tools: Die-Cut Machine; Flourish Die; Sun Punches; Fence Border Punch; Handmade 'Cloud' Template; Gamsol Odorless Mineral Spirits by Gamblin; Paper Blending Stump; Stampin' Dimensionals and SNAIL Adhesive by Stampin' Up
  • Finished Size: 4 1/4" x 5 1/2"
Shop for Stampin' Up products online ... 24/7 ... HERE

If you have any questions about Stampin' Up products or stamping techniques, feel free to contact me HERE.

Tuesday, March 9, 2010

I Go Both Ways ... You?

Pin It

So, Crafty Stampers, I'm off havin' the time of my life on Jury Duty today, but I thought you'd find this interesting:


If you are seeing this lady spinning clockwise, then it means that you are using the right side of the brain. If you are seeing her spinning counter-clockwise, then you are using the left side of the brain.

Some people are able to see her spinning in both directions, but most of them see her rotating only in one direction. If you can see her spin in one direction and then make her spin in the other, then you are a part of a handful of people.

Even if it might not seem so, both directions can be seen. Apparently, this has been proven at Yale University, in New Haven, Connecticut, after 5 years of studying the human brain and its functions. Supposedly only 14% of the US population can see her spinning in both directions.

I didn't make this up; I found this information HERE. So, whaddya make of this?

Thanks so much for stopping by ... I'll be back tomorrow. Go forth and have a happy, goin' both ways kinda day!

~Hugs,

Monday, March 8, 2010

Don't Believe Everything You Read ...

Pin It


Happy (?) Monday, Stampers! Hope your weekend was long and lovely!

Today's super-simple card project was created for The Play Date Cafe's weekly color challenge, PDCC19. This week, the color challenge calls for Deep Yellow, Pale Yellow, and White. For all the challenging deets, including a look at the tangy inspiration photo, clicky HERE.

Here's a lookie at my v-e-r-y yellow card:

I'm pretty unhappy with this photo, but I've been taking pix of this card for hours and I'm officially saying "uncle." And now I've run outta time ... and daylight. And there will be no photographing anything today because yet again, I'm starting Jury Duty at 8:00 a.m. this morning. I get summoned once a year ... regular as Christmas! Is it just me or does this happen to anyone else?!?

And I promise to do my very best to get to all of your blogs this week, but it may be a bit difficult what with the whole American-Civic-Duty thing going on this week. But if you don't see me posting comments on your blogs, this would be why. I promise to swing by your blogs just as soon as possible to 'oooh' and 'ahhhh' over all of your fabulous projects!

I used two very retired Stampin' Up sets to create this card: the duck is from 1999's "Hoppy Easter" stamp set, and the l'il tag is from 2006's "Terrific Tags" stamp set. For the rest of the amazing product info, check out the Card Recipe, below.

Soooooooooo, this weekend Sheila and I and our respective DHs got together to go out for dinner. We settled on Mexican and decided to try the 'hot' new Mexican restaurant in downtown West Palm.

As we waited to be seated, Sheila jabbed me with her elbow and directed my attention to a sign posted on the wall. It read, "It's a Fact: Tacos is Brain Food."

So much for "facts" ...

Thanks so much for spending part of your busy Monday with me ... have a great day!

~Hugs,


Today's Challenges:

Card Recipe:
  • Card Stock: "Summer Sun" and "Whisper White" Card Stock by Stampin' Up; "Summer Sunrise" Card Stock by PTI
  • Stamps: Duck Image from "Hoppy Easter" Stamp Set (Retired) by Stampin' Up; Tag Image from "Terrific Tags" Stamp Set (Retired) by Stampin' Up
  • Ink: "Summer Sun" Dye Ink by Stampin' Up
  • Accessories: Satin Ribbon
  • Tools: Die-Cut Machine; Square Die; A2 Embossing Folder; Stampin' Dimensionals and SNAIL Adhesive by Stampin' Up
  • Finished Size: 4 1/4" x 5 1/2"
Friday, March 5, 2010

Slap Happy and Border-Punch Drunk

Pin It

TGIF, Stampers!

I have some news to share with you: I couldn't be happier to announce that I'm now a permanent member of Sharon Johnson's "Stamp Simply Challenge" team! Holy Moly Guacamole! I'm absolutely slap happy thrilled to be a member of this fabulous team of talented artists. Now, if I could just figger out a way to osmosize some of that amazing talent, the stampin' side of life would be just perfect!

So, this week's "Stamp Simply" challenge is to use border punches on your stamping project. Don't have a border punch? No problem. You can create a faux punched border with scallop-edged Nestabilities, as Sharon demonstrates HERE ... or, you can use a corner rounder punch to create a scalloped edge border as shown HERE in a tutorial by Beate Johns for Splitcoast Stampers. You can even use plain old circle punchies to create a faux scallop edge. And don't we all have a pair of decorative-edge scissors buried somewhere in our stamp room?

If you decide to play along, and we hope you do, please link your project using Sharon's Mr. Linky located HERE. If you upload to an online gallery, such as Splitcoast Stampers, please use keyword: "ssnotime129." We can't wait to see your punchy project!

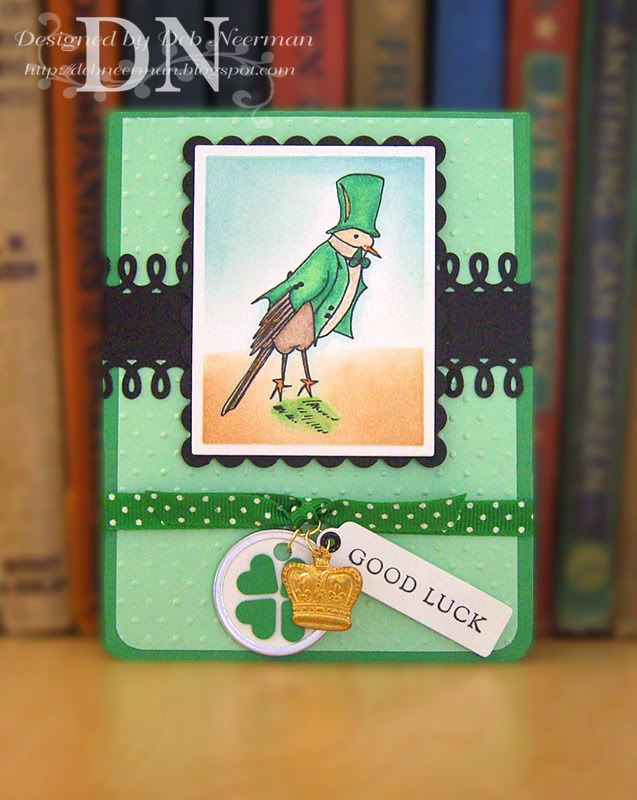
Here's my very green border-punched card:

Clicky HERE to see Sharon's oh-my-gosh-gorgeous sample ... and you have got to see the rest of the Stamp Simply team's amazing punched-border projects:

Barbara Anders: Paper Pursuits,

Jennifer Buck: The Buck Stamps Here,

Jenny Gropp: One Krafty Kat,

Tammy Hershberger: Stamp Happy,

Janine Orchard: 2bKrafty,

AJ Otto: The Willow Garden,

Deb Saaranen: Dream in Color,

Barb Schram: Explore. Dream. Discover., and,

Our fabulous Guest Designer for the month of March, Marlene Bender: Heart Spring.

The focal image on my card was created using a digital stamp from the Digi Kitty, "Robyn Redbreast." But as soon as I saw this adorable image, I thought it would be perfect for a St. Patrick's Day card ... it must be that dapper waistcoat and top-hat!

I double punched my loopy border, added some grosgrain ribbon, a stamped message tag, a gold crown charm, and a little white metal-edged tag. TIP: I created the shamrock on the tag by punching out four l'il green hearts using Stampin' Up's small heart punch.

For the rest of the punchy product info, check out the supply list below.

Sooooooooo, yesterday Sheila and her insane wacky sister, Jill, stopped by and caught me red-handed ... playing 'Keno Pop' on Pogo.com. Okay, I confess: I'm a huge fan of Internet games in general and Pogo games in particular.

This casino-style game makes a lot of noise, has hundreds of running flashing lights, and reflective mercury-like silver balls flying all over the place. It's sort of like Christmas ... without the gifts ... or the cookies.

"Wow, this looks like fun!" Jill exclaimed, pulling up a chair. "Look at all those flashy lights going around the board and stuff flying all over the place!"

"How on earth can you play this game with the psychedelic light show goin' on?" Sheila asked me.

"Well, I really don't notice it, but if it's bothering you I can turn the lights off." I offered.

"Oh, yeah, you definitely should do that!" Jill said, "Just think of how much energy you'll save by shutting off all those lights!"

Give it a minute, it'll grow on you ...

Thanks so much for spending part of your busy day with me ... I hope you have a fabulous weekend!

~Hugs


Today's Challenges:

Card Recipe:
  • Card Stock: All Card Stock by Stampin' Up
  • Stamps: Sentiment from "Fundamental Phrases" Stamp Set by Stampin' Up
  • Digital Image: "Robyn Redbreast" by DigiKitty
  • Ink: "Basic Black" Dye Ink by Stampin' Up; Distress Inks
  • Color Medium: Prismacolor 'Premier' Pencils by Sanford; Spica Glitter Pens
  • Accessories: Grosgrain Ribbon; Gold Crown Charm; Metal-Edge Round Tag by Stampin' Up; Black Eyelet; Jump Rings
  • Tools: Die-Cut Machine; Rectangle Die; Scalloped Rectangle Die; Tag Die; Swiss Dots A2 Embossing Folder; Loopy Border Punch by MS; Corner Rounder Punch by Stampin' Up; Small Heart Punch by Stampin' Up; Stampin' Dimensionals and SNAIL Adhesive by Stampin' Up
  • Finished Size: 4 1/4" x 5 1/2"
Thursday, March 4, 2010

You've Got A What Where?!?

Pin It


Happy Thursday, Crafty Stampers!

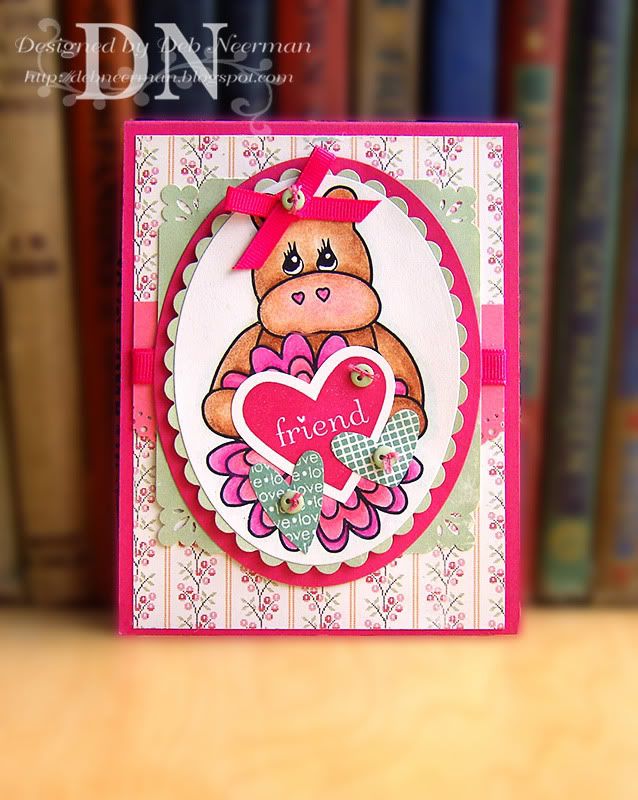
Today's card project is unlike any card I've ever created ... of that, I'm fairly certain. I'm usually not one for cutesy animal images ... but there was something about this adorable Hippo that even I couldn't resist. So I didn't even try:

This cute l'il digital image, by Digi Kitty, was printed on card stock then colored with Prismacolor pencils blended with Gamsol. Check out the Digi Kitty blog to find out how you can get a really cute, really free digital image, too!

Being a stampin' fool, I simply HAD to add some rubbah stampin' to the project, using stamps from SU's new "I {Heart} Stamps" set. So, no, I'm not hiding an ugly card-making faux pas ... not this time!

For the rest of the 'oh-how-cute' product info, check out the supply list, below.

Sooooooooo, yesterday Sheila and I took Reid-the-Wild-Child to the Library to pick up some ... would you believe! ... FREE books to read. Clicky HERE if you're at all confused by that statement.

Anyway, while we were checking out we bumped into our friend, Carolyn. And it was fairly obvious that we hadn't seen her in awhile as she was v-e-r-y pregnant. We'd a noticed that ...

"WoW, you're huge!" Sheila brilliantly observed.

"And you look great!" I quickly added.

After a few minutes of "whaddya doin', where ya goin', whatcha knowin'," Carolyn turned to Reid and asked, "Hey, Reid, would you like to feel the baby kicking?"

So Reid tentatively placed his hand on Carolyn's baby bump and asked, "So, how will the baby get out of there?"

Sheila turned a lovely shade of green, but Carolyn stayed cool, simply saying, "Oh, the Doctor will help, Reid."

Eyes widened in amazement, Reid exclaimed, "WHAT?!? You've got a Doctor in there, too?!?"

Thanks so much for visiting today ... be sure to swing by tomorrow for some new newsy news!

~Hugs,


Today's Challenges:

Card Recipe:
  • Card Stock: All Card Stock by Stampin' Up
  • Designer Paper: Cosmo Cricket
  • Stamps: Hearts from "I {Heart} Hearts" Stamp Set by Stampin' Up
  • Ink: "Melon Mambo" Dye Ink by Stampin' Up; Juniper Dye Ink by CTMH
  • Color Medium: Prismacolor Premier Pencils by Sanford
  • Accessories: Mini-Buttons; DMC Embroidery Floss; Grosgrain Ribbon
  • Tools: Die-Cut Machine; Oval Dies; Fancy Corner Punch; Doily Lace Border Punch; Heart to Heart Punch by Stampin' Up; Gamsol Odorless Mineral Spirits by Gamblin; Blending Stump; Sharpie Paint Pen; Stampin' Dimensionals and SNAIL Adhesive by Stampin' Up
  • Finished Size: 4 1/4" x 5 1/2"
Wednesday, March 3, 2010

When Good Cards Go Bad ...

Pin It


Happy Stump Day, Hampers!

Today's card project was created for a color challenge that ended at least a week ago. Or more. The card got buried on my desk and resurfaced just in time ... to be very late. That's bad.

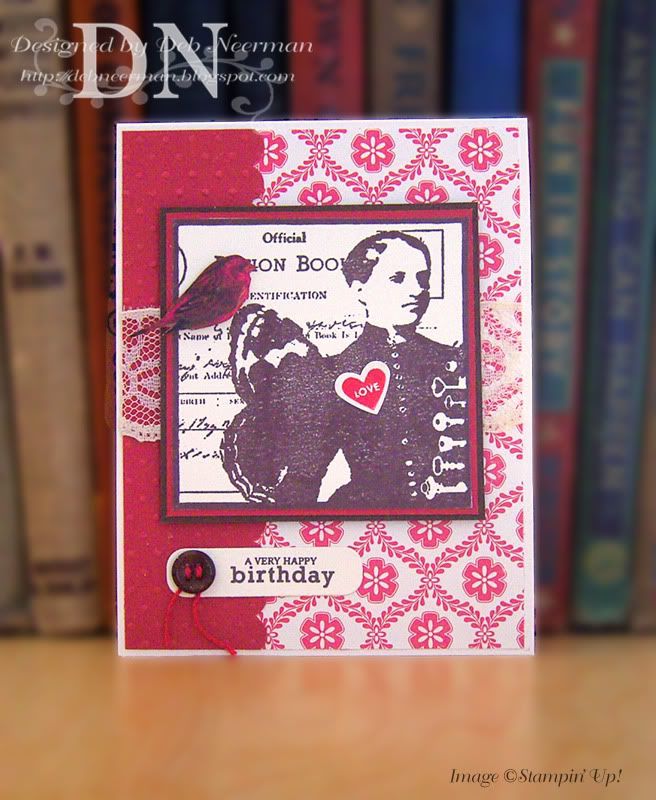
Here's a look at my juvenile delinquent card:

I covered my card base with DP from October Afternoon, and added some scallop-border-punched SU card stock that had been run through the 'Bug in the Swiss Dots A2 embossing folder. Some handmade vintage lace peeks out from under the focal image.

I stamped my vintage collage-type image with Chocolate Chip dye ink and double matted it, added a l'il heart stamped image, and parked a cute red bird on the vintage lady's wing.

I added a stamped sentiment, a threaded vintage button, and finis! So easy, even I could do it!

For all of the fascinating product info, check out the supply list, below.

Sheila and Reid-the-Wild-Child were pretty boring well-behaved yesterday so I got nothin' on them, but ...

Yesterday my computer-techno-wizard-geek DH gets a call from an elderly woman who needed service "at once." And off he went ... geez, why didn't I think of sayin' that?!?

When he returned, I asked him what her problem was.

"Oh, she was shopping online and was having trouble using her credit card. She wasn't sure if she had a computer problem or if her credit card was bad. She just needed a little help." the DH answered.

"She needed help shopping?!? No woman needs help shopping!"

"Well, she did. She was trying to use her CD drive to swipe her credit card."

I can die now; I've officially heard everything.

Thanks so much for spending part of your busy day with me!

~Stampin' hugs,


Today's Challenges:

Card Recipe:
  • Card Stock: "Chocolate Chip," "Riding Hood Red," (Retired), and "Very Vanilla" Card Stock by Stampin' Up
  • Designer Paper: October Afternoon
  • Stamps: Collage Image, Unknown (Unmounted); Sentiment, PTI; Heart from "I {Heart} Hearts" Stamp Set by Stampin' Up
  • Ink: "Chocolate Chip" and "Real Red" Dye Inks by Stampin' Up
  • Accessories: Vintage Handmade Lace; Vintage Button; Bakery Twine; Red Bird Image
  • Tools: Die-Cut Machine; Label Die; Scallop Border Punch by Stampin' Up; Stampin' Dimensionals and SNAIL Adhesive by Stampin' Up
  • Finished Size: 4 1/4" x 5 1/2
Shop for Stampin' Up products online ... 24/7 ... HERE

If you have any questions about Stampin' Up products or stamping techniques, feel free to contact me HERE.

Tuesday, March 2, 2010

Six of One, Half a Dozen of the Other ...

Pin It


Happy Tuesday, crafty stampers!

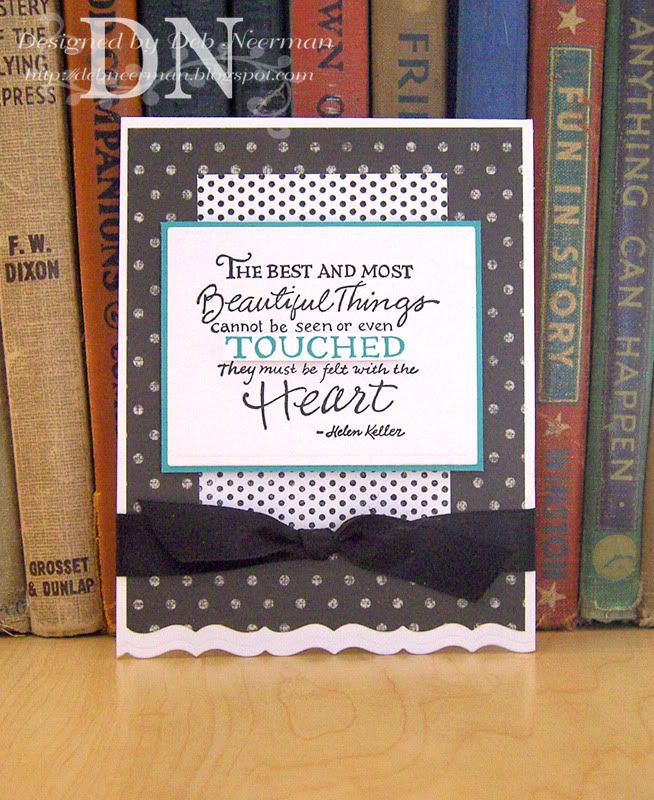
Today's card project was created for The Play Date Cafe's "Color Splash" challenge, PDCC18. The "Color Splash" challenge requires a black and white card with a 'splash' of a color. This week's suggested color is teal; or in my case, SU's "Bermuda Bay."

For all the challenging deets, including a look at the inspiration photo, clicky HERE to visit the Play Date Cafe challenge blog.

Here's my card:

I stamped my beautiful sentiment on Whisper White card stock using Basic Black dye ink, then again on a scrap of card stock using Bermuda Bay dye ink. I cut out the second impression and adhered it over the first for a ... splash! of color.

The black with white polka dot paper is from DCWV; the white with black polka dot paper was created using a background stamp.

Finally, the decorative edge on the card base and on the DP was created with a Borderabilities die ... I think. It has since (in all of two days!), gone missing in my studio and Lord knows how long it'll be before whatever-it-is resurfaces. Funny thing is, I've had it for months but this was the very first time I used the dang thing! Well, I didn't like it all that much anyway ... I kid.

For all the splashy product info, check out the supply list, below.

Soooooooooo, on Saturday after we had the strange Wal-Mart shopping experience (clicky HERE for all of the unbelievable deets), Sheila decided to toss some lunch Reid-the-Wild-Child's way. Sad but true: the Golden Arches.

Reid has a big ears, an overactive bladder, and the loudest screech of any child, anywhere ... but a small appetite. And he wanted Chicken McNuggets. But only six of them.

"I'd like a half-dozen of the 'Chicken McNuggets.'" Sheila told the McHappy counter-person.

"Sorry, we don't have a half dozen nuggets."

"You don't? Are you sure about that?" Sheila asked.

"Sorry, we only have six, nine, or twelve pieces of 'Chicken McNuggets.'"

"So, just to be clear: I can't order a half dozen nuggets, but I can order six?" Sheila asked.

"Yes, Ma'am, that's right."

"Okay, then just give me six ... but since I really want a half-dozen, would you mind counting them for me when they're packaged? I just wanna be sure that I get a full half-dozen."

"Oh, sure, no problem. But I can assure you that you won't be getting a half-dozen. You'll get six. That's all. Just six." she replied.

Later that day, when we told this story to Sheila's psychotic weird sister, Jill, she said, "So, what happened? Did you end up with six or a half a dozen?"

Omigosh, it's contagious!

Thanks so much for stopping by ... hope your day is fantastical!

~Hugs,


Today's Challenges:

Card Recipe:
  • Card Stock: "Bermuda Bay" and "Whisper White" Card Stock by Stampin' Up
  • Designer Paper: DCWV
  • Stamps: Sentiment, Inkadinkado; Background, CTMH
  • Ink: "Basic Black" and "Bermuda Bay" Dye Inks by Stampin' Up
  • Accessories: 5/8" Black Satin Ribbon
  • Tools: Die-Cut Machine; Rectangle and Border Dies; Stampin' Dimensionals and SNAIL Adhesive by Stampin' Up
  • Finished Size: 4 1/4" x 5 1/2"

Shop for Stampin' Up products online ... 24/7 ... HERE

If you have any questions about Stampin' Up products or stamping techniques, feel free to contact me HERE.

Monday, March 1, 2010

Shhhhh ..**, Monday Already?

Pin It


Shhhhh ... oot; it's Monday ... again.

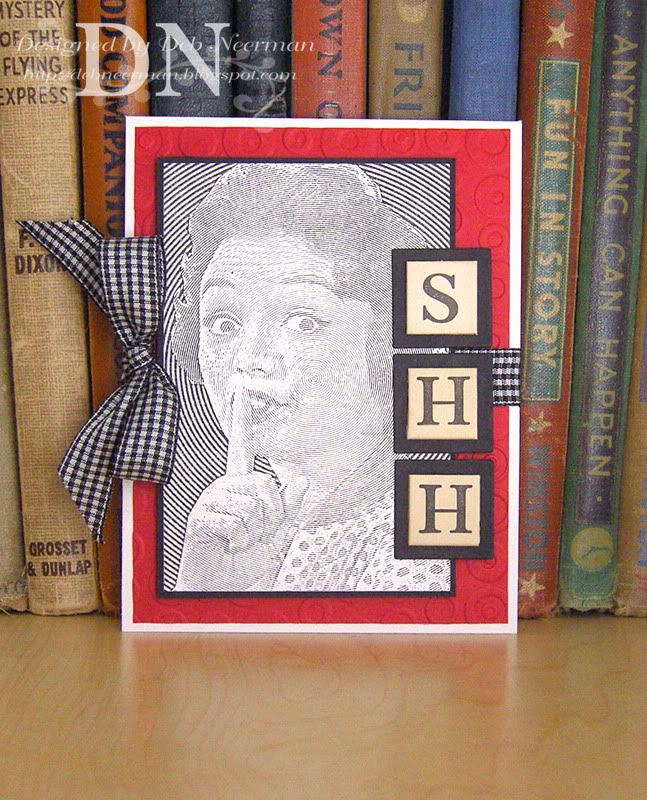
Today's card project was created following a sketch from Just-Add-Ink:

To check out all the sketchy challenge deets, or to play along, clicky HERE to visit Just-Add-Ink.

I stamped my retro image on Whisper White card stock with Basic Black dye ink, added some vintage anagram letter tiles, an embossed background mat, and a cute l'il gingham ribbon.

I'll be using this card ... and a few dozen more just like it ... as the invites for an upcoming surprise birthday party. Hence, the 'shhhhhhhhh!'

For all the super-secret product info, check out the supply list, below.

Soooooooo, this weekend Sheila and I bopped over to a large-discount-store-who-shall-remain-nameless (Wal-Mart) to do some bargain-hunting.

We got in line to check-out and the woman behind us used one of those divider bars to separate her purchases from Sheila's.

After the girl had scanned all of Sheila's items, she picked up the 'divider', looking it over for the bar code so she could scan it.

When she couldn't find the bar code, she asked Sheila, "Do you know how much this is?"

Sheila answered, "Ya know what? I've changed my mind; I don't think I'll buy that today."

"Oh, okay," the cashier said, "thanks. It can take forever to get a price-check in here."

!?!?!

Thanks so much for swingin' by ... hope you have a great day!

~Hugs,


Today's Challenges:

Card Recipe:
  • Card Stock: "Basic Black," "Real Red," and "Whisper White" Card Stock by Stampin' Up
  • Stamp: Vintage/Retro Woman, Unknown (Unmounted)
  • Ink: "Basic Black" Dye Ink by Stampin' Up
  • Accessories: Black and White Gingham Ribbon; Vintage (1935) Anagram Letter Tiles
  • Tools: Die-Cut Machine; Square Die; A2 Embossing Folder; Stampin' Dimensionals and SNAIL Adhesive by Stampin' Up
  • Finished Size: 4 1/4" x 5 1/2"
Shop for Stampin' Up products online ... 24/7 ... HERE

If you have any questions about Stampin' Up products or stamping techniques, feel free to contact me HERE.