Showing posts with label Copic Markers. Show all posts

Friday, July 31, 2009

Hey, It's Cousin It!!

Pin It


TGiF, my Imaginary Stampin' Friends! Is it just me, or did this week contain 10 days?

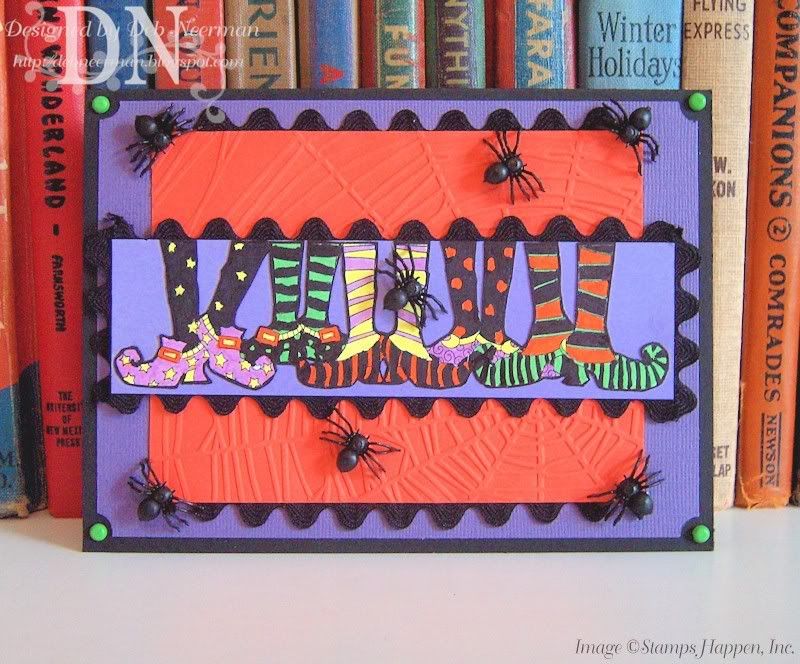
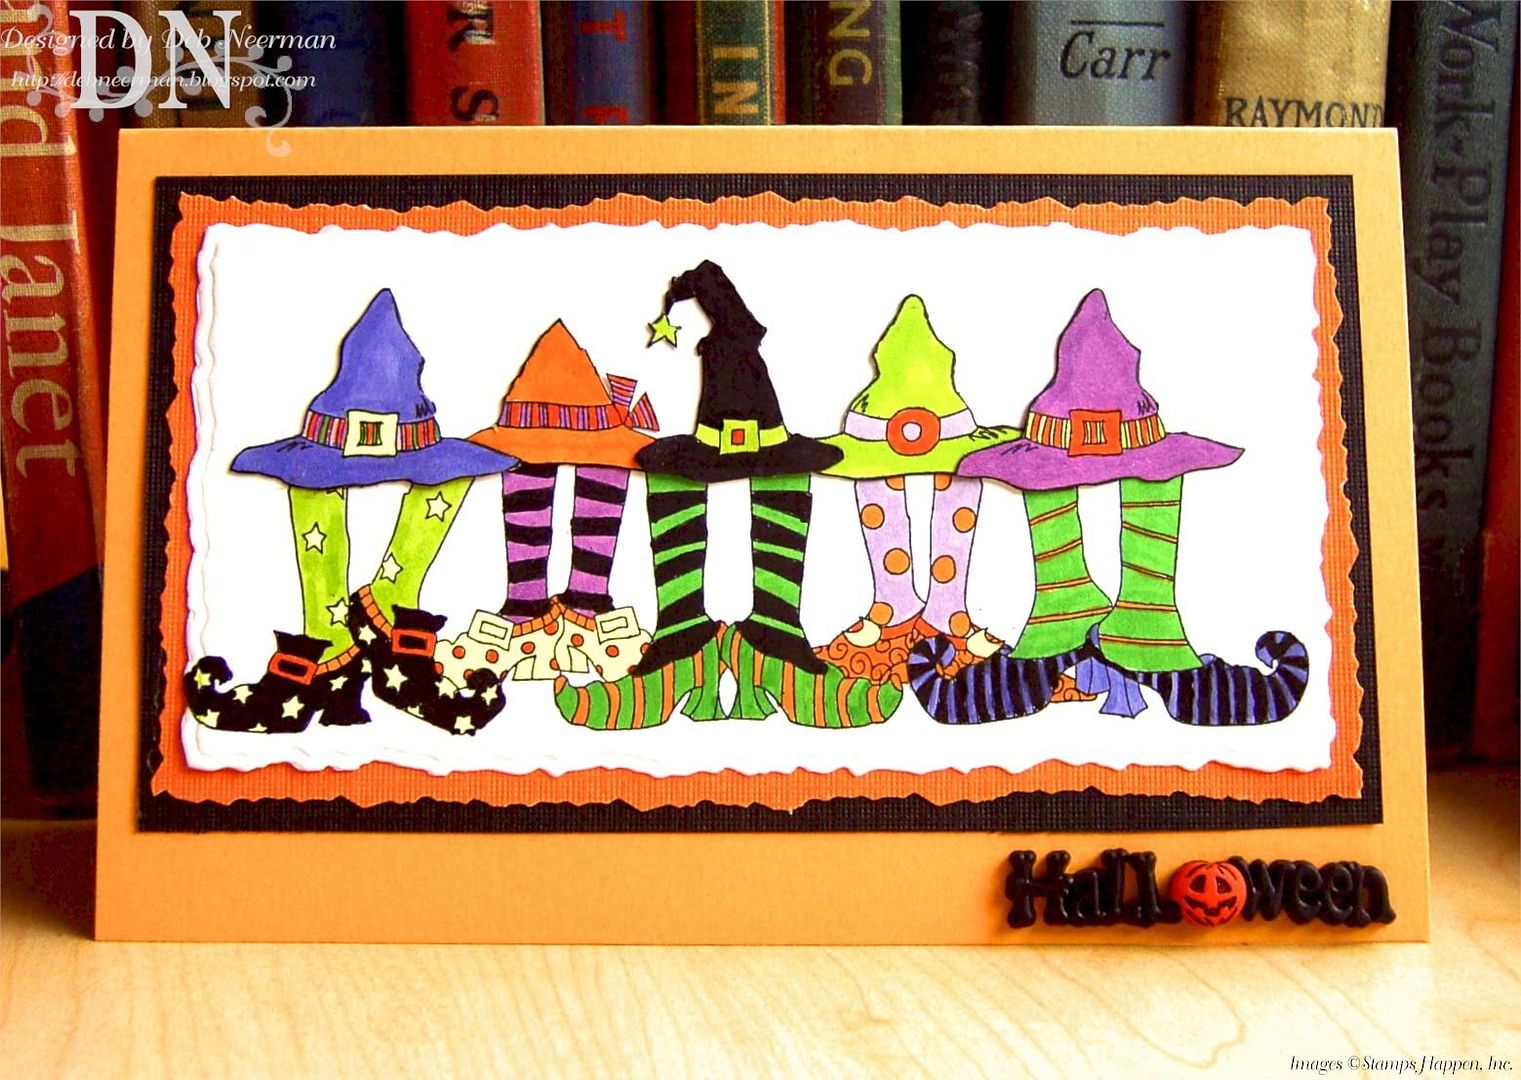
Today's card project was created using two craft stamps from Janlynn Corporation's "Stamps Happen, Inc." The Witches Hats craft stamp can be seen HERE; the Witches Shoes craft stamp can be seen HERE.

I thought it would be fun, fun, fun to use them together, a la' Cousin Itt (minus the floor-length hair), from the Addams Family. You remember the The Addams Family TV show, yes?

They're creepy and they're kooky, mysterious and spooky, they're all together ooky, The Addams Family. As I recall ... their house is a museum, where people come to see 'em, they really are a scream, The Addams Family. Neat. Sweet. Petite. So get a witches shawl on, a broomstick you can crawl on, we're gonna pay a call on, The Addams Family!

Seriously, it's amazin' AND scary what's lounging around up there in my head, no?

For all the frighteningly fun product info, check out the supply list, below.

Soooooooooooo, last night Sheila and I went to the Mall to check out the sale at Burdine's.

While we were wondering around, a voice on the store's loudspeaker announced: "We apologize for the inconvenience, but we will be testing the speaker system to make sure it works properly in case of emergency."

Then the voice added: "If you are unable to hear this announcement, please contact us at the Service Desk."

Have a great weekend, my ISF's!

~Hugs,

  • Card Stock: DCWV; Papertrey Ink
  • Stamps: Witches Shoes and Witches Hats by Janlynn Corporation's "Stamps Happen, Inc."
  • Ink: Tuxedo Black Memento Dye Ink by Tsukineko
  • Color Medium: Copic Markers
  • Accessories: Halloween Embellishment by Jesse James
  • Tools: Die-Cut Machine by Provo Craft; Deckle Edge Die by Spellbinders; Deckle Edge Scissors by Provo Craft; Scotch ATG 714 Adhesive
  • Finished Size: 4 5/8" x 7"
Thursday, July 16, 2009

Gone Camping ... Real Birch Bark Included

Pin It


Happy Thursday, race fans!

Today's card project was created using the "Happy Camper" set designed by Theresa Momber for Gina K. Designs. I have fallen in love with this set ... I can't believe how many projects I've created using it ... and I still love it! If you're ready to fall in love, clicky HERE.

In case you were wondering about my post title, I stamped my "Gone Camping" sentiment on real birch bark! Really! I used StazOn solvent ink but I don't think it was necessary; I suspect it would work just as well using your favorite dye ink. Give it a try!

Oh. And if you have any birch trees in your yard, would you mind mailing me some? I've been hoarding this bit for years and now I need to replenish my birch-bark-supply ... sadly, birch trees don't grow down here. Come to think of it, the age of this bark may have something to do with it taking ink so well ...

I stamped my tent image on Stamper's Select card stock then stamped a mask on a Post-It note, catching as much of the sticky part as possible. Then I over stamped my vintage PSX Black Walnut tree image ... easy-peasy!

TIP: To mask without leaving a "halo" around your original stamped image, trim your mask inside the outline of your stamped image. Works every time!

I drew a horizon, sponged on lots of Distress inks, and added these funky l'il leaves I've had for-evuh. I don't even know where I got them, that's how long I've had 'em.

For the rest of the stupefying product info, check out the supply list, below.

So, Sheila hosted her annual 4th of July Extravaganza on, strangely enough, the 4th of July. She always tries to have something special just for the kiddies, and this year she hired a clown. I would have told you this story sooner but ... well, I forgot.

"So Reid, who's coming to your house tomorrow with with wild hair, a big nose, and huge feet?" I asked the Wild Child.

"Oh," Reid replied, "It's Uncle Larry, right?"

Ummm, Uncle Larry is my DH ...

~Hugs,

  • Card Stock: Textured and Black Card Stock by Bazzill Basics; Stamper's Select White Card Stock by Papertrey Ink
  • Other Paperish Thing: Real Birch Bark from a Real Birch Tree
  • Stamps: Sentiment and Tent from Gina K. Designs; Black Walnut Tree by PSX
  • Ink: Sentiment Stamped in StazOn Solvent Ink by Tsukineko; Tree and Tent Images Stamped in "Tuxedo Black" Memento Dye Ink by Tsukineko; "Brushed Corduroy," "Faded Jeans," "Mustard Yellow," and "Dried Marigold" Distress Inks by Ranger Industries
  • Color Medium: Copic Markers
  • Accessories: Plastic Leaves, Unknown
  • Tools: Die-Cut Machine by Provo Craft; Nestabilities Dies by Spellbinders Paper Arts; Corner Rounder Punch by CarlaCraft; Inkssentials Ink Tool by Ranger Industries; Zig Markers; Scotch ATG 714 Adhesive; Foam Tape; Mini Glue Dots
  • Finished Size: 4 1/4" x 5 1/2"

Wednesday, July 15, 2009

Rich Razzleberry Primrose ...

Pin It


Happy Stump Day, hampers!

Today's card project was created using card stock and dye ink from Stampin' Up's new "In Color," Rich Razzleberry. Is this not a great color, or what?!? Yum! Clicky on the photo for a closer look at the yumminess.

I stamped my primrose image twice on Very Vanilla card stock using Rich Razzleberry dye ink, colored the flower and leaves with Copic markers, then layered the second colored image over the first for dimension. {breathe ...}

I cut out the stamped image with a Megabilities Curvy Rectangle die then mounted the image on a larger die using foam tape.

I'll add an appropriate sentiment to the inside of my card as the stamped image takes up a lot of real estate.

For the rest of the razzle-dazzle, check out the supply list, below.

Sooooooooo, this weekend Sheila and I took a hike through the Loxahatchee Refuge which is part of the Florida Everglades.

As we're hiking along, we come across a sign that reads, "Beware of Panthers." Okay, YIKES!!

"Gee, I wish I wore my running sneakers." Sheila said.

"Ummm, what's the difference?" I asked, "It's not like you're gonna outrun a panther!"

"Actually," Sheila replied, "all I have to do is outrun you."

This from my dearest friend ...

~Hugs,

  • Card Stock: Textured Card Stock by Bazzill Basics; "Very Vanilla" and "Rich Razzleberry" Card Stock by Stampin' Up!
  • Stamp: "Primrose" by Stampourri
  • Ink: "Rich Razzleberry" Dye Ink by Stampin' Up!
  • Color Medium: Copic Markers
  • Accessories: Grosgrain Ribbon by Close to My Heart
  • Tools: Die-Cut Machine by Provo Craft; Megabilities Dies by Spellbinders Paper Arts; Scotch ATG 714 Adhesive; Foam Tape
  • Finished Size: 4 1/4" x 5 1/2"

Thursday, July 9, 2009

My Tent or Yours?

Pin It


Happy Thursday, campin' stampers!

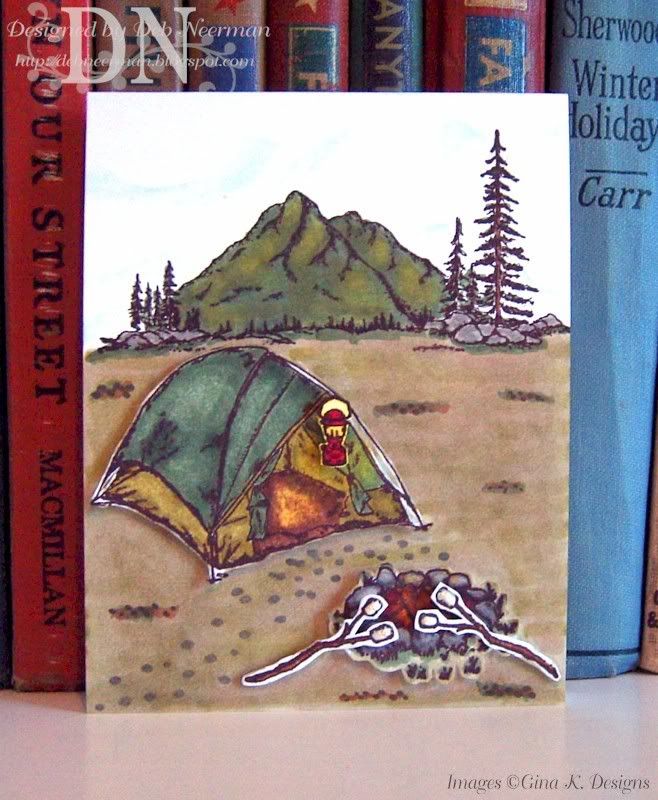
Today's card project was created using the fantabulous "Happy Camper" set by the uber-talented, Theresa Momber for Gina K. Designs. You NEED this set ... it's so wonderful that it makes even MY coloring look good! For a look at the entire set, clicky HERE. Oh ... and while you're there, check out Theresa's previous stamp set, "Out West." Love that one, too ...

I stamped the mountains directly on my card stock base, then stamped the tent, the lantern, the campfire, and the marshmallow sticks on scraps. All the card elements were colored with Copic markers, cut out, and adhered to my card base using foam tape. I added just a teeny bit of Liquid Applique to the tiny l'il marshmallows.

I used a freehand acetate template and fluid chalk ink to create my cloudy sky ... if you click on the photo, I think you can see it ...

For the rest of the stupefying product info, check out the supply list, below.

Sooooooo, last night Sheila and I decided we HAD to go to Mike's ... and we had to bring Reid-the-Wild-Child with us.

As we're ridin' along enjoying the tropical scenery and stuff, Reid suddenly asks, "Auntie, what does 'horny' mean?"

"Yikes! Well, Reid, your Mommy is sitting right here and I know that she would LOVE to answer your question. In fact, she might be very hurt and sad if you didn't let her answer. You wouldn't want that, would you? And, know what? I'm glad you asked Reid 'cuz I've wondered what that word means too."

"Thanks. Thanks a LOT. I WILL get you for this." Sheila whispered through clenched teeth.

So for the next ten minutes Sheila nervously explained what horny meant in a sweet, romantic, PG-13 kinda way. But she was clearly suffering; and I couldn't help but giggle ... jess a little. To myself. She was so stressed, it was hard to watch ... almost.

When Sheila finished, I couldn't resist: "Hey, Reid, where exactly did you hear the word 'horny?'

"Well, today at Scout camp, my den leader was talking about the animals we would learn about tomorrow. And he said one of them is the Horny Toad."

Oh. Horny Toads ...

~Hugs,

  • Card Stock: "Stampers Select" by Papertrey Ink
  • Stamps: "Happy Camper" Set by Gina K. Designs
  • Ink: Dark Brown and Sky Blue Fluid Chalk Inks by Clearsnap, Inc.
  • Color Medium: Copic Markers
  • Accessories: Foam Tape
  • Tools: Acetate Cloud Template; White Liquid Applique; Heat Tool; Olfa Craft Knife
  • Finished Size: 4 1/4" x 5 1/2"

Wednesday, July 8, 2009

Bats and Cats and Witches Hats ...

Pin It


Happy Stump Day, hampers!

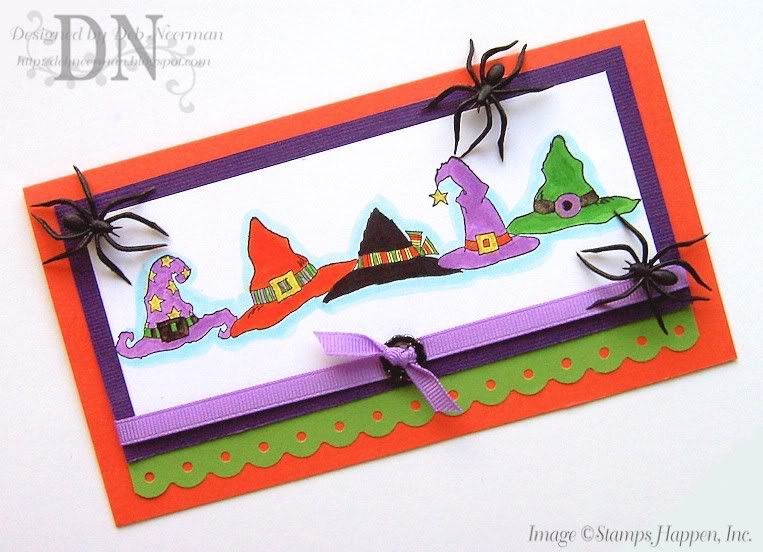
Today's card project was created with this fun craft stamp from Janlynn's Stamps Happen, Inc. This just happens to be one of my favorite Stamps Happen stamps ... and it's a blast to color, too!

To check-out this kewl craft stamp, clicky HERE. BTW, while you're there, you just might want to take a look at their Clearance section 'cuz there's a ton of awesome craft stamps on sale. Stamps? Stamps on sale?!? Well, hello Dolly, these are a few of my favorite things! Clicky HERE to go directly to the craft stamps on Clearance.

And just between you and me, there's a "Christmas in July" sale going on at Janlynn's too. Clicky HERE to check it out.

I stamped my image on PTI's "Stampers Select" white card stock with Memento dye ink, then colored the image using Copic markers. I added some glitter to the hats with a Sakura Stardust pen, then matted the image on textured card stock. I painted a silver Stampin' Up! ribbon slide with my black Copic marker, added some grosgrain ribbon, and some creepy-lookin' spiders.

For the rest of the frightening product info, check out the supply list below.

Soooooooo, I was babysittin' Reid-the-Wild-Child when he asked me why all of his cousins in Wisconsin "talk funny."

"Well, just like they think we have a Florida accent, we think that they have an accent too." I 'splained.

"We don't have an accent," Reid declared.

"Everyone speaks in different ways." I explained. "To them, it sounds like we speak very slowly and that all of our words are drawn out a bit."

Reid's eyes went as big as saucers, "What? You mean they hear funny too?"

Give it a minute, it'll grow on ya ...

~Hugs,

  • Card Stock: Bazzill Basics; DCWV; Papertrey Ink; Stampin' Up
  • Craft Stamp: "Witches Hats" by Janlynn's "Stamps Happen, Inc."
  • Ink: "Tuxedo Black" Memento Dye Ink by Tsukineko
  • Color Medium: Copic Markers (#'s 100, B00, G14, Y06, V15, YR68)
  • Accessories: Grosgrain Ribbon; Ribbon Slide by Stampin' Up!; Spiders from My Basement (Not Really, Just Seein' if You're Paying Attention); Spiders Really from Party City
  • Tools: Sakura "Stardust" Gelly Roll Pen; Fiskars Border Punch; Scotch ATG 714 Adhesive; Foam Tape
  • Finished Size: 7" x 4"

Monday, June 29, 2009

Hallowe'en in June ...

Pin It


Hey, there you are! Happy Monday ... hope you had a fantastical weekend!

I know it's early, but I jess love Halloween ... and I really love creating Halloween cards and projects. This card was created using this uber-fun craft stamp from Janlynn's "Stamps Happen, Inc." This kewl stamp is available HERE.

This card turned out to be perfect for SCS's current Ways to Use It challenge, WT224, "Bold & Bright." For all the challenging deets, clicky HERE. To go straight to the WT224 card gallery, clicky HERE. For the ginormous view of my card, clicky there on the photo.

I stamped my witches shoes on white card stock, colored the image in with Copic markers, then cut the image out and mounted it on purple card stock.

I added a C'bugged back ground, some rick-rack, a few brads, and some creepy black spiders. Easy-peasy!

I'm thinkin' that you could use this craft stamp year-round. Simply by coloring in the image with seasonal colors, you can create Christmas Wishes Witches, Valentine's Wishes Witches, St. Paddy's Day Wishes Witches, and so on.

For all the spooky product info, check out the supply list, below.

Sooooooo, this weekend, Sheila had her Mom & Dad over for the weekend and invited the DH and I to come on over and help them eat some BBQ. Well, that's a no-brainer ...

When we got there, Reid-the-Wild-Child's Grammy was telling him what her own childhood had been like:

"Oh, we used to pack a picnic lunch and stay all day out on the lake. And I had a swing made from a tire; it hung from a tree in our front yard. We rode our pony. We picked wild raspberries and blueberries in the woods. We fished in the pond, and rode our bicycles everywhere!"

Reid was wide-eyed, taking this all in. At last he said, "Darn, I wish I'd gotten to know you sooner!"

~Hugs,

  • Card Stock: Purple Textured Card Stock by Bazzill Basics; Purple Card Stock by DCWV; "Stampers Select" White and Black Card Stock by Papertrey Ink; "Tangerine Tango" Card Stock by Stampin' Up!
  • Craft Stamp: "Witches Shoes" by Janlynn's Stamps Happen, Inc.
  • Ink: "Tuxedo Black" Memento Dye Ink by Tsukineko
  • Color Medium: Copic Markers (100, Y06, G14, V15, and YR68)
  • Accessories: Brads by American Crafts; Rick-Rack by Wright's; Black Plastic Spiders
  • Tools: Die-Cut Machine by Provo Craft; Spider Web A2 Embossing Folder by Provo Craft; Ticket Corner Punch by Stampin' Up; Foam Tape; Scotch ATG 714 Adhesive
  • Finished Size: 5" x 7"


Wednesday, May 6, 2009

You're Invited ... to a Tee Party!

Pin It


Happy Hump Day, stampers!

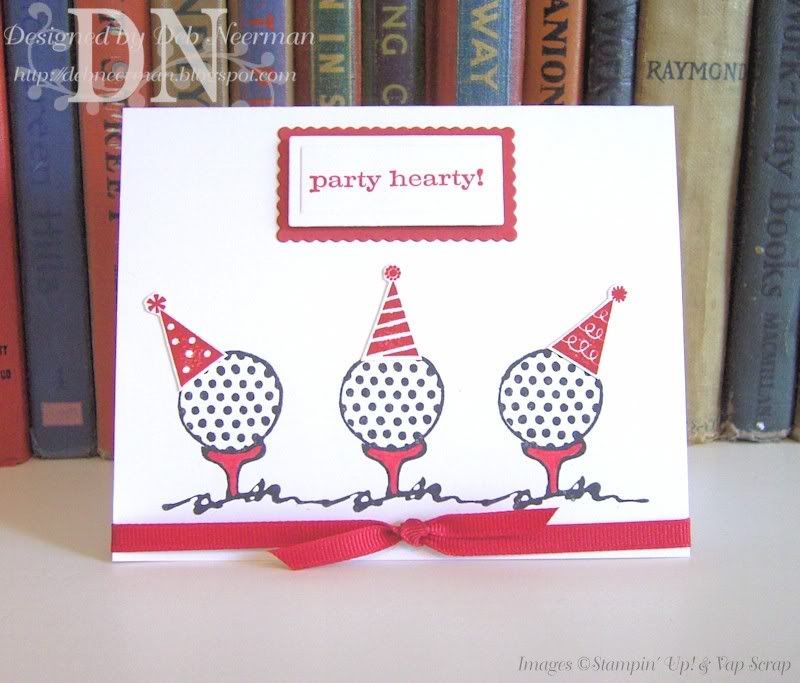
Today's birthday card was created for the DH's bestest friend and golf buddy ... I'll bet you didn't see that comin', huh?!?

Using my SAMJ, I stamped the golf tees and golf balls on PTI's "Stamper's Select" card stock. Using SU's "Riding Hood Red" dye ink, I stamped the l'il party hats and my sentiment and adhered them to the card base.

I colored the tees with a Carmine Red (R37) Copic marker and tied on some grosgrain ribbon. Easy-peasy and ready to serve in just 15 Minutes!

For all the magnifico product deets, check out the Supply List, below.

Sooooooooo, last night I sat with Reid-the-Wild-Child while Sheila ran out. I plopped down next to the Littlest Rascal on the coach in front of the TV.

Reid was watcing some kooky game show, of all things, and was totally engrossed.

The game show host asked one of the players, "Which national company has the slogan, 'Come fly the friendly skies'?"

"United Airlines," the contestant answered.

"Which national company has the slogan, 'Don't leave home without it'?"

"American Express."

"Now, players, tell me which company uses the slogan, 'Just do it'?"

Reid jumped up and yelled, "MOMMY!!"

Have a great day!

~Hugs,

  • Card Stock: "Stamper's Select" by Papertrey Ink; "Riding Hood Red" by Stampin' Up!
  • Stamps: Golf Ball and Tee by Vap Scrap; Sentiment from "Party Hearty" Set by Stampin' Up!
  • Ink: "Tuxedo Black" Memento Dye Ink by Tsukineko; "Riding Hood Red" Dye Ink by Stampin' Up
  • Other Color Medium: Copic Marker R37
  • Accessories: 1/4" Grosgrain Ribbon
  • Tools: Die-Cut Machine by Provo Craft; Nestabilities Dies by Spellbinder's; Scotch ATG 714 Adhesive; Dimensional Foam Tape

Saturday, August 16, 2008

"Three's Company" ... Wait; Isn't Three a Crowd?

Pin It


Hey, everyone it's Cartoon Day again! Yay!

And let me apologize right away for my wonky photo; I'm not sure if it's Photobucket, or Blogger, but the image appears to be w-a-y too tightly focused. My original photo looks fine, so I'm not sure what's causing the problem. It'll prolly resolve itself before this post hits the blog and then you'll be reading this thinkin' I'm crazy ... again! Maybe it's just me ...

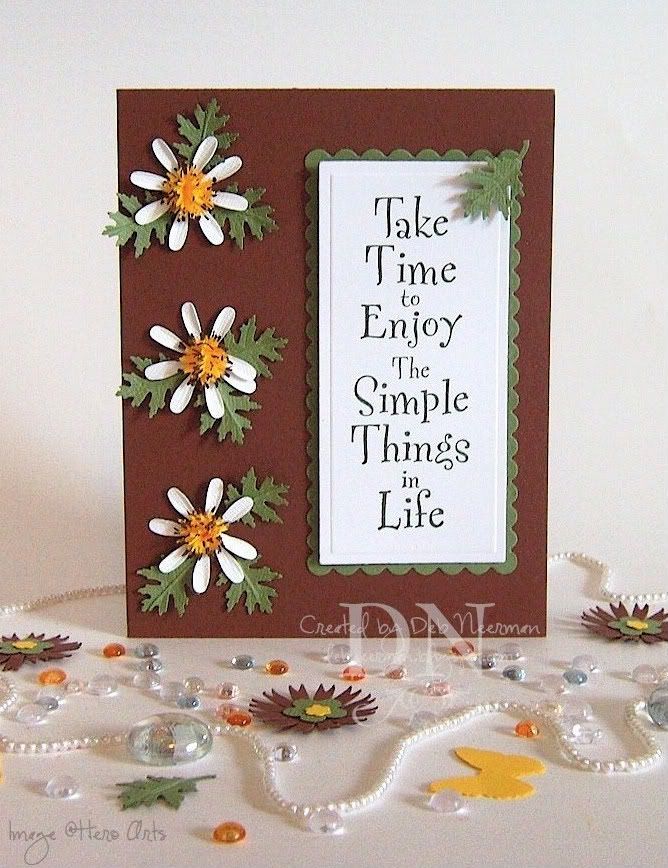
Today's card project was created for the "Stamping Challenges to Love" girls' second challenge, "Three's Company. The idea is to create using multiples of threes ... of anything. I chose to make some punch art flowers, three of 'em; with leaves, three of 'em.

My flowers are styled after Coreopsis'... also known as Tickseed, a member of the daisy family. I'm not certain I've achieved it, but that was what I was goin' for ... just so's ya know.

I used exactly three punches to create my flowers ... perfect for the "Three's Company" challenge, huh? In case you're interested, I listed the punches below in the supply list.

Once the flowers were made, I simply stamped my image on Stamper's Select white card stock, die cut a scalloped mat, and using a sliver of a dimensional, stuck a lonesome l'il leaf on the upper right-hand corner. A simple card, but definitely not a quicky!

Thanks so much for spending part of National Bratwurst Day with me ... hey, it could be wurst!

~Hugs,


  • Card Stock: Cut Card Stock; Bazzill Basics; Papertrey Ink
  • Stamp: "Time to Enjoy" by Hero Arts
  • Ink: Staz-On "Olive Green" by Tsukineko
  • Color Medium: Copic Marker #E77
  • Tools: Cuttlebug Die Cut Machine; Long Classic Rectangle and Scallop Dies by Spellbinder's; Dimensionals, Scotch Foamies, "The Ultimate" glue by Api; Medium and Small Stylus' by Fiskars; Daisy Punch by McGill; Sun Punch by Cuttin' Edge; Oak Leaf Punch, Unknown

Friday, August 8, 2008

Stare at This Until You See the Magic 3-D Picture ...

Pin It


So today, while going through some neat vintage Tarot cards, I wondered: if a short fortune-teller escaped from prison, would he then be considered a small medium at large?

I kill me ...

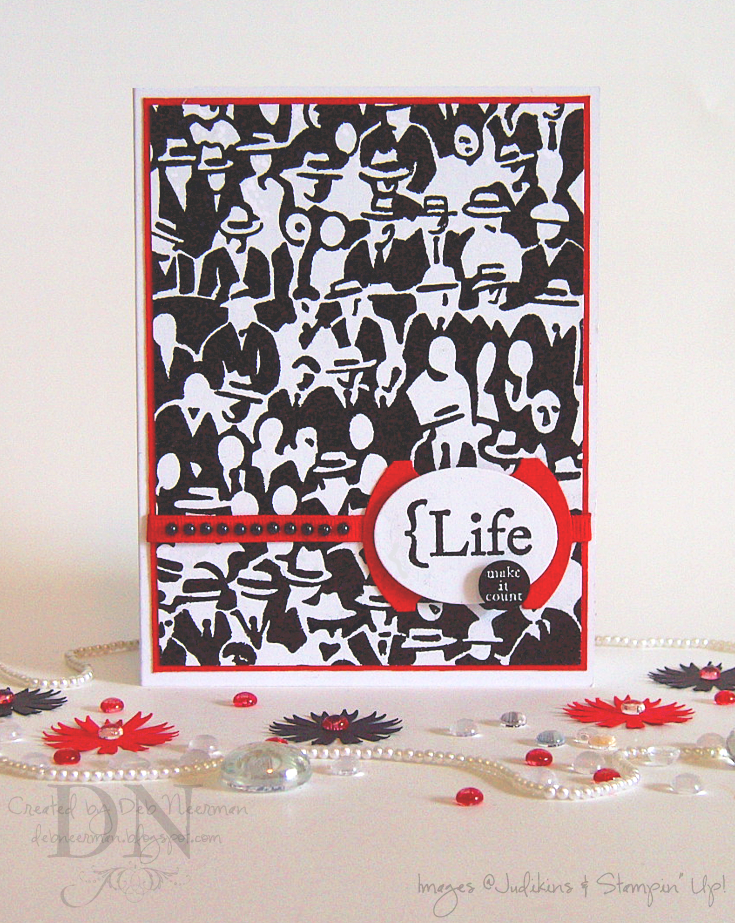
Today's card project was created for Allison's "Suggestive Sunday" blog challenge. This week, Allison asked us to create an abstract paper project inspired by the Framed Art department at Target. So, after viewing 18 pages of Abstract art on Target.com (who knew?!?), I chose to use this w-a-y kewl, and w-a-y big, JudiKins rubber stamp.

I stamped my image on white card stock with Versamark, embossed with Midnight Black embossing powder, and matted with red speciality paper. Yup, every bit of black you see on this card is heat embossed. I stamped my sentiments, from Stampin' Up!, (thanks, Mel!), in the same manner, and mounted them on a unfolded round file tab punchie.

TIP: Oftentimes when heat embossing, for one reason or another, you'll find a 'bare' spot. Rather than pitch the whole project, do this: wait for the embossed card stock to cool, then go over your bare areas with a matching marker or paint pen. On this humongous embossing project, I touched up the bare spots with a Copic marker (#100).

Finally, I adhered my sentiments using black dimensionals, added a ribbon, and some black faux pearls, and finis!

Now, click on the image for a ginormous photo and keep staring at it until you see the magic 3-D image. Then, if you would, please leave me a comment letting me know what you saw in there, okeedokee?!? 'Cuz we're having some differing opinions here ... thanks!

Don't forget to Rock the Vote at Y.ou K.now Y.ou R.ock's "Rock the Cover" contest!

Until tomorrow, I leave you with the immortal words of Venus de Milo who said, "I guess huggin' is out."

~Cheers,


Card Stock: "Stamper's Select - White" by Papertrey Ink; Stamp: by JudiKins; Ink: "Versamark" by Tsukineko; Embossing Powder: "Midnight Black" by Stampendous; Copic "Ciao" Marker #100; Grosgrain Ribbon: Unknown, Obtained in a Ribbon Share; Faux Pearls: by Mark Richards; Adhesive: "Scrap Fusion PA" by Ivy Scraps, Black Dimensionals; Tools: Cuttlebug Die-Cut Machine; Die: "Large Classic Oval" Nestabilities Set by Spellbinder's; Punches: "Round File Tab" Punch by Stampin' Up!, 1.5" Circle Punch by Punch Bunch


Tuesday, August 5, 2008

Hello, Pretty Bird ...

Pin It


Welcome to the jungle!

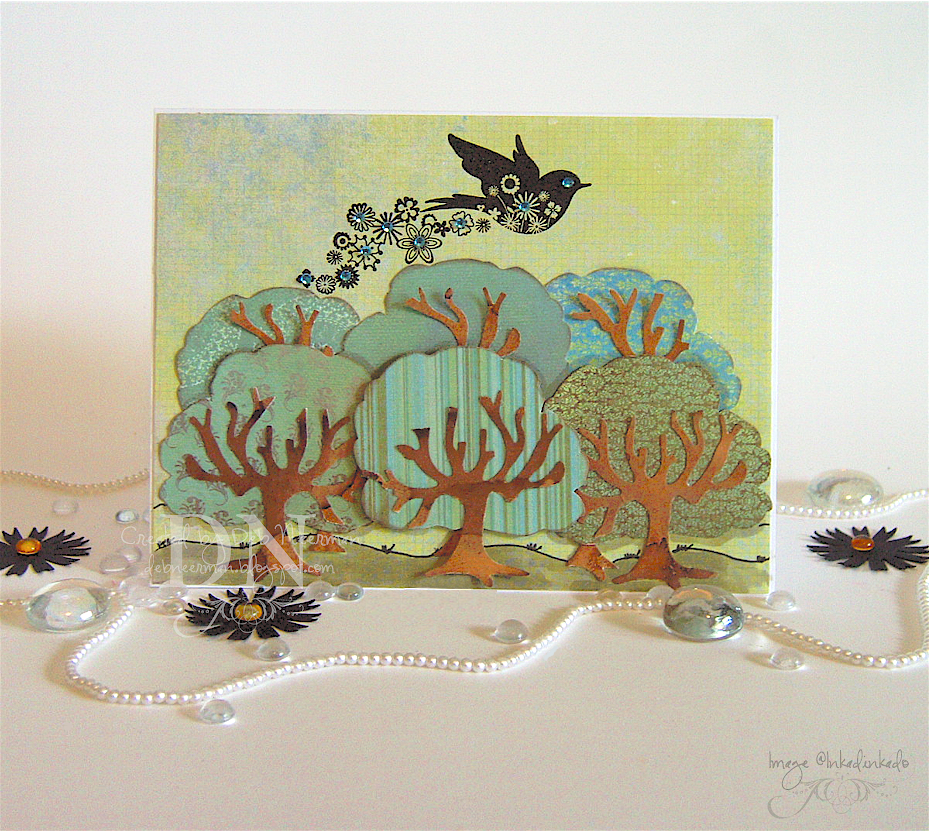
Today's card project was created for no good reason using craft punches and a kewl bird stamp from Inkadinkado. This is such a beautiful stamp, and so realistic, too ... 'cuz all birds fly scattering a trail of flowers and faux gemstones behind 'em! As always, for a closer look, simply clicky on the photo.

Using designer paper from Memory Box, I punched out six trees and using scraps of walnut-ink-stained card stock, I punched out the bare trees.

I adhered all my trees to my card stock base, matted with DP from Basic Grey, popping some of them up on dimensionals.

Using a lining pen, I drew in the ground line and some grass clumps (doesn't that look just like grass!?!), and added some shading with Copic marker W3.

Finally, I used a stamp positioner to stamp my bird using "Graphite Black" Brilliance ink, and added some rhinestone-bling.

Now, be honest, doesn't this scene look just like Central Park ... on LSD?!?

~Hugs,

PS: I've received a couple of emails from peeps askin' about my supply list. Lately, I haven't been including a list and, apparently, some of you actually enjoy seeing which supplies I've used in a project.

I'm happy to include it in my posts, but I'd really appreciate some feedback regarding supply lists ~ do you care, do you read them, or do you think they're a waste of both of our time and energy since you already have all this krap, too? Lemme know whatcha think, okeedokee? Thanks!

Card Stock: Papertrey Ink; Designer Paper: "Periphery" Collection by Basic Grey, "Inspire" Collection by Memory Box; Stamp: Inkadinkado; Ink: "Graphite Black" Brilliance by Tsukineko; Pen: American Crafts; Copic Marker; Tree Punch: Punch Bunch; Bare Tree Punch: McGill; Faux Rhinestones: Michaels (a gift from my pal, Anna); Walnut Ink: 7gypsies; Adhesives: Scrap Fusion PA by Ivy Scraps, Dimensionals: Unknown, Obtained in a Sticky Share

Saturday, July 19, 2008

Little Blessings Make Life a Joy ...

Pin It


Today's card project was created for no good reason except that I wanted to color it use this stamp! And speaking of this stamp, does anyone know who manufactured it? I've had it for-evuh and it's unmounted so I haven't a clue.

These designer papers were hangin' out on my worktable from a recent project and, since they had to be stowed away in my paper cupboard, I decided I'd rather use 'em than put them away. Talk about lazy craftin', huh?!? But if you ever saw my paper cupboard, you'd know exactly how much of a chore it is putting paper back in an organized fashion. And when I say "organized" I mean filing them by manufacturer and then by color. Just a little OCD'ish, huh?

I stamped my image on Xerox 110# card stock, then colored it in using Copic markers. Using a cloud template and Sky Blue fluid chalk ink, I added clouds behind the flyin' angel. You have to click on the image to see the clouds ... and even then they're hard to discern.

I cut out my stamped image with a die from Nesties Large Classic Ovals and matted it on lavender card stock using dimensionals.

Finally, I added a lavender binder clip, some 1/4" wide grosgrain ribbon, four brads, four photo corners and, finis!!

Thanks so much for sharing part of your day with me ... and have a great weekend: you deserve it!

~Hugs,


Card Stock: Bazzill, Xerox 110#; Designer Papers: Making Memories and Deja Views; Stamp: Unknown; Inks: "Black Soot" Distress Ink by Ranger, Colorbox "Sky Blue" Fluid Chalk Ink by Clearsnap; Color Medium: Copic Markers; Brads: Unknown, Found in Mt. Brad; Binder Clip: Unknown, Found in Mt. Binder Clip; Photo Corner Punch: Stampin' Up!; Die-Cut Machine: Provo Craft; Oval Dies: Nestabilities by Spellbinder's; Grosgrain Ribbon: Unknown, Obtained in a Ribbon Share; Dimensionals: Unknown, Obtained in a Sticky Share; Adhesive: Scotch ATG 714

Wednesday, July 9, 2008

On the Farm ... A "15 Minute" Project

Pin It


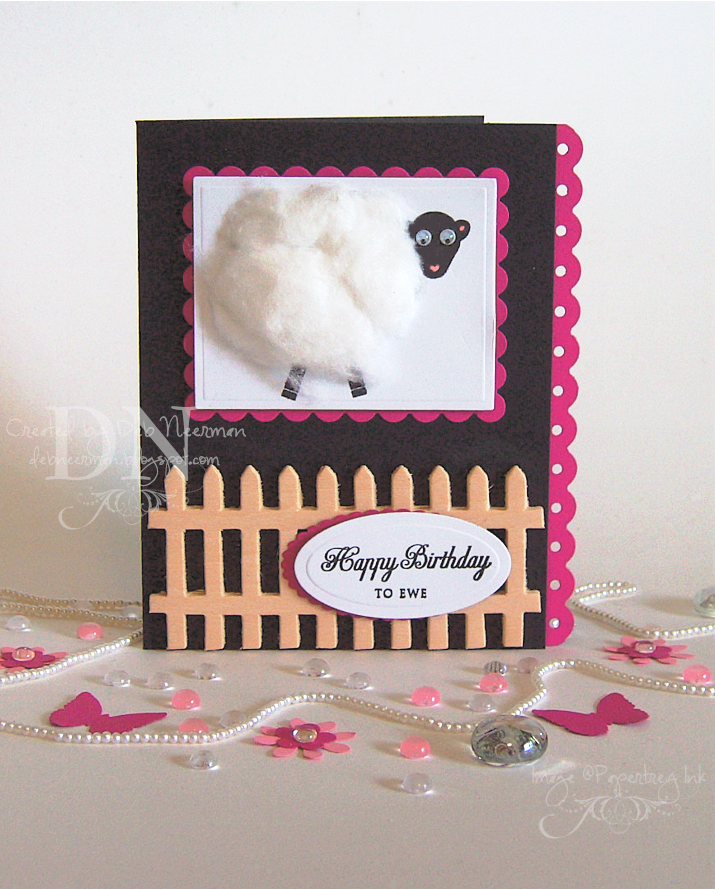
Today's "15 Minute" card project was created super-fast for the Caardvark's "On the Farm" challenge. This week, the 'Varks challenge called for a paper project created with a "farm" theme.

Using stamps from Papertrey Ink's "My Punny Valentine" collection, I stamped the sheep and the sentiment on Xerox 110# card stock.

I gave the sheep two googly eyes, some funky pink lips, and filled in her body with lots of fluffy cotton balls; that is one fat ewe, boys and girls!

The wooden fence was glued down to my Bazzill "Raven" card stock and I added a scalloped edge to the card using Fiskars' "Threading Water" border punch.

I cut a couple of fuchsia mats in the 'Bug, mounted them on black dimensionals and voila! A farm-themed birthday card ... just for 'ewe!'

Thanks so much for sharing part of your busy day with me; YKYR!!

~Hugs,


Card Stock: "Raven" by Bazzill, Fushia by DCWV, and Xerox 110#; Stamps: "My Punny Valentine" Collection by Papertrey Ink; Ink: "Black Soot" Distress Ink by Ranger; Color Medium: Copic Marker; Googly Eyes: Darice; Wooden Fence: Darice; Border Punch: Fiskars; Large Classic Rectangle, Large Scallop Rectangle, Petite Oval, Petite Scallop Dies all from Spellbinder's; Die-Cut Machine: Provo Craft; Adhesive: Scotch ATG 714 and "The Ultimate" by Api; Black Dimensionals: Unknown, Obtained in a Sticky Share

Tuesday, July 8, 2008

Make it Girly!

Pin It


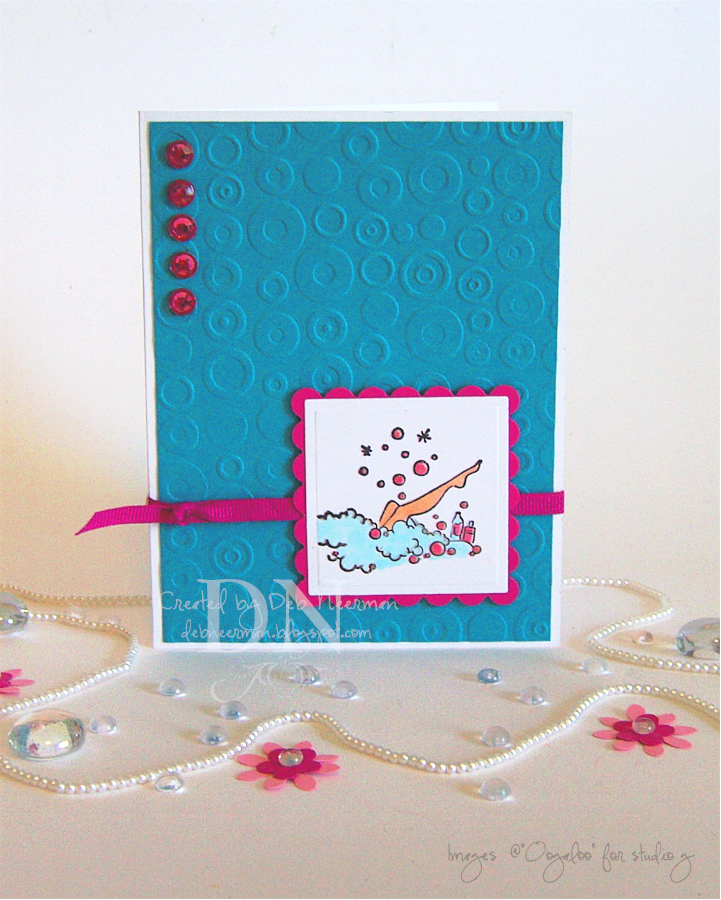
Today's "15 Minute" project was created for Sharon's "Make it Girly" blog challenge. This week, Sharon asked that we create a card that is "soft and girly." I chose this image 'cuz a bubble bath is pretty dang "girly" to me ... although I'm sure that lots of men indulge in a bit of the bubbly every now and then!

As always, for a ginormous larger view, simply click on the image.

I stamped my image on Xerox 110# card stock and colored it in with Copic markers. I added just a hint of glitter to some of the bubbles but I'm afraid it really doesn't show in my photo.

I used the "Spots and Dots" Cuttlebug embossing folder for my background, cut a scalloped-edge mat, tied a ribbon around and through the card, and added five sparkly rhinestones.

This card will go in to my stash; I'll stamp an appropriate sentiment on white card stock and mat it on matching card stock when needed. Easy-peasy and ready to serve in just 15 Minutes!

Thanks so much for sharing part of your busy day with me; YKYR!

~Hugs,


Card Stock: Xerox 110# and DCWV; Stamp: Oogaloo for studio g; Ink: "Black Soot" Distress Ink; Glitter Pen by Sakura; Rhinestones: Darice; Ribbon: Unknown, Obtained in a Ribbon Share; Embossing Folder: "Spots and Dots" by Provo Craft; Die-Cut Machine by Provo Craft; Large Classic Square and Large Scallop Dies by Spellbinder's; Adhesive: Scotch ATG 714 and Scrap Fusion by Ivy Scraps

Tuesday, May 27, 2008

Bird's of a Feather Flock Together ...

Pin It


I wonder who's responsible for that cliche? Well, yes, I 'spose I could Google it, but that was really more of a rhetorical question. And these birds actually do look like they'd hang together ... they'd have no choice: the other birds would either kill 'em or laff 'em outta town!

Anyway, today's card project was created for no good reason using a really neat stamp from Magenta. I stamped my image on Xerox 110# card stock then colored it using Copic markers ... wish I could see some improvement in my Copic coloring skillz but so far, nada. I added some detail to the bird's feathers with an extra-fine point white Sharpie paint pen.

I stamped my image a second time, colored three of the images, and used them to create cute little metal-edged tags using ... guess what: a Tag Maker!

I stamped my sentiment, tied a w-a-y bright orange grosgrain ribbon around the card, made a cute little bunny-ears bow, and was done! Easy-peasy and ready to serve in ... a half hour.

Don't forget to enter for a chance to win four kewl Diva Impressions stamps ... simply comment on the post below. And your chances are pretty dang good considering there's only about 20 comments!

Thanks so much for sharing part of your busy day with me!

~Hugs,


Card Stock Base: CutCard Stock; Other Card Stock: Xerox 110#, DCWV; Stamps: Bird Stamp by Magenta, Sentiment by Papertrey Ink; Dye Ink: Adirondack "Pitch Black" by Ranger; Color Medium: Copic Markers, Sharpie Paint Pen; Small Square Tags: Making Memories; Grosgrain Ribbon: Unknown, (Obtained in a Ribbon Share); Tag Corner Punch: Stampin' Up!; Tag Maker by Making Memories; Dimensionals: All Night Media; Adhesive: ATG 714

Saturday, May 24, 2008

Got Any Three's?

Pin It


I kill me ...

Today's card project was finally created for Allison's "Suggestive Sunday" challenge. This week, Allison challenged us to create a "manly" card. Ahhhh, the dreaded "manly" card ... the curse of the card maker!

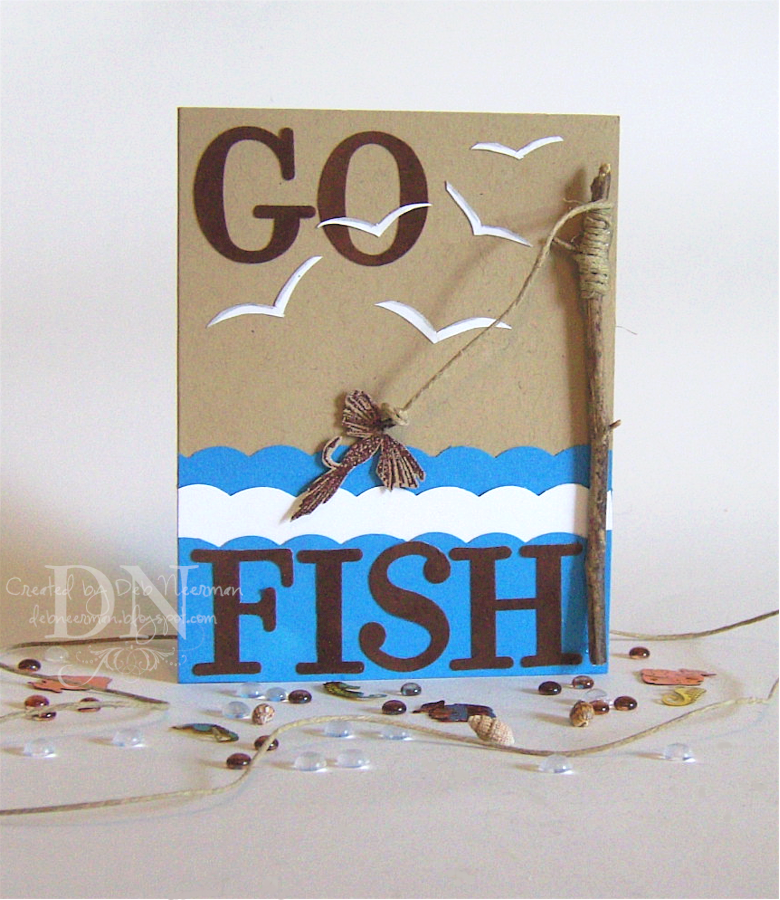
I stamped my fishing lure image with Versamark and heat embossed with "Java Jolt" embossing powder, then attached it to a length of natural jute thread using a jump ring. I recycled a twig from my yard for my "fishing pole" and wrapped the opposite end of the jute thread around the twig and glued it in place. I used slivers of dimensionals to mount the lure.

TIP: Always save the excess "stuff" after you've used up your sheets of push-out dimensionals. The remaining sheet of ... well, holes ... can be cut into tiny pieces to use on smaller projects.

My sentiment was created using Velvet Alpha stickers ... I think they're from Making Memories but don't have the original packaging so your guess is as good as mine. The "waves" were created with Fiskars decorative edge scissors and the sea gulls were cut freehand. What's that? They don't look much like sea gulls?!? LOLO, I'm not surprised, I can barely cut a straight line freehand! Oh, that little bit of grey along the top of the "wings" ... I applied just a hint of color using Copic marker W3.

Thanks so much for stopping by ~ and thanks so much for all your kind comments ... you guys make my day!!

~Hugs,


Card Stock: Bazzill, DCWV; Stamp: Unknown Maker; Ink: Versamark; Embossing Powder: Comotion; Copic Marker W3; Fiber: 7gypsies; Twig: Mother Nature; Velvet Alpha Stickers: Making Memories (I thin' ...); Adhesive: ATG 714; Dimensionals: All Night Media; Craft Glue: The Ultimate by Api

Thursday, May 8, 2008

It's a Girl's World After All ... a Blog Challenge Entry

Pin It


Today's 8" x 4" card project was created for Allison's "Suggestive Sunday" blog challenge. For this week's theme, "Girls of the World," Allison provided us with some really cute clip art images to use to create our entries. If you'd like to download this collection for your personal use, click HERE.

As you can tell, there's no stamping on this card. Here's a perfect project for all of you non-stampers ... I know you're out there!

I paper-pieced my girls by first printing out a copy of the entire sheet on regular text weight paper. Then, using an 80# sheet of white card stock, I held the printed sheet behind the card stock and determined the placement of my designer paper. Next, I simply taped my DP over the area where my selected images would print, and ran the prepared card stock through my printer. If I haven't explained this well, and I prolly haven't, please feel free to ask questions.

I cut out the clothing from the DP, colored my girls with Copic markers, and added some Stickles to each girl. You might have to click on the image to see it but it's there!

The background was created by running card stock through my 'Bug using Cuttlebug's "Perfectly Paisley" embossing folder. Because my paper was much longer than the folder, I simply ran it through once, flipped the card stock so that the non-embossed portion of the card stock was in the folder, and ran it through again.

Finally, I set some eyelets, ran some soft fibers through the set eyelets, and created a scallop border using a pair of Fiskars decorative edge scissors ('Clouds).

Tomorrow, I thin' I'll be posting some more Diva Impression rubber stamps to give away. Hope to see you back for that!!

~Hugs,


Card Stock: Bazzill, Cut Card Stock; Copic Markers; Clip Art Images; Designer Paper, American Traditional Designs, "Bohemian Chic" Collection; Decorative Edge Scissors: "Clouds" by Fiskars; Die Cut Machine: "Cuttlebug" by Provo Craft; Embossing Folder: "Perfectly Paisley" by Provo Craft; Dies: "Nestabilities" by Spellbinder's; Crop-A-Dile; Dimensionals: All Night Media; Stickles by Ranger Industries; Eyelets: American Craft; Fibers: EK Success, "Adornaments"

Saturday, April 19, 2008

15 Minute Project ... A Quick & Dirty Birthday Card

Pin It


My allergies are kickin' my butt today so this post will be short and sweet ... kinda like me!

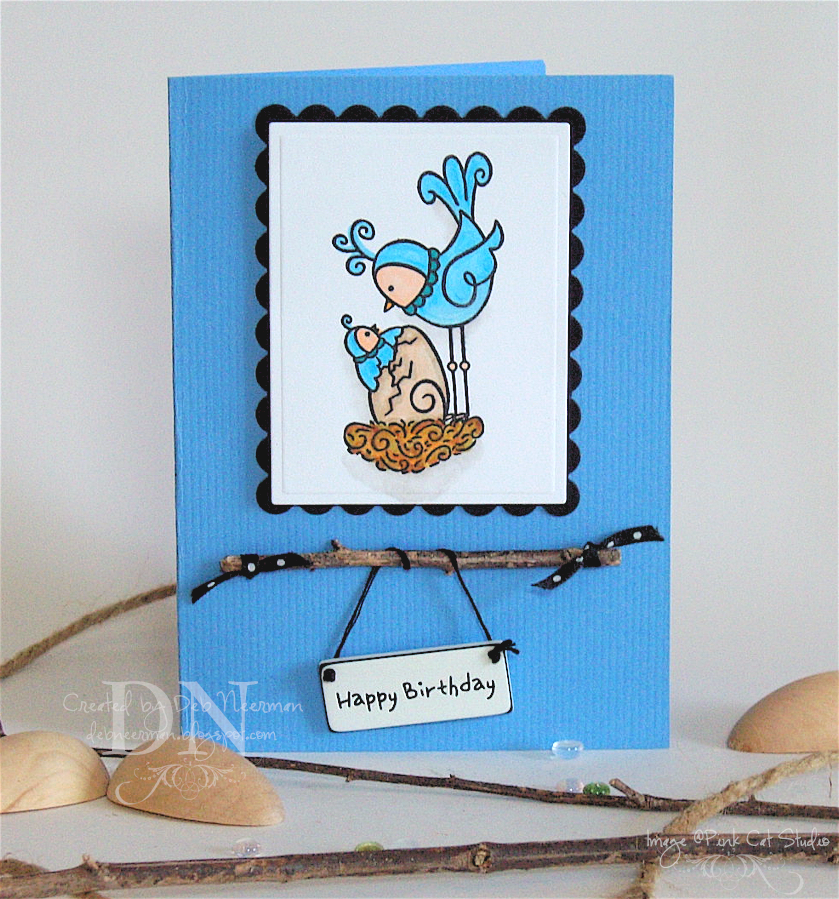
I stamped my image on Xerox 110# card stock, then colored it in with Copic markers. Using a W1 marker, I created a shadow behind and below the image ... which doesn't show at all in my photograph. The dang thing looks like it's suspended in mid-air! But, IRL, it's grounded with a very respectable shadow.

I tied this kewl little word license plate to a twig with embroidery floss, tied on some scraps of ribbon, then glued the whole shebang to my Bazzill card stock base.

Easy-peasy and ready to serve in just 15 Minutes!

Thanks for sharing part of your busy weekend with me ... and I hope that your tomorrow (and mine!), is allergy-symptom-free!

~Hugs,


Ingredients: Card Stock: Bazzill, Xerox 1003; Stamp: Pink Cat Studio; Ink: Palette Hybrid; Copic Markers; Twig: Mother Nature; License Plate: Unknown; Embroidery Floss: DMC; Ribbon: Michaels; Adhesive: Scotch ATG; Dimensionals: Fiskars; Cuttlebug Die-Cutting Machine; Spellbinder's Nestabilities Dies

Wednesday, April 9, 2008

15 Minute Project ... Vintage-Inspired Anniversary / Wedding Card

Pin It


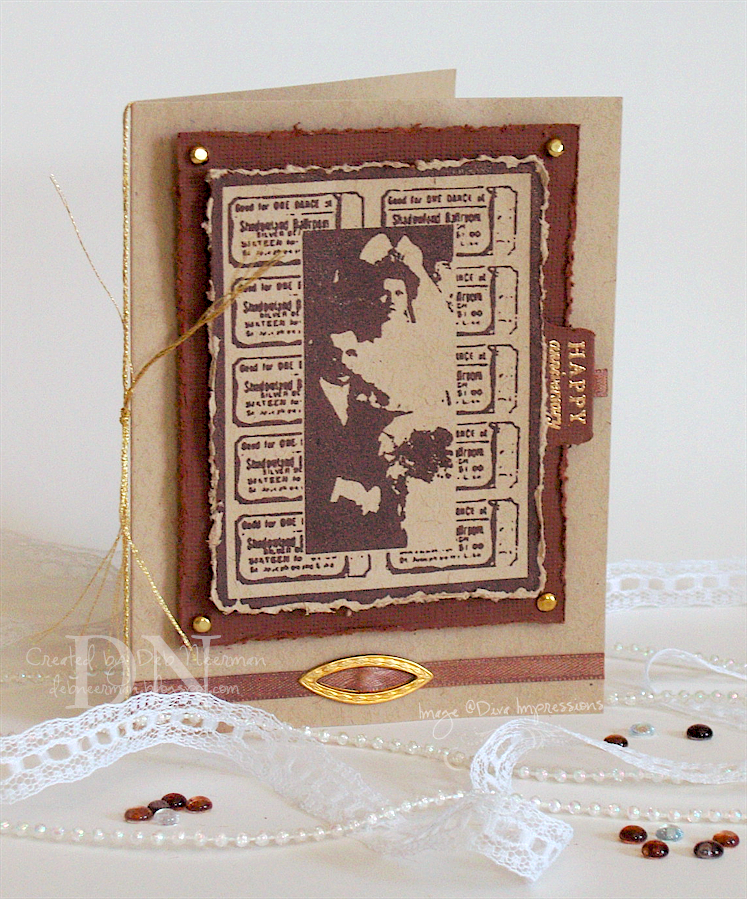
Today's vintage-inspired "15 Minute Project" was created in a flash using card stock, ribbon, some gold embellies, and two stamps.

This uber-kewl stamp was purchased HERE from Diva Impressions ... let me just say that I love these stamps and the quality is second-to-none. And no, I don't design* for them or have any other affiliation with Diva Impressions; I'm just a fan.

I stamped the central image in brown ink on Kraft card stock, trimmed and distressed the edges with my .99 edge distresser, then mounted the stamped image using dimensionals. I also distressed the edges of the dark brown mat, added four gold brads, and mounted the whole shebang on my card front using dimensionals.

Using watermark ink, I stamped my "Happy Anniversary" sentiment on card stock punched out using a round file tab punch; then embossed with fine detail embossing powder.

I didn't have any ribbon that exactly matched my ink, so I used a sepia Copic marker to color a length of white, 1/4" wide satin ribbon. I folded over a teeny scrap and adhered it to the back of the file tab. I slipped the same ribbon through a gold ribbon slide and adhered 'em both to my card front.

Finally, I added a little shine by tying some sparkly gold embroidery fiber around the fold of the card.

Easy peasy and ready to serve in just 15 Minutes!

Thanks so much for spending part of your busy day with me!

~Hugs,


Card Stock: Bazzill; Stamps: Wedding (Diva Impressions), Sentiment, (Papertrey Ink); Ink: Versamark, Palette Hybrid; Copic Marker; Embossing Powder: Ranger (Queens Gold); Embroidery Floss (DMC); Brads and Ribbon Slide (Unknown, found in Mt. Metal Embellies); Ribbon: (Unknown); Edge Distressing Tool (Heidi Swapp); Dimensionals (Fiskars)


*Guess I spoke too soon!! Since this project was posted, I've been invited to design for Diva Impressions; and I said yes!! Thanks so much, Beth!

Tuesday, April 8, 2008

CASE a Bloggin' Sistah ... a Blog Challenge Entry

Pin It


Today's card project was created for Allison's "Suggestive Sunday" blog challenge. This week, Allison asked us to CASE a bloggin' sistah; I knew in a minute that I would CASE a card created by one of my very favorite bloggers and artists, Shannan Teubner. If you haven't visited Shannan's so-inspiring-and-so-much-fun blog then get movin' cowgirl! Do it now and then come back.

Back? Where were we? Oh, yes, Shannan. Shannan is uber-talented, honest and open, modest, warm, and very friendly. Bein' that I'm kind of a 'newbie', Shannan has gone out of her way to make me feel welcome on SCS and beyond. I always get a kick outta visiting Shannan's blog and gawkin' at her incredible projects; you will too! Oh, and Shannan also happens to be one of the funniest writers in Blogdom. I always come away from her blog with a big ole' grin ... it's unavoidable, she's that much fun!

It was difficult to settle on one card, but in the end, I chose THIS card to CASE.

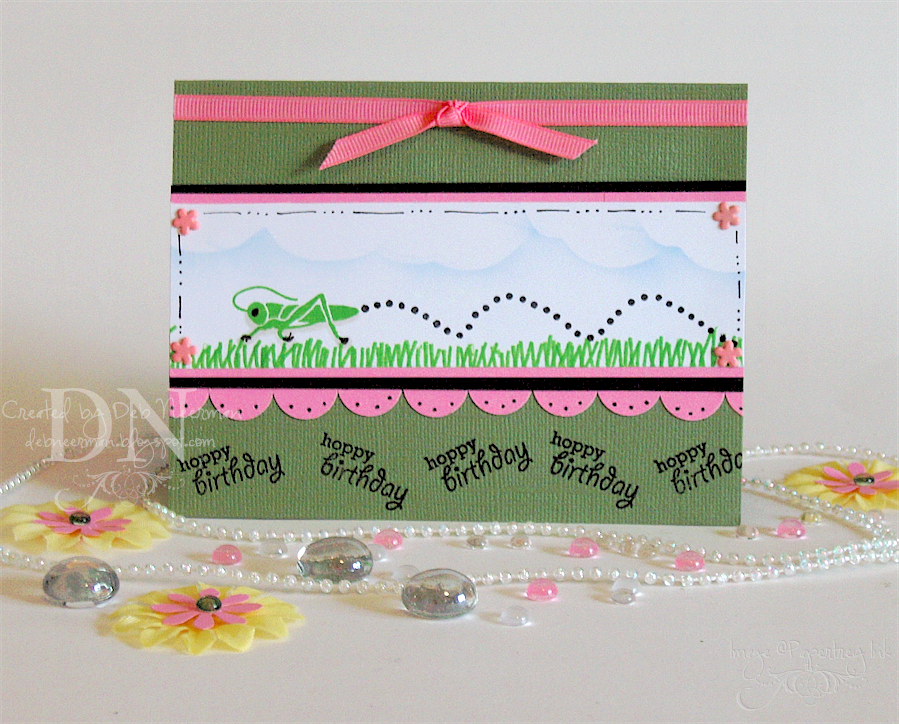
I added the card stock elements and then created my focal image on Xerox 110# card stock. First, I created clouds based on Jessica's uber-kewl cloud tutorial ~ so easy and fun! I think my first attempt came out pretty well ... so, thanks so much Jessica; this tutorial is a keeper!

Using stamps from PTI's "Green Thumb" collection, I stamped my grass and the grasshopper and switched over to PTI's "Little Lady" collection to create the hoppy-trail. Using Copic marker W1, I created a shadow under my grasshopper ... but I'm afraid it doesn't show up too well in my photo. INR though, it looks pretty kewl ... come 'on over and check it out!

I used a fine point black marker to draw some details on my grasshopper and the dots-and-dashes border, then added four pink flower brads and was done!

I love this card ... thanks so much Shannan!!!

I also wanted to show you this kewl Award I received from Kisa! I just recently discovered Kisa's blog ... she is so sweet and very talented; she's sure to go far in the stamping world ... click HERE to visit her blog.


Apparently, there's quite a list of rules that go with winnin' this Award ... one of which is to pass the Award on to five inspiring bloggers. Let me tell ya, there's no way I can narrow it down to five bloggers. Heck, I mentioned four wonderful bloggers just in this post! So, to the 8,743 other stampin' bloggers I love and call my friend, here ya go!!

The other requirment is to post a link to the originating blog: so, click HERE to visit Arte y Pico. I don't understand a word of it, lol, but I'm sure it's all good!

Okay, I'll stop now. I think this is the longest post I ever blogged ... and for me, that's really sayin' something!

Thanks so much for sharing part of your busy day with me!

~Hugs,


Card Stock: Bazzill, DCWV, Xerox 110#; All Stamps: Papertrey Ink; Inks, Brilliance , Palette Hybrid, Staz-On; Marker, American Crafts; Copic Marker

Wednesday, April 2, 2008

15 Minute Project ... and a "Floral" Blog Sketch Challenge

Pin It


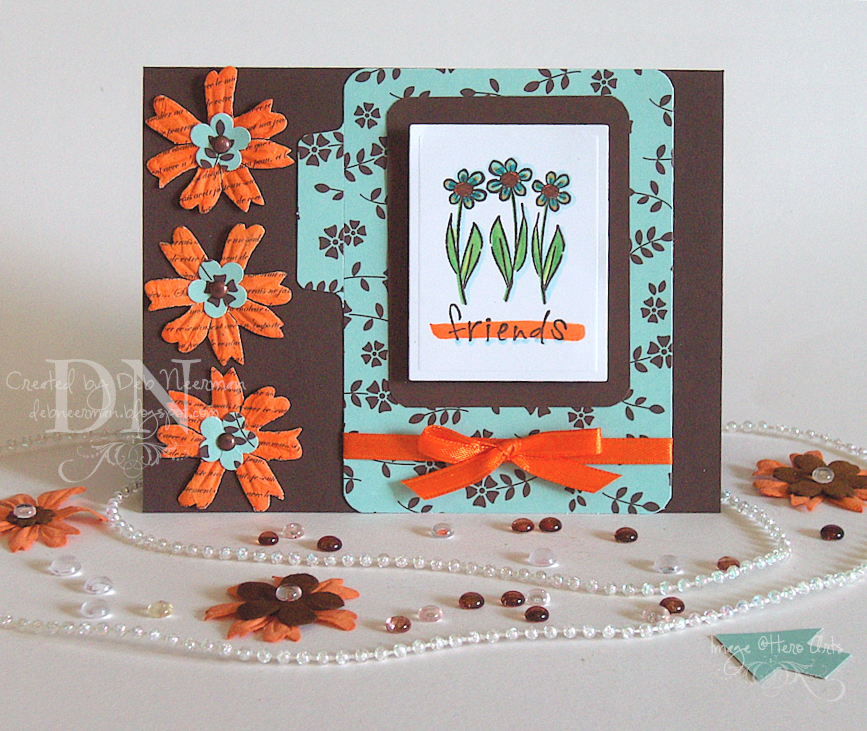
Today's "15 Minute" card project was created for Lizzie Anne Designs weekly sketch challenge. I love participating in these challenges as the girls always throw in an extra "twist." This week, in addition to following a sketch, you also had to incorporate florals in your project.

My floral image was stamped on Xerox 110# card stock, colored with Copic markers, and cut with a Nestie in the Cuttlebug. I added some orange ribbon and a mini file-folder die cut from October Afternoon's "County Fair" collection.

In keeping with the sketch, I removed the file tab from the right hand side of the die-cut and reattached it to the left side of the file folder.

In not keeping with sketch, I added three paper flowers on the left. Really, I had too ... that wide, empty space just sat there, staring at me. So, I caved and filled the emptyness with some handmade and Prima flowers, and three antique copper brads.

Easy-peasy and ready to serve in just 15 Minutes!

Thanks so much for sharing part of your busy day with me ~ and thanks for all your kind comments; I really appreciate receiving them from you!

~Hugs,


Xerox 110# Card Stock; Stamp: Hero Arts, Ink, Staz-On Timber Brown; Copic Markers, Prima Flowers, Designer Paper, October Afternoon, "County Fair" Collection; Ribbon, Offray, Brads, American Crafts