Friday, September 5, 2008

You Look Familiar; Did We Go To Different Schools Together?

Pin It


Hey, everyone, it's "Be Late for Something Day!" Well, you can count on me to do my part: I've been late all day!

ONward Hoarding-Card-Makers:

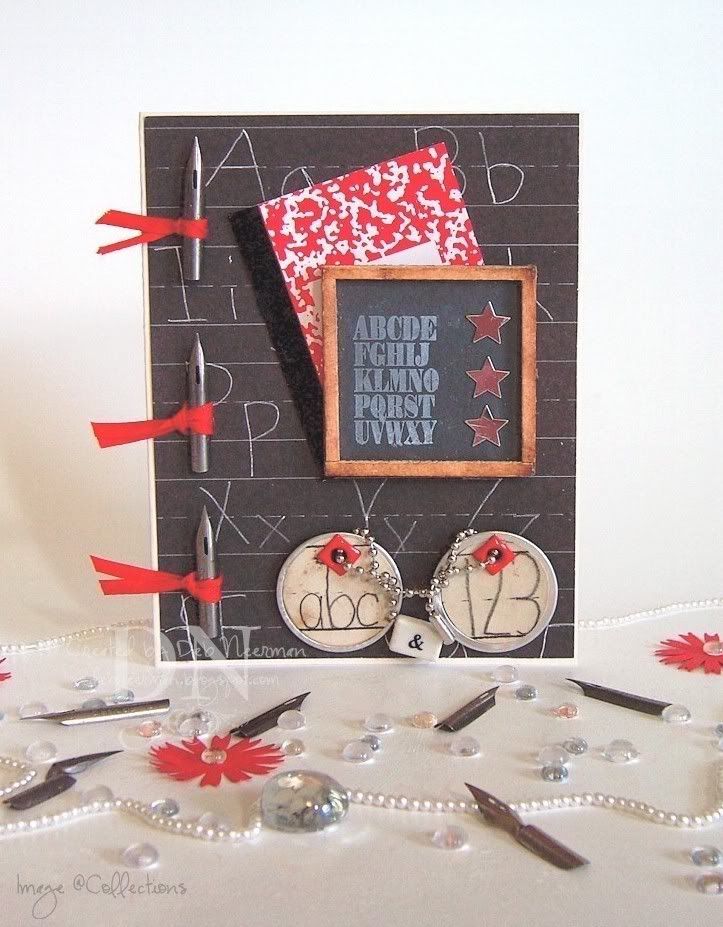
Today's card project was created for Allison's "Suggestive Sunday" blog challenge. This week, Allison's theme is "back to school." Yikes, please don't make me go!

I stamped my alphabet image on this cute l'il blackboard using Pigment ink and heat set.

I covered my card base with some kewl old Rusty Pickle chalkboard paper, added the cover from a little composition notebook, and adhered two metal edge tags connected with ball chain.

Finally, I tied ribbon around three vintage pen nibs and added some silver stars to the chalkboard.

And I'm not really opposed to going back to school ... it's just the principal of the thing!

Thanks for swingin' by ... and don't forget, you've only got a few more hours to get your Y.ou K.now Y.ou R.ock "Heavy Metal" challenge entry posted!

~Hugs,

  • Card Stock: Papertrey Ink
  • Designer Paper: Rusty Pickle
  • Stamp: "Alphabet" by Collections
  • Ink: Colorbox Brush Pigment Ink
  • Accessories: Mini-Composition Notebook; Wooden Chalkboard; Silver Stars; Eyelets; Ball Chain; Ambersand Bead; 1/8" Ribbon; Vintage Pen Nibs
  • Tools: The Ultimate Glue; Scrap Fusion PA

Thursday, September 4, 2008

Collections: I'm Takin' One Up ...

Pin It


Happy "Newspaper Carrier Day!"

And Jim, if you're reading this, what say in honor of the day you actually deliver the paper here; you know, at the house of the people who pay you. Please? Maybe just this one time? The other neighbors are gettin' tired of delivering our paper for you. Thanks. Your tip? Oh, yes, here's one: don't breathe under water.

ONward Hoarding-Card-Makers!

While diggin' around in my studio (literally), I came upon a box of vintage glass slides. I knew I had 'em ... my BFF had sent them to me months ago. I just didn't know where I had 'em, lol! Now that I had 'em in my hot l'il hands, I decided it was time to use 'em.

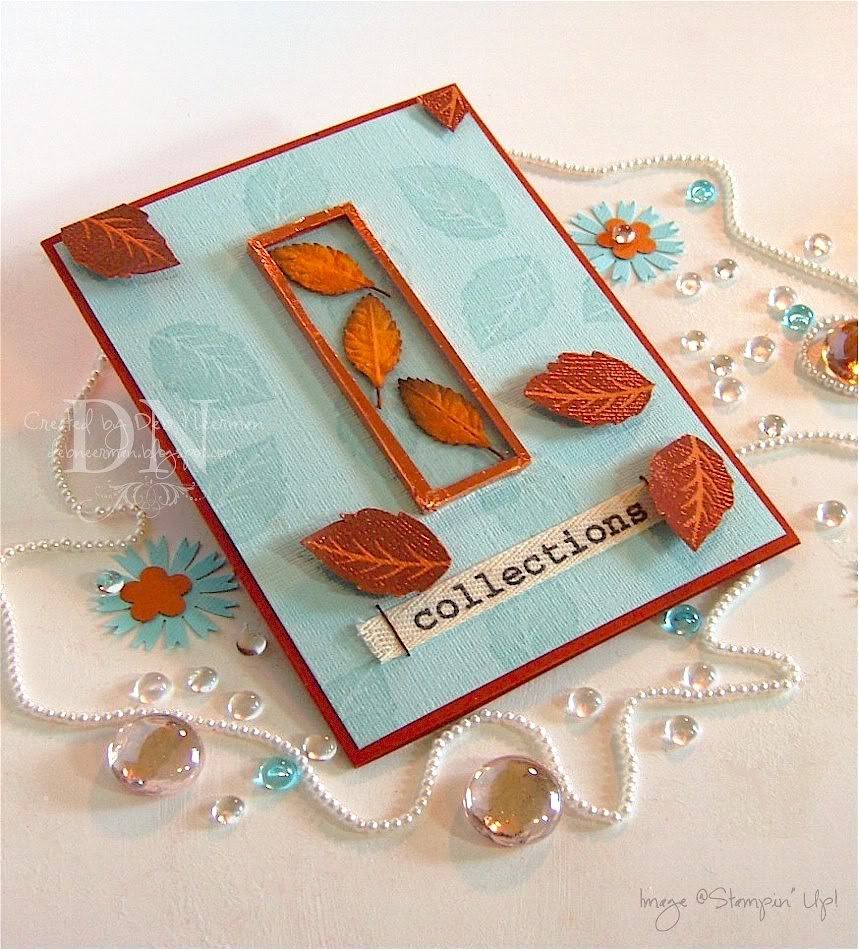
I adhered some some paper leaves to one slide and covered them with a second slide, then sealed the slides together using copper foil tape.

Using watermark ink, I stamped a leaf on textured card stock, then stamped the same image on rust colored textured card stock. Those I heat embossed, then cut them out and popped them up on dimensionals over some of the watermark inked ones.

TIP: When you stamp your image on card stock with watermark ink, apply a duplicate image over the first image using dimensionals. You'll create beautiful depth and shadows. Don't be afraid to experiment with watermark ink, it does w-a-y more than hold embossing powder!

I adhered the prepared slides to the card front using vellum dots ... kinda tricky to get on the glass, but once there, they held fast and are completely invisible. If you haven't already, you need to try vellum glue dots; they work on lots of surfaces, not just vellum.

Finally, I adhered my twill ribbon to the watermarked card stock using copper staples.

Super-simple to create and surprisingly light ... tastes great, less fillin'!

Hey, that reminds me! Last night for a splurge, the DH and I went to our favorite French restaurant for dinner. As we waited for our salads, a scruffy looking guy walked in.

Immediately the maitre d' appeared and we heard him say, "I'm sorry, Sir, but you can't come in here without a tie." The guy grumbled and complained, but left.

Not five minutes later he returned with a pair of jumper cables wrapped around his neck. The maitre d' studied him for a moment and then said reluctantly, "Okay, you can come in, but don't start anything."

Seriously.

~Hugs,

  • Card Stock: Bazzill Basic
  • Stamp: Stampin' Up!
  • Ink: Versamark
  • Accessories: Vintage Glass Laboratory Slides; Copper Foil Tape; Paper Leaves; Twill Ribbon; Copper Staples
  • Tools: Heat Gun; "Penny Copper" Embossing Powder; Bone Folder; Dimensionals; Vellum Glue Dots
Wednesday, September 3, 2008

And It's a Cereal Too ...

Pin It


Today's card project was created using stamps and designer papers from Close to My Heart ... and some vintage ephemera from my vast collection. Well, it's more like half-vast ...

I kill me ...

ONward Hoarding-Card-Makers!

I stamped the distressed fishes on a scallop border cut from a page in a book published in 1894, then embossed with Distress embossing powder.

The sentiment was stamped on Vintage Cream card stock with "Timber Brown" Staz-On, cut out with a Nestie and mounted with dimensionals on the brown card stock.

I looped natural jute around the card, and adhered it to my card using silver prong studs. I tied more jute around the rows, frayed the ends, and finis!

Okay, I made a startling math discovery today. Frankly, it was pretty startling to find myself even thinking about math, but ... Okay, here it is:


  1. "Squirrels" x "Hoard" = Nuts (a x b = c)
  2. "Stampers" x "Hoard" = Nuts (a x b = c)
Now I remember next to nothing about math but I DO remember being taught that math is a science, an exact science. Uh oh, the DH can't be right:

  1. Me: "OMiGosh, I love that new BasicGrey collection; I simply HAVE to have it!!"
  2. DH: "You're gonna buy MORE paper? You don't even use the paper you already have!"
  3. Me: "But this is different paper; I don't have any of this paper!"
  4. DH: "Okay. Tell me what you're goin' to do with THIS particular paper?
  5. Me: "Umm, well, I'm not sure right now but I'll definitely use it. A lot!"
  6. DH: "No, you won't, you'll hoard it."
  7. Me: "Ummm ... "
  8. DH: "You're nuts."

Well, we may be nuts, but we're cute, right?!?

Thanks so much for spending part of your busy day with me; you rock!!

~Hugs,

  • Card Stock: Papertrey Ink
  • Designer Paper: "Perfect Day" by Close to My Heart
  • Stamps: "Relax" Collection by Close to My Heart
  • Ink: Distress Embossing Ink; "Timber Brown" Staz-On; Fluid Chalk Ink
  • Accessories: Silver Brads; Natural Jute; Silver Prong Studs; Distress Embossing Powder
  • Tools: Die-Cut Machine; Nestabilities Dies; Slit Punch; Threading Water Punch; Scrap Fusion PA; Dimensionals
  • Other: Vintage Ephemera

Tuesday, September 2, 2008

Dare to B Fabulous! Not You, Though: YOU Already Are ...

Pin It


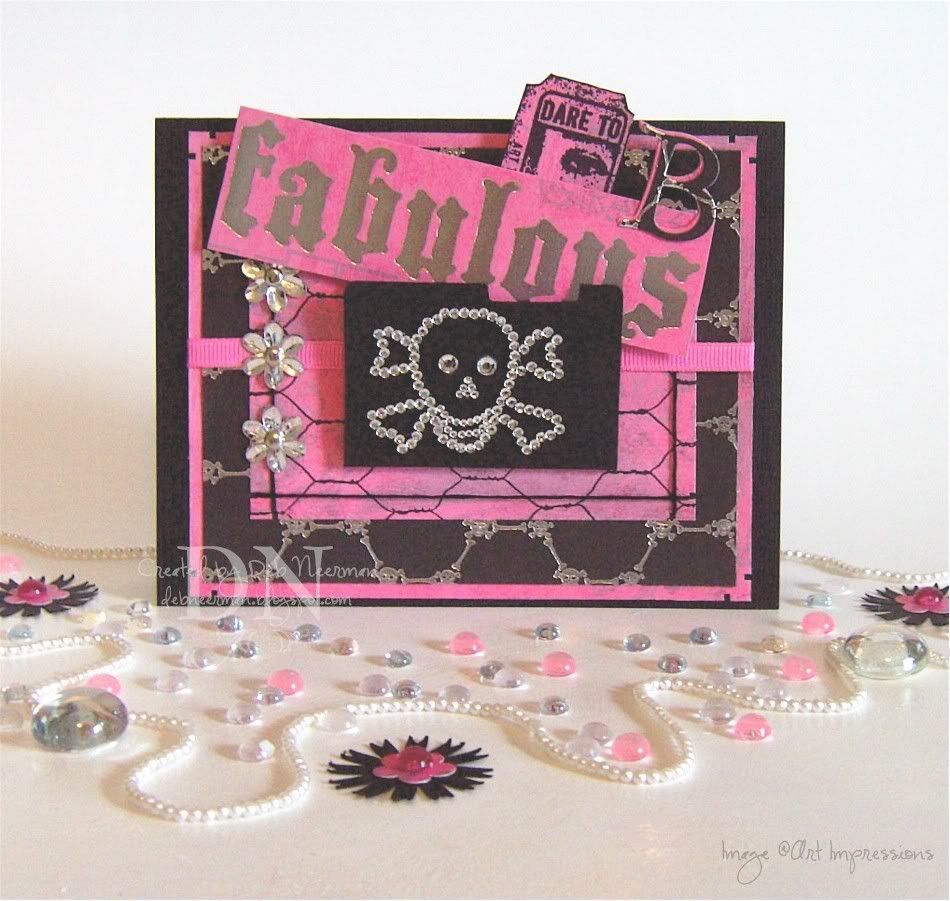
Today's card project was created for the "Stamping Challenges to Love" bling challenge, but I got distracted, (oh, look, something shiny!), and didn't get it posted in time. So, I'm sharing it with you. Just you.

All the DP used here is from DCWV's "Rock Star" collection ... a kewl collection to have kickin' around; especially if you have teenagers. 'Cuz this is like, "rad" ... or something ...

ONward-Hoarding-Card-Makers:

There's nothin' better than a multi-purpose greeting card: I could send it to any one of you, my fabulous imaginary friends, OR use it as a girly-girl Halloween card. I {heart} this kewl skull bling from MAMBI; I also {heart} the glitzy-and-shiny flowers from the always amazin' Mel. I also {heart} Mel. What I don't {heart} is applyin' these four-part, self-adhesive skulls ...

The chicken wire stamp is from Art Impressions and the ticket stamp is a self-mounted job I snagged years ago on eBay. I think it's from Limited Edition but I wouldn't bet my bling on it ...

I mounted the skull bling on a black mini-file folder, die cut two "B" letters, notch-punched the corners, clipped the word from the DP, added some ribbon, and mounted everything on dimensionals. [breathe ...]

Okay, now this is scary: today is "National Beheading Day!" Yikes, I sure hope they mean marigolds!! Ummm, does anyone besides me think it's spooky that I posted a skull on National Beheading Day? I honestly didn't know that when I started this post ... honest! No, really-honest-honest!

On that cheerful note, I'll take my leave ... I hope you'll be-headin' back to my blog again tomorrow!

~Hugs,


  • Card Stock: "Raven" by Bazzill Basics
  • Designer Paper: "Rock Star" by DCWV
  • Stamps: "Chicken Wire" by Art Impressions; "Dare Ticket," Unknown
  • Ink: Black "Jet Black" Archival (My New Favorite Black Ink ... thanks Anna!)
  • Accessories: Skull Bling by MAMBI; Glitzy Flowers; Grosgrain Ribbon; DMC Embroidery Floss; Silver Brads
  • Tools: Die-Cut Machine; Alphabet Die; Mini-File Folder; Notch Punch; Glue Pen; Scrap Fusion; Dimensionals

PS: I'm continuing to add stamps, stamping catalogs, and stamping magazines to my eBay store. I've also just listed an unmounted pop-up template for making fun pop-up cards! Most auctions start at just .99, and shipping is very reasonable. If you're interested in purchasing stamps ( ... interested?!?), you just might find a treasure. Click HERE to check 'em out ... my homeless stamps thank you.

Monday, September 1, 2008

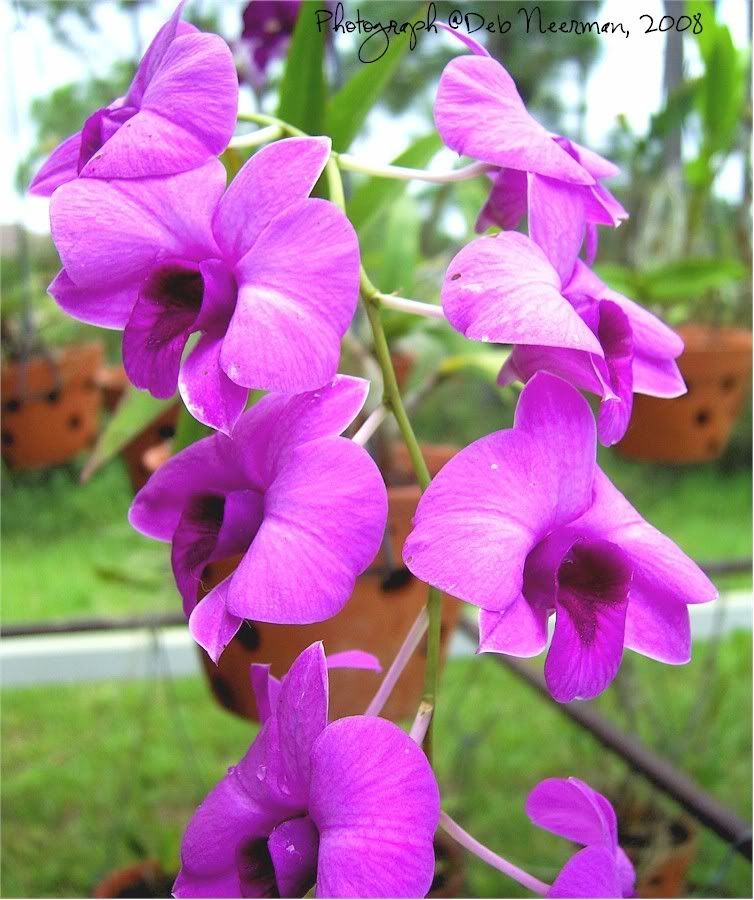
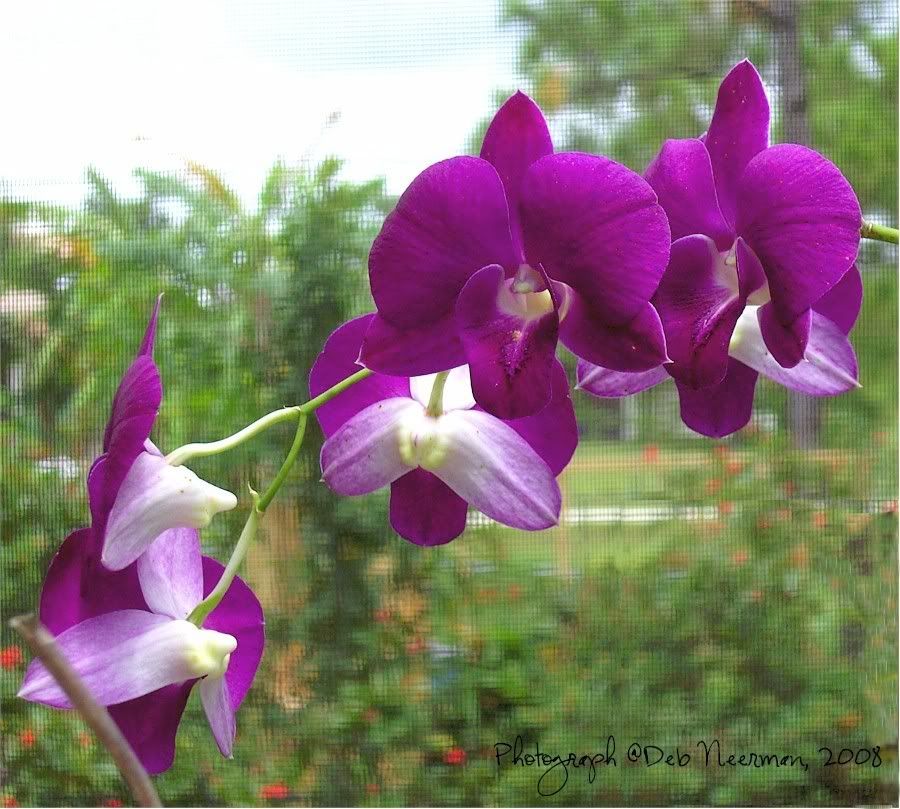
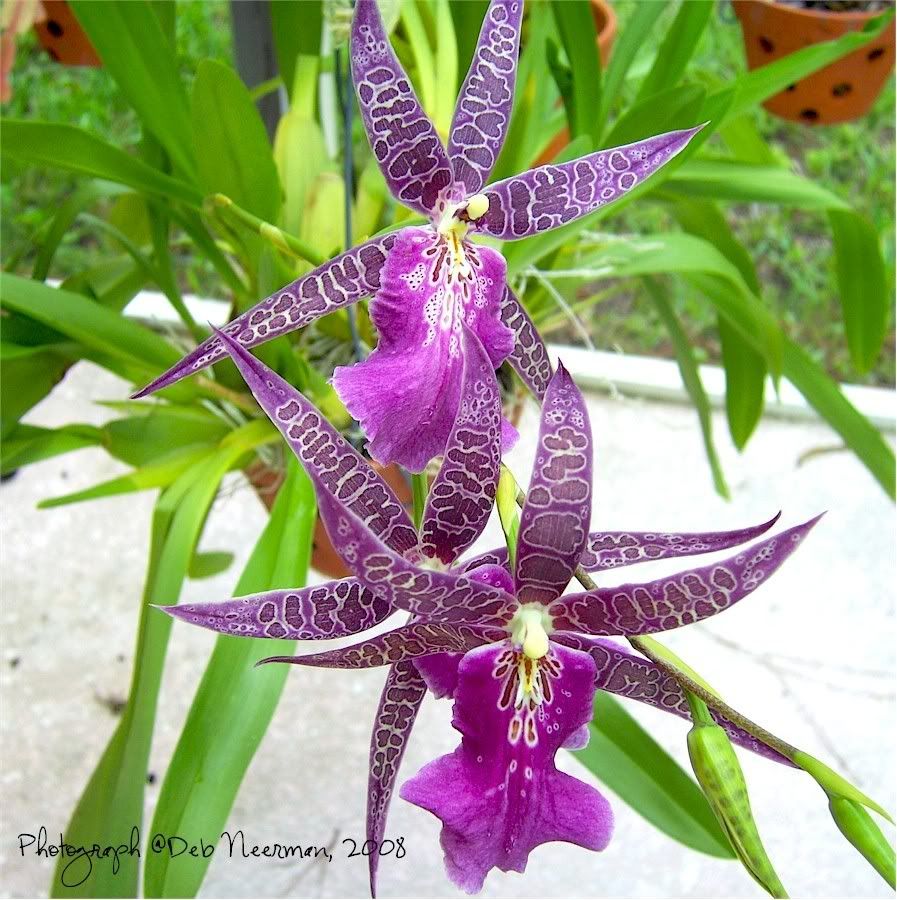
Hey, Wanna Meet My Kids?

Pin It


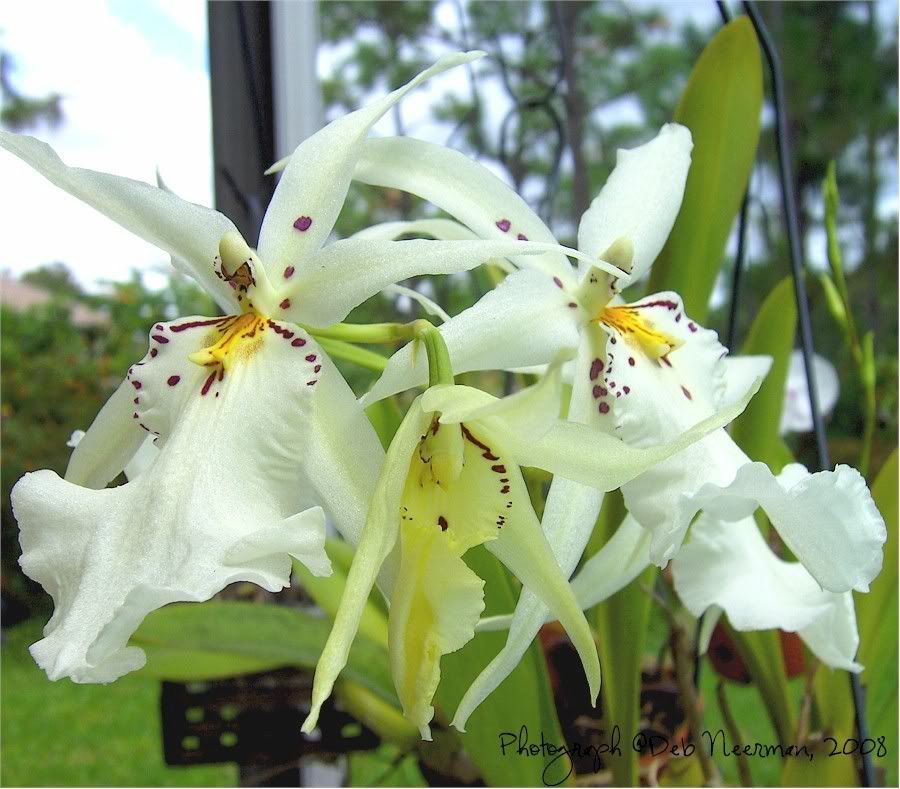
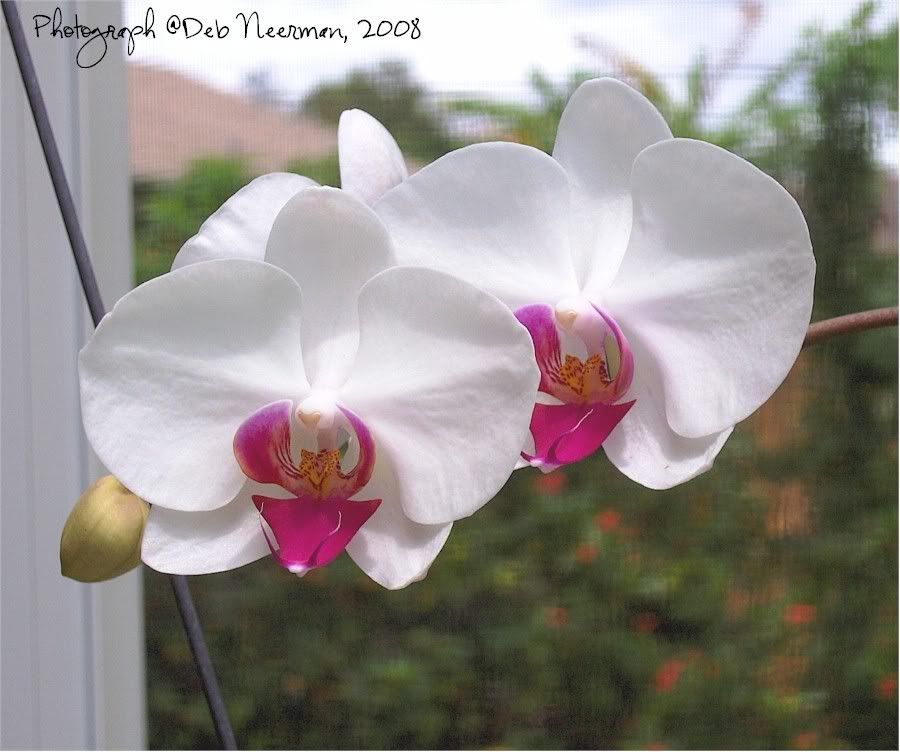
This ^ is Babette; she's my oldest ...


And this l'il cutie ^ is Marjorie ... she's really startin' to blossom!


This ^ is Rain ... I named him after The Artist Formerly Known as Prince. See the purple rain on him?


This ^ is Ginger; she's bouncing back nicely from a terrible accident involving a giant tree frog.


This ^ smokin' hot redhead is Rosie ...


This ^ is Kitty; she's the baby of the family. Isn't she purty?!?!

Anyway, I hope you enjoy my baby pix. It's monsoon season down here so the kids are expressing their appreciation by throwin' lots of buds. As always, you can click on the images for a ginormous photo.

In other family news, the DH is really lovin' our new water bed! Me? I dunno; the bed is comfy but I feel we're drifting apart ...

~Hugs!

Sunday, August 31, 2008

Is That a Wide Ribbon or are You Just Glad to See Me?

Pin It


Happy National Trail Mix Day! So, I was stunned to discover that most people don't use trail mix for it's intended purpose: to leave a trail to follow back to your car. Well, why even buy it then? And it's not like it's a big secret ... read the label people: "TRAIL mix" ... Duh!

ONward-Hoarding-Card-Makers!

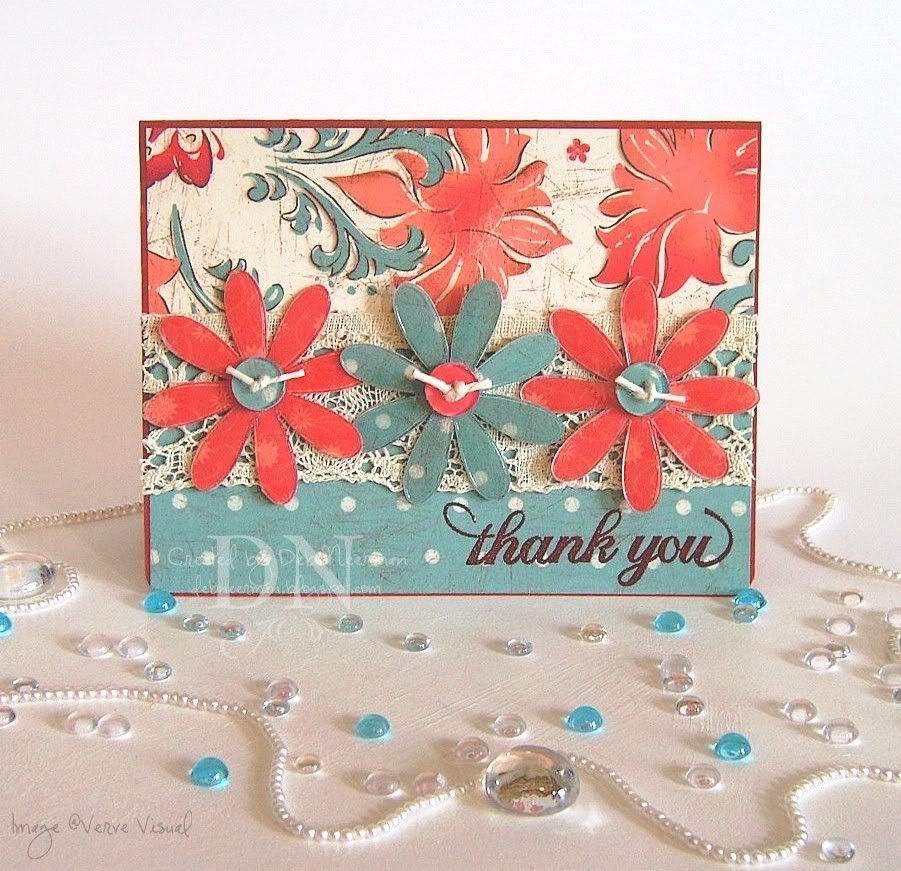
Today's card project was created for Allison's "Suggestive Sunday" blog challenge. This week, Allison challenged us to use wide ribbon on our paper creations. Technically, I'm in default as I've actually used a wide scrap of vintage handmade lace. What the heck, as long as I don't tell anyone, I bet no one will even notice ...

I covered my card base with gorgeous DP from Close to My Heart ... I really and truly {heart} this collection and plan on hoarding buying more. Click on the image for a closer look at this beauteous patterned paper.

I stamped my sentiment with Versamark, then heat embossed using Bright Chocolate Brown powder.

Finally, I covered the paper seam with my controversial vintage lace-ribbon, then covered three Heidi Swapp Ghost Flowers with more paper from this collection. Umm, I actually covered the paper with the flowers but that's just a minor craftin' technicality. I did the same with my clear buttons, knotting some natural twine through the holes, and finis!

So, last night, as I lay gazing up at the stars, I thought, "where the hell is my roof?!?"

Thanks so much for spending part of your busy holiday weekend with me; you rock!

~Hugs,

  • Card Stock: Lasting Impressions
  • Designer Paper: Close to My Heart (CTMH)
  • Stamp: Verve Visual
  • Ink: Versamark
  • Accessories: Embossing Powder by Comotion; Clear Buttons; Heidi Swapp Ghost Flowers; Natural Twine; Vintage Handmade Lace
  • Tools: Heat Gun; Scrap Fusion PA; Mini-Glue Dots; Hey, is Anyone Actually Readin' This?

Saturday, August 30, 2008

Punch a Crow, Stamp a Crow, Counting Crows ... a 15 Minute Project

Pin It


Happy Toasted Marshmallow Day! And anyone who says, "anything is possible," hasn't tried to strike a match on a marshmallow ... toasted or otherwise.

ONward-Hoarding-Card-Makers!

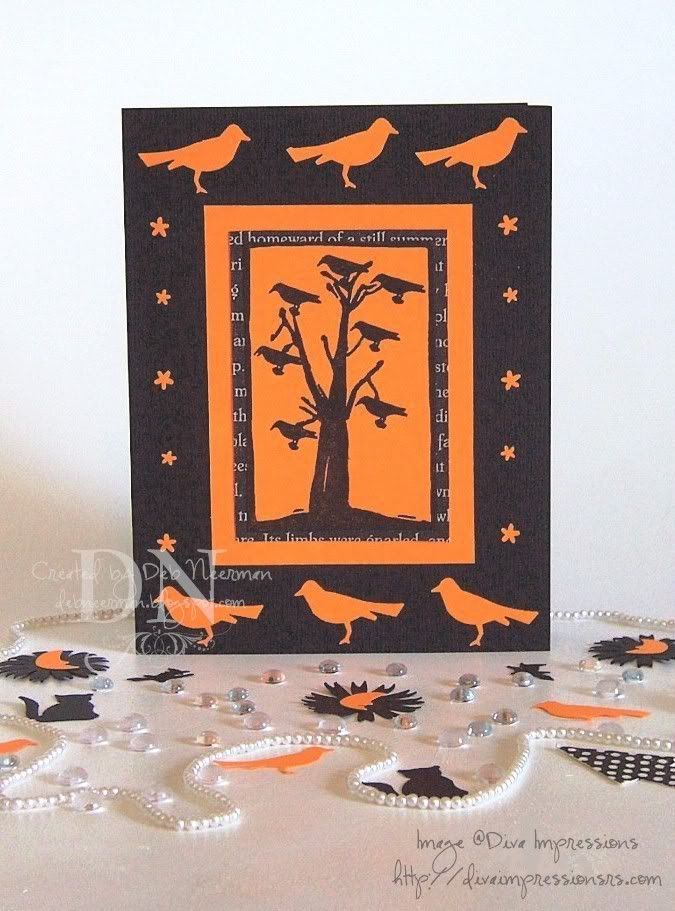
Today's 15 Minute Project was created in a flash using my favorite craft tool: punches! Or, in this case, punch!

I stamped my image, available HERE, on DCWV card stock, and double matted it.

Then, I punched out six birds with my bird punch, which also punches out those cute l'il star/flower shapes, and adhered everything down on my card base.

Easy-peasy and ready to serve in just 15 Minutes!

Cute story to share with you: The little boy next door found a dead bird in his yard and asked me if I'd attend the "funeral." Of course, I agreed.

As we solemnly stood by, Adam officiated. As he laid the bird's tiny "casket" into the hole, he prayed, "Glory be unto the Faaaather .... and unto the Sonnn .... and into the hole he gooooes."

Now go toast a marshmallow or two!

~Hugs,

  • Card Stock: DCWV; Bazzill Basics
  • Patterned Paper: Rusty Pickle? Junkitz?
  • Stamp: "Tree Full of Crows" by Diva Impressions
  • Ink: Brilliance "Graphite Black" by Tsukineko
  • Tools: Bird Punch by McGill; Scrap Fusion PA by Ivy Scraps

Friday, August 29, 2008

Have a Nice Trip? See Ya Next Fall ...

Pin It


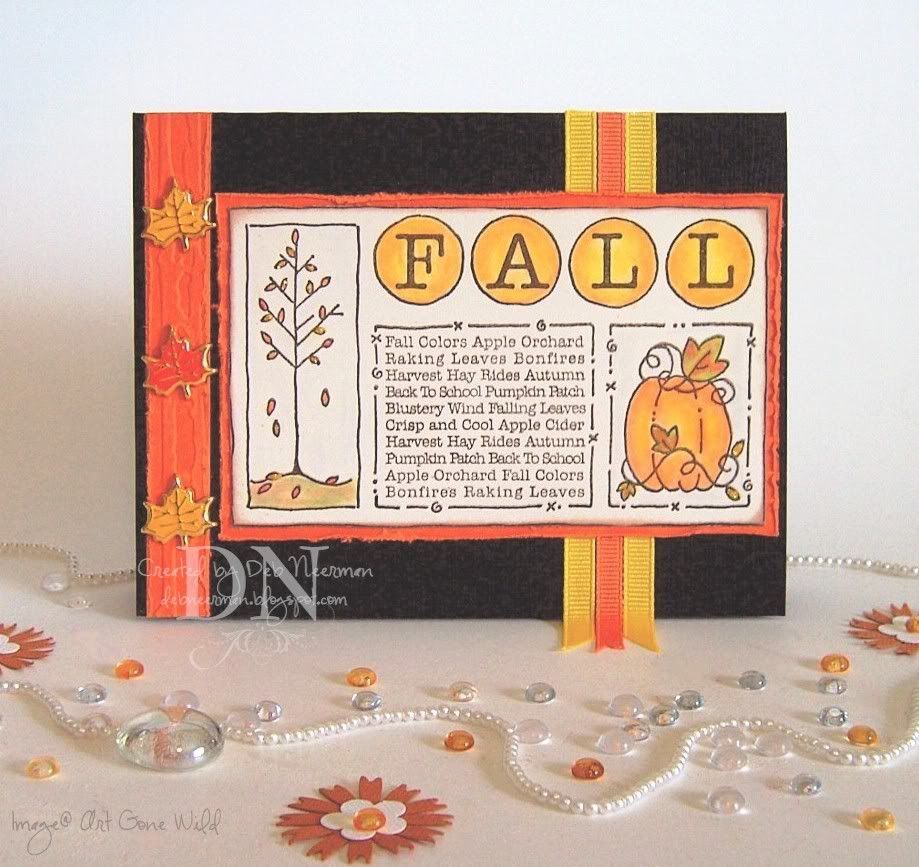
This card is my very first Fall card making project and was created for absolutely no reason other than the fact that I wanted to ink up this humongous rocker stamp from Art Gone Wild.

I stamped my image on Stamper's Select card stock, then colored it with Prismacolor pencils, blending with Gamsol. I added a teensy-tiny bit of yellow Stickles glue onto some of the leaves, then mounted the image on card stock that had been run through the Cuttlebug in the "Distressed Stripes" A2 embossing folder.

I used a Heidi Swapp distressing tool to rough up the edges of the embossed card stock, then mounted three metal leaf brads on a strip of the same card stock and adhered it to the left-hand side of the card.

Finally, I added some grosgrain ribbon to the right-hand side of the card, allowing it to hang off the edge ... 'cuz I'm wild and crazy ... and then adhered my matted focal image.

So, please allow me to be the first person to wish you a happy "More Herbs, Less Salt Day." It's funny, but I recall having a similar conversation with my Dad when I was in high school ... and then I was grounded for four years.


~cHEeRS,

  • Card Stock: Bazzill Basic; Papertrey Ink
  • Stamp: "Fall Frame" Rocker by Art Gone Wild (I cut off the frame part)
  • Ink: Staz-On "Timber Brown" by Tsukineko
  • Color Medium: Prismacolor "Premier" Pencils by Sanford
  • Accessories: Leaf Brads, HOTP; Grosgrain Ribbon; Stickles Glue by Ranger
  • Tools: Cuttlebug Die-Cut Machine; "Distressed Stripes" Embossing Folder by Provo Craft; Heidi Swapp Distressing Tool

PS: I seem to be in some kind of weird stamp-purgin' mode 'cuz I can't stop listing 'em for sale in my eBay store. I've also listed a kewl Stampers Anonymous catalog and a rare Zettiology catalog. And magazine back issues, including Stamp It!, and Somerset Studio. Check 'em out and see if you can find a treasure ... the price is right, that's for sure! And if you don't find something you LURVE today, there's always tomorrow! And I haven't even started on the unmounteds!

Thursday, August 28, 2008

O, Joy. A Joyful Card Opening Technique ...

Pin It


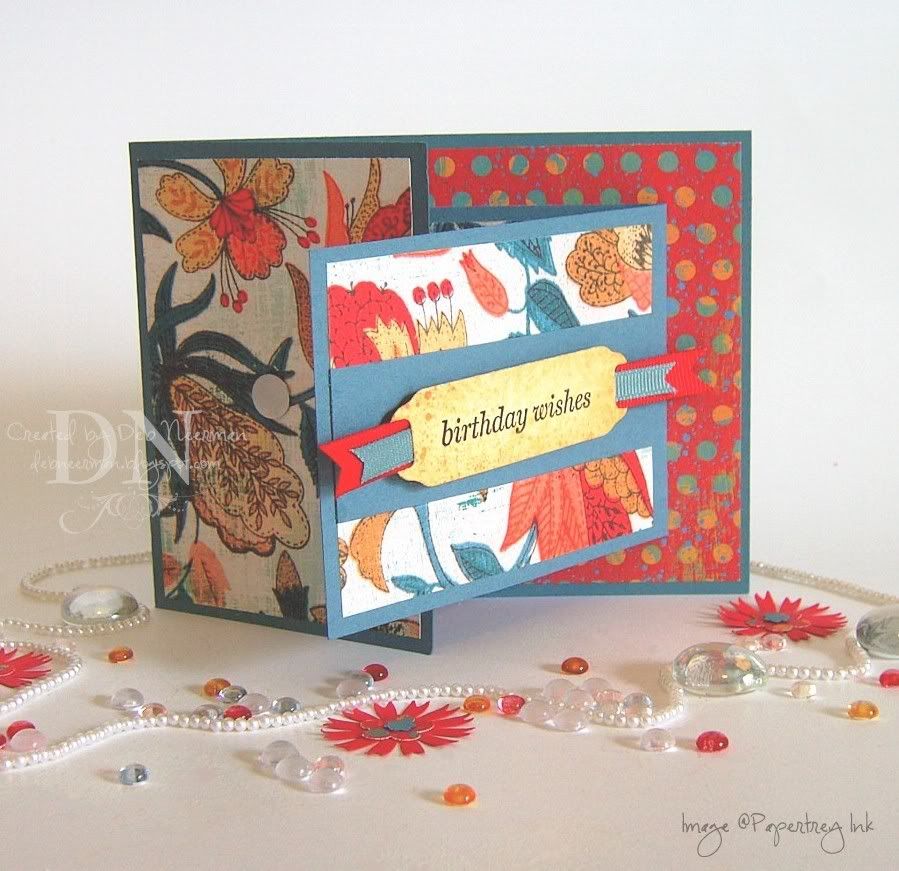
Does anyone have any idea why this card is called a "Joy Fold" card? I mean, it was fun and all, but fell w-a-y short of being a "joy." Successfully completed childbirth is a "joy." This was more like a "not unpleasant" card fold ...

You can find the joyous directions for this card on Splitcoast Stampers. Click HERE for all the joyful deets.

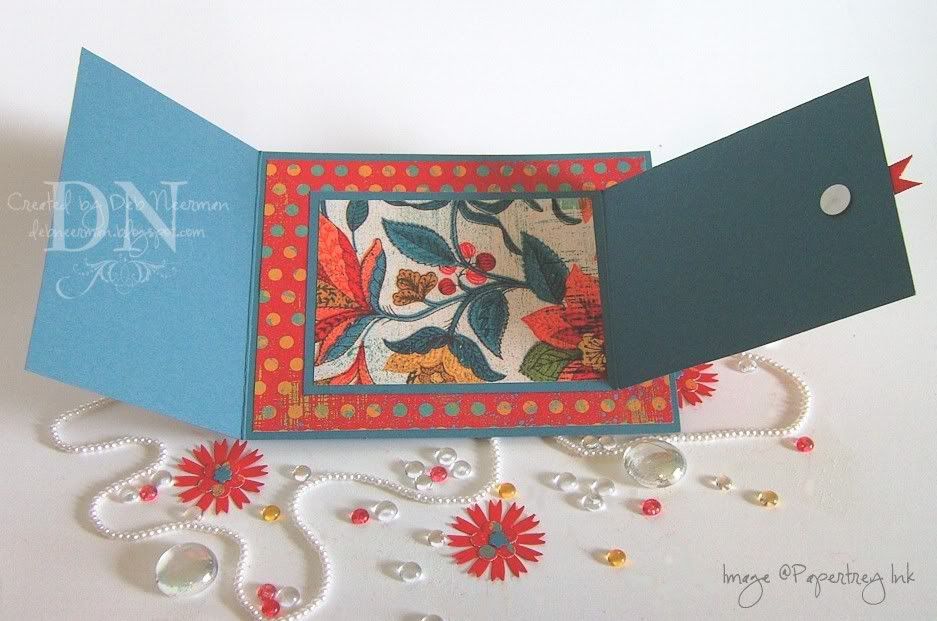
The top photo shows a full frontal; oh, joy!

This ^ is the partially-open-joyful-view.

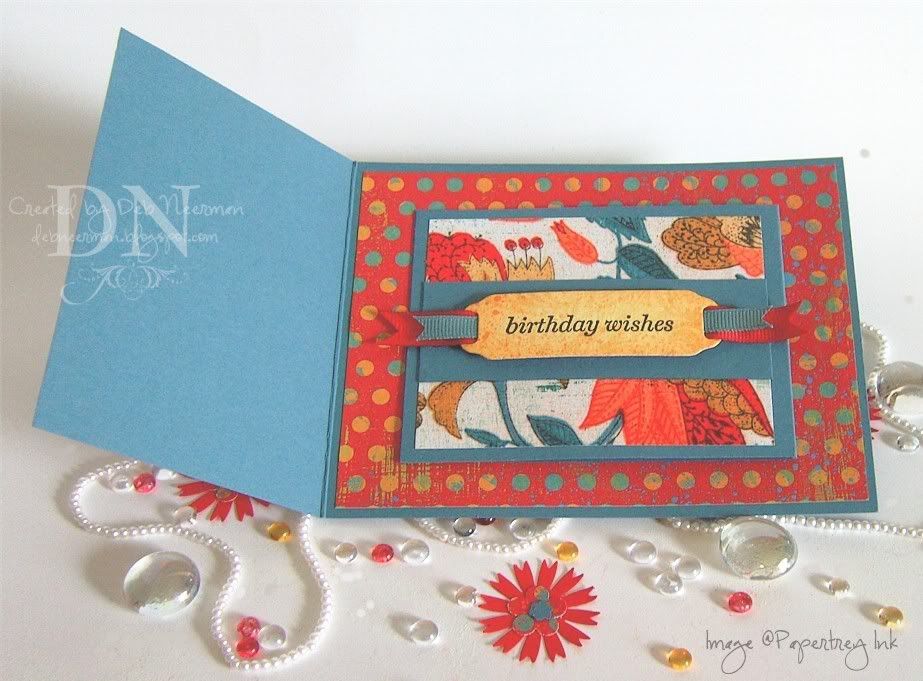
There are a variety of different ways you can create the closure for this joyful card; I used BasicGrey magnetic closure snaps. The round silver object you see on the left is one piece of the said magnetic snap closure set.

TIP: To easily match up your magnetic snaps, attach one to your card stock in the desired position. Attach the second magnet to the first, and mark the back of the second magnet with chalk or a charcoal pencil, then close. The chalk or charcoal will leave a faint mark on the exact position where the second magnet should be adhered.

FUN FACT: Snappin' this card closed IS a joy! The fun is only achieved by using magnetic snaps, though ...


Joyous semi-interior view ^.


Joyous full interior view ^. The round silver disc you see on the right is the other piece of the magnetic snap closure set.

I created my "Joy Fold" card using "Blue Bayou" card stock from Stampin' Up!; the DP is from Daisy D.

My sentiment was stamped with Brilliance ink and cut with a die from Spellbinder's "Ribbon Tags" collection, then threaded with grosgrain ribbon and mounted on dimensionals.

Oh Joy.

Hey, quick question: Why do croutons come in airtight packages? Isn't it just stale bread to begin with? Food for thought ...

Anyway ... thanks so much for spending part of your busy day with me!

~Hugs,

  • Card Stock: "Blue Bayou" by Stampin' Up!
  • Designer Paper: Daisy D's Paper Company
  • Stamp: "Simple Little Things" by Papertrey Ink
  • Ink: "Graphite Black" Brilliance by Tsukineko
  • Accessories: Magnetic Closure Snaps by BasicGrey; Grosgrain Ribbon; Derwent Charcoal Pencil
  • Tools: Die-Cut Machine; Ribbon Tag Die by Spellbinder's; Scrap Fusion PA; Black Dimensionals

PS: I've added more stamps, stamping magazines, and kewl stamp catalogs to my eBay store inventory. Most auctions are starting at just .99 with low shipping; click HERE to go to my store and see if you can find a treasure or three. Now THIS is joy!

Wednesday, August 27, 2008

You Can Tuna Piano, but You Can't Tuna Fish ...

Pin It


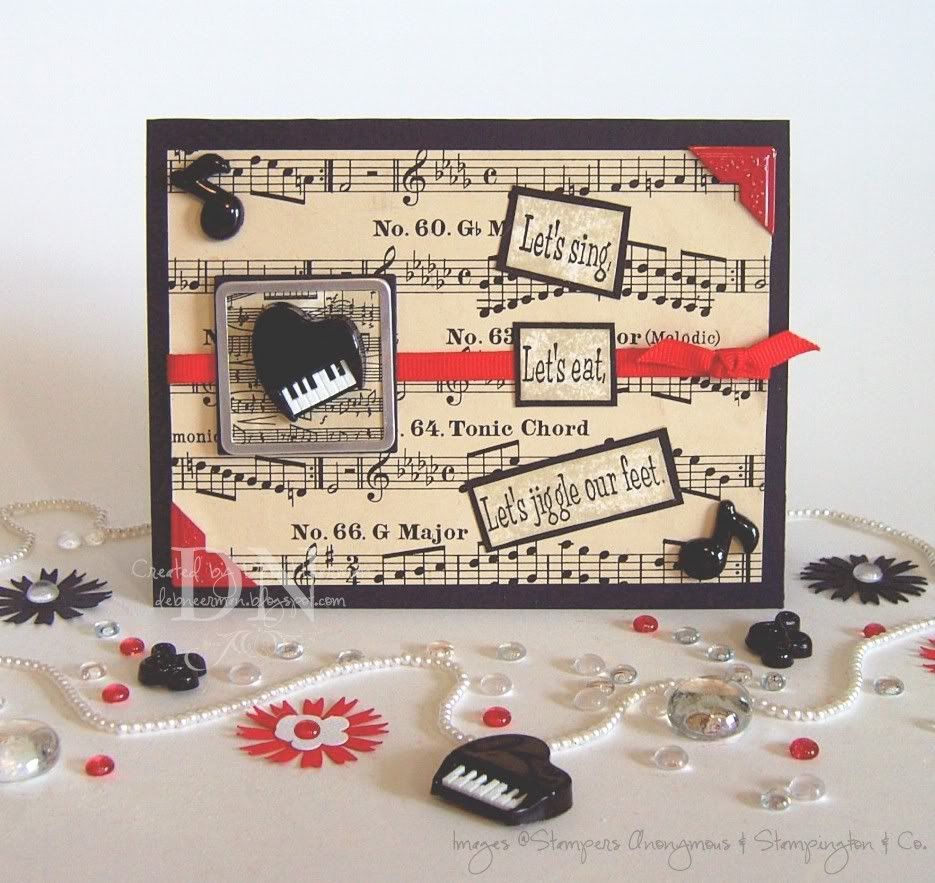
Today's musically-inclined card project was created for the Caardvark's "Name that Tuna" blog challenge. Obviously, the theme is "music" ... I only mention that in case you're lookin' for the fish.

My background paper is a page from a vintage sheet music book, "Lemoine Etudes Enfantines." I don't know the year that this was published, but the price on the book when new was .60, so I'll take a guess and say ... 1938. Anyone else want to venture a guess?

Onward-Hoarding-Card-Makers:

Using the DTP technique, I inked up a large scrap of white card stock with Distress ink, then stamped my sentiment using Brilliance ink. I cut the sentiment apart, mounted 'em on card stock, and adhered them to my card.

I stamped the sheet music stamp using the same ink then slipped it into a metal-edged tag. I mounted the tag on a scrap of black card stock, glued down my 'piano,' then glued down the whole shebang over grosgrain ribbon.

Finally, I added some Daisy D's metal photo corners, clipped the shanks off the cute little "note" buttons, and glued 'em down on opposing corners. Finis!

I have the funniest story to share with you:

Last night, my friend Sheila asked me to run down to Big Lots with her.

As she was checking out, it so happened that the box of Tampax she wanted had no price. I cringed when the cashier got on the intercom and announced, "Price check on register five. Tampax; Supersize."

Now that was bad enough, but the guy looking for the price apparently mistook "Tampax" for "thumbtacks." 'Cuz, in a serious tone, his voice boomed back over the intercom, "Do you want the kind you push in with your thumb or the kind you pound in with a hammer?"

Seriously.

Hugs,

  • Card Stock: Bazzill Basics; Papertrey Ink
  • Stamps: Sentiment by Stampers Anonymous; Sheet Music by Stampington
  • Ink: "Old Paper" Distress Ink by Ranger; Brilliance "Graphite Black" by Tsukineko
  • Accessories: Grosgrain Ribbon, Unknown; Musical Note and Piano Buttons, Unknown; Metal Photo Corners by Daisy D's
  • Tools: Tag Maker by Making Memories; Dimensionals; Glue Dots; Scrap Fusion PA; The Ultimate by Api

Tuesday, August 26, 2008

Take Time to Enjoy Your Day, 'Cuz No One Can Do it for You ...

Pin It


Hey, today is National Cherry Popsicle Day ... wanna know how cool this is ?!? Frozen!

I kill me ...

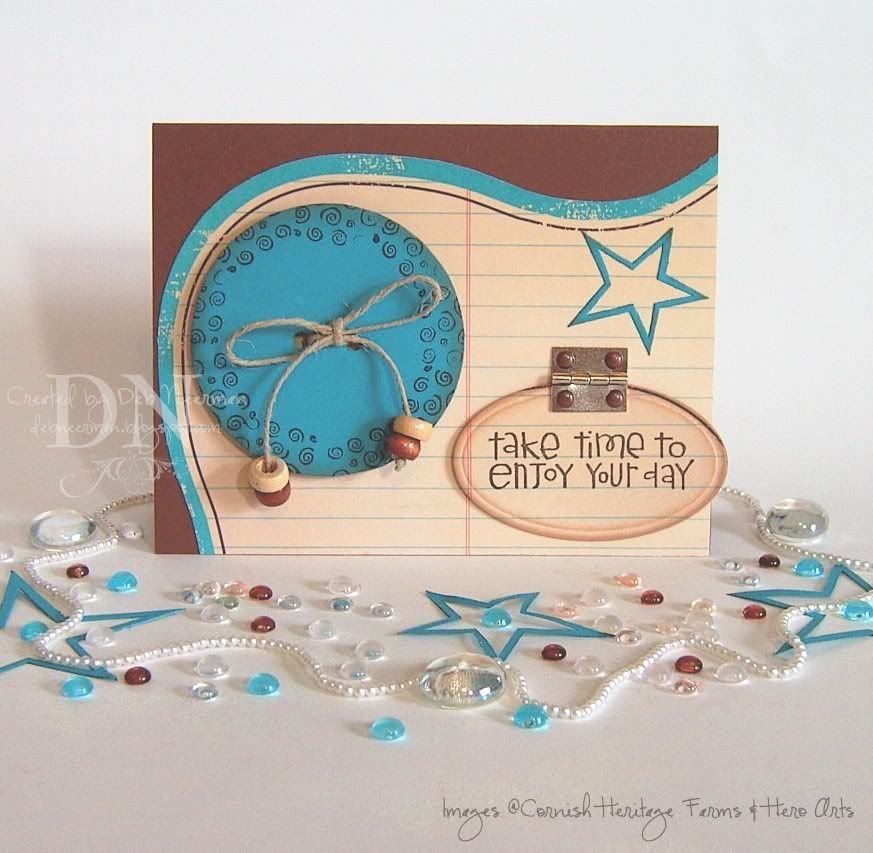
Hey, paper hoarders, today's card project was created just for the heck of it using DP from Making Memories, and a large chipboard button.

I covered the aforesaid large chipboard button with turquoise card stock, stamped a swirly border, tied on some natural jute twine embellished with wooden beads, and adhered the whole shebang to my card base.

I stamped my sentiment on a scrap of DP, cut it out using a small oval die, sponged on fluid chalk ink, then mounted it to the card base using a metal hinge. For fun, you can stamp a secret message or fun image under there ... or add a sticker, a charm, or whatever! I'd show you what I put under there, but it's a secret ...

Finally, I die cut a turquoise star using a Cuttlebug die, and finis!

Thanks so much for swingin' by! And be sure to recycle your cherry Popsicle stick for a future project. Then go stick out your tongue in front of a mirror ... kewl!

~Hugs,

  • Card Stock: Cut Card Stock; DCWV
  • Designer Paper: Making Memories
  • Stamps: Sentiment by Cornish Heritage Farms; Swirls by Hero Arts
  • Ink: Staz-On by Tsukineko; Colorbox by Clearsnap
  • Accessories: Chipboard Button; Natural Jute Twine; Wooden Beads; Metal Hinge; Brads
  • Tools: Die Cut Machine; Cuttlebug Star Die; Black Dimensionals; Scrap Fusion PA

Monday, August 25, 2008

A (Windy and Rainy) Week in My Life ...

Pin It


Happy "Kiss and Make-Up" day! Prolly would be best to kiss before applying the make-up but, whatever ...

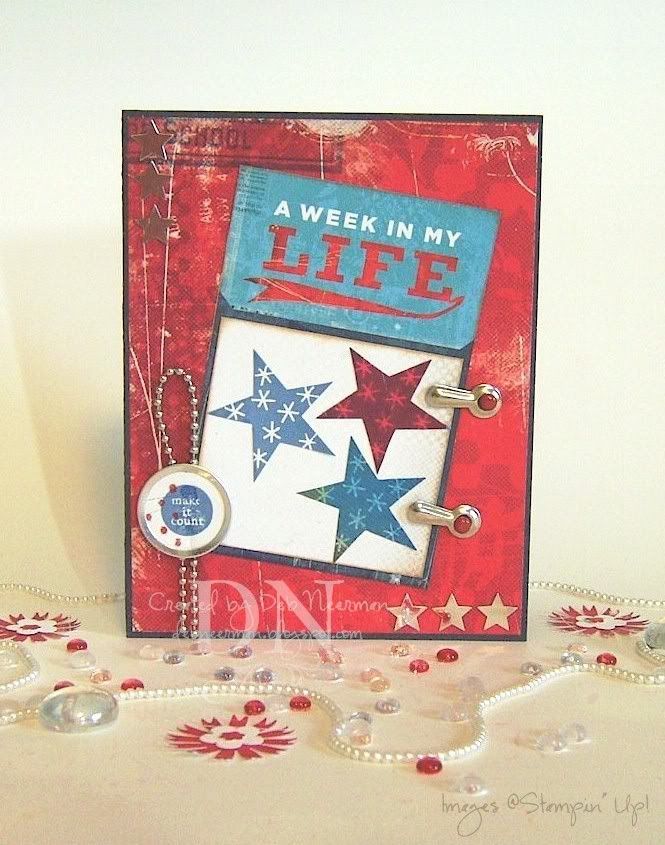
Today's card project was created for no good reason ... except that I really wanted to use this new paper collection.

I created this card using a die-cut and designer paper from Cosmo Cricket's "Get Happy" collection. And, woWza, what a bright and colorful collection it is! In fact, this collection pushes me right to the edge of my "bright and colorful" limit.

I stamped my stars on matching DP with Distress ink, added some photo turns with brads, and six silver stars. Thanks, Mel, you're a star!

I stamped my itty-bitty sentiment on a scrap of "Get Happy" paper and created a small metal-edge tag using my Tag Maker.

Finally, I cut a length of ball chain, looped it, and attached it to my card front with super-strong adhesive.

Easy-peasy and ready to serve in just 15 Minutes!

Thanks for dropping by; I hope you have a great day. Go ahead, kiss and apply make-up to someone you love today!

~Hugs (and Kisses),

  • Card Stock: Bazzill
  • Designer Paper and Die Cut: "Get Happy" Collection from Cosmo Cricket
  • Stamps: Stampin' Up!
  • Ink: " Faded Jeans" Distress Ink from Ranger Industries
  • Accessories: Silver Photo Turns; Brads; Silver Stars; Ball Chain;
  • Tools: Tag Maker by Making Memories; "The Ultimate" Glue; Scrap Fusion PA

PS: In response to a couple of emails I recently received; yes, all my cards are available for purchase, including this one. Please contact me for prices and availability, okeedokee?!? Thanks!

Sunday, August 24, 2008

Need a Tree Topper? How 'Bout a Tree?

Pin It


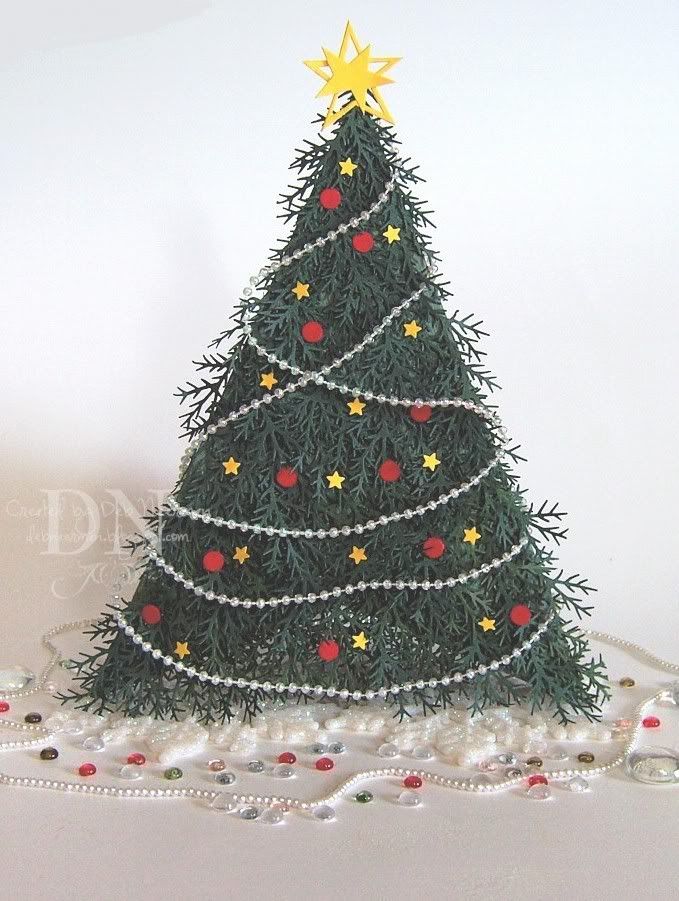
Hey, anybody need a Christmas tree topper? Maybe a nice l'il tree for a tabletop? Well, then, here ya go!

Today's no-stampin' paper project was created for Allison's "Suggestive Sunday" blog challenge. This is my second project created using the Pyramid fold and as promised, it's totally over-the-top, no?

Using green card stock and my pine bough paper punch, I punched out a bazillion pine boughs and layered them on to my pyramid.

I created a star-topper using a Cuttlebug die, wrapped a length of iridescent pearls around the tree, then created 'ornaments' using a star and circle punch.

Yup, I can hear you already, "w-a-y too much time on her hands," but I created this pyramid card in less time than it took to create my Halloween pyramid card. My speedy secret? A Power Punch tool and lots of fast drying super-sticky-craft glue. Oh. And Red Bull ...

Hope you're enjoying your Sunday; thanks so much for spending part of your day with me!

~Hugs,

  • Card Stock: DCWV; Bazzill Basics
  • Accessory: Iridescent Pearls
  • Tools: Power Punch; Star Punch; Circle Punch; "The Ultimate" Glue

PS PEEPS: If you're interested in purchasing stamps ... as if ... I've just listed several nice ones in my eBay store. To check 'em out, clicky HERE. Thanks for lookin'!

Saturday, August 23, 2008

Fly Away, L'il Swallow or Bird of Paradise: That's an Ostrich Egg!

Pin It


Just kiddin' ... and allow me to be the first to wish you a v-e-r-y happy Cartoon Day! Lemme know what cartoon's ya'll are watching, okeedokee? I'm lookin' to widen my horizons ...

Hey, did you know that today is also "National Sponge Cake Day?" Seriously. I don't make this stuff up. In honor of the day, I'll be heading out to PublixWhereShoppingIsAPleasure for some fresh-baked sponge cake. Even if you don't enjoy this yummy treat for dessert, it's lots o'fun to play with. Just don't use it to clean your counters ... I learned that the hard way!

ONward, Hoarding Card Makers! Today's card was created using DP from BasicGrey's "Periphery" collection, a couple of my favorite old stamps, and some grosgrain ribbon. Easy-peasy-sponge-cake-squeezy!

I stamped the mesh image on Vintage Cream card stock using "Peeled Paint" Distress ink, and stamped the egg images (they're doubled-up for dimension), using "Faded Jeans" Distress ink.

I layered some patterned paper, tied on some ribbons, punched out some photo corners, added a frame hanger, and ... finis!

Thanks so much for stopping by; enjoy your weekend ... and your sponge cake!

~Hugs,


  • Card Stock: Papertrey Ink
  • Designer Paper: "Periphery" Collection, BasicGrey
  • Stamps: "Mesh" by Stampers Anonymous; "Egg" by Oxford Impressions
  • Ink: Distress Inks by Ranger; Colorbox Fluid Ink by Clearsnap
  • Accessories: Gold Frame Hanger; Brad; Grosgrain Ribbon;
  • Tools: Die Cut Machine; Nestabilities Dies; Brad; Scrap Fusion PA by Ivy Scraps; Dimensional Foamies by Scotch; Photo Corner Punch by Stampin' Up!

Friday, August 22, 2008

A "Tag,You're It" Guest Designer Gig

Pin It


Hey, stampers, it's "Be an Angel Day!" Today's the day to be up in the air and always harping about something. Now go buy yourself some heavenly new stamps.

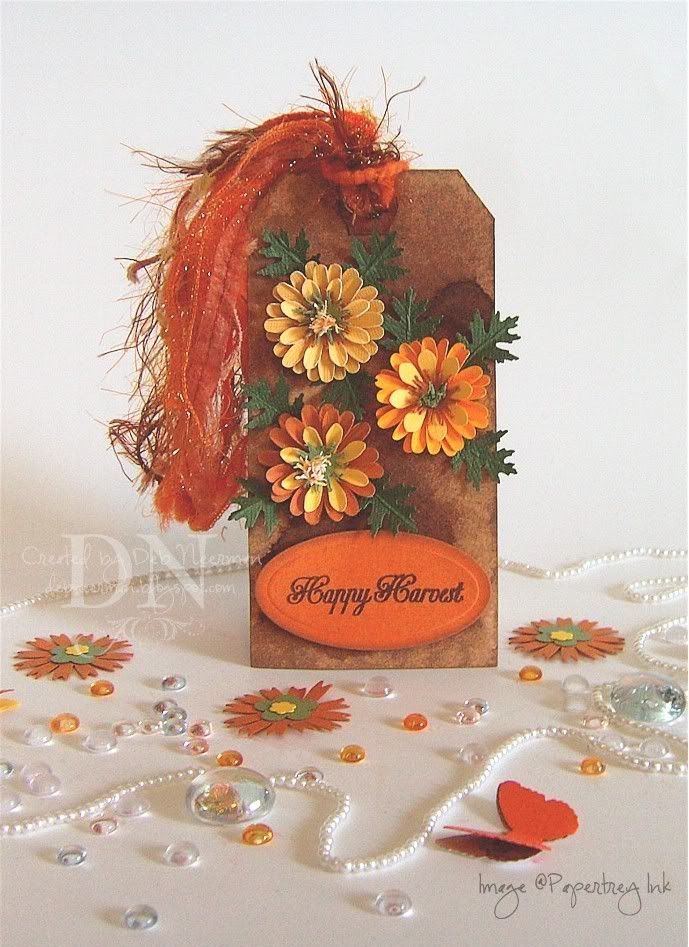
Onward. I can't tell you how excited I was when the loverly Anne and Sam invited me to be this week's guest designer for the "Tag You're It" challenge! Well, I could tell you how excited I was, but my post's are already too long ... and boring ... and I am tryin' to be a Angel today, so I won't go into all the that.

For my stint as Guest Designer, I chose "Punch Art" for my theme. But you prolly guessed that already, didn't you Miss Smarty Pants ...

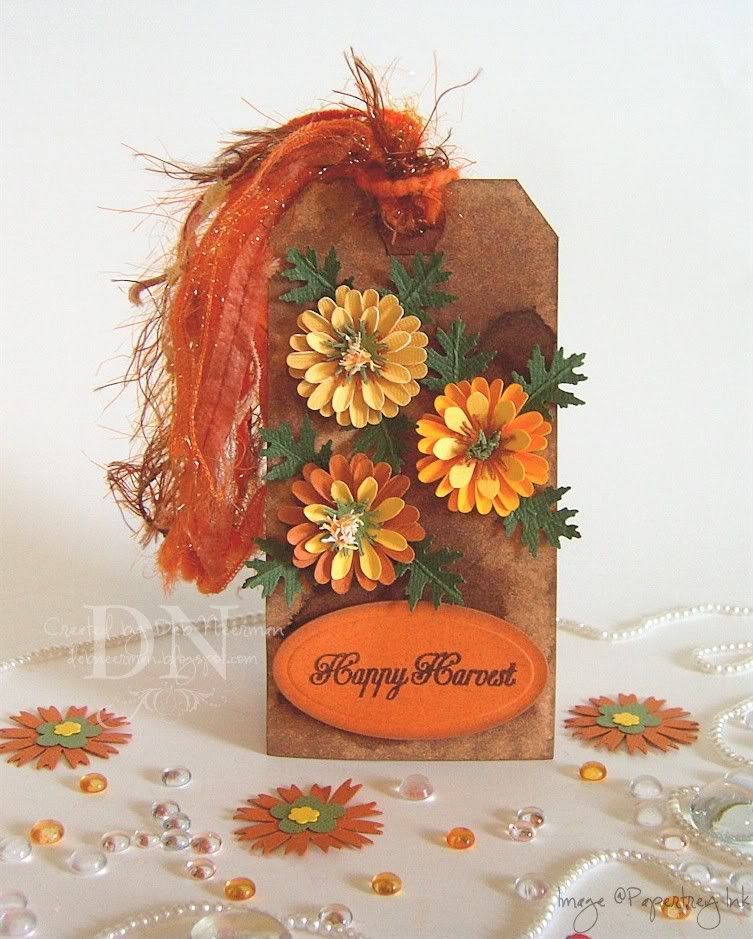
Using daisy punches, I created three marigold-ish-like flowers, created stamens using a sun punch, then created leaves using an oak leaf punch. I mounted the flowers on my heavily distressed shipping tag using super-duper-icky-sticky glue.

Here's a close-up for those of you who are hearing impaired:


I stamped my sentiment on Bazzill card stock and mounted it on my tag using dimensionals. Finally, I tied on lots of funky fibers in fall colors ... say that five times fast!

Making these punch art flowers is so much fun and so easy ... no, really! I wouldn't lie to you, don't forget, I'm an Angel ... today, anyway!

Oh. Today, my niece called and told me she is putting together a CD of 70's rock groups for her BFF. She asked me if I could help and name a couple of them.

"Yes!" I said.
"Who?" she asked.
"There you go," I answered.

~Hugs!

  • Card Stock: Bazzill
  • Stamp: Papertrey Ink
  • Ink: Staz-On by Tsukineko, Fluid Chalk Ink by Clearsnap
  • Accessories: Fibers, Personal Collection, Various Manufacturers
  • Tools: Die Cut Machine; Large Classic Oval Die by Spellbinder's; Daisy Punch by McGill, Small Daisy Punch, Unknown, Sun Punch by Cuttin' Edge, Leaf Punch, Unknown; Stylus' by Fiskars; The Ultimate Craft Glue by Api; Black Dimensionals, Unknown

Thursday, August 21, 2008

Halloween Pyramid Card ... Broomstick Delivery Only

Pin It


Happy National Spumoni Day ... enjoy a fresh Italian today!

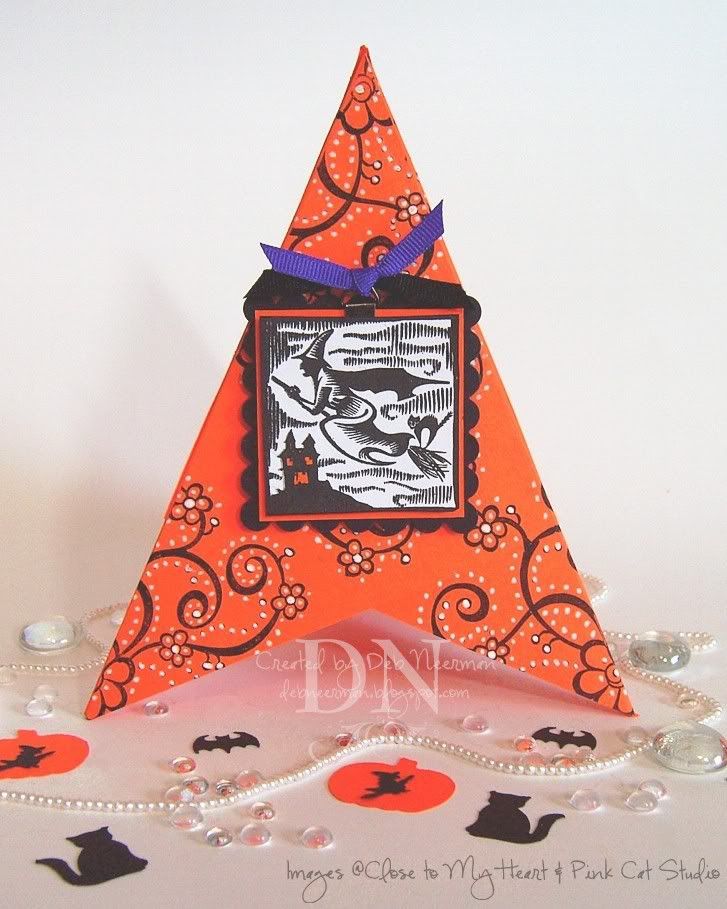
Today's fun paper project was created for Allison's "Suggestive Sunday" blog challenge. This week, Allison asked that we follow a template and create a Pyramid card, a/k/a a Diamond Card, a/k/a a Tepee Card.

I used plain orange card stock to create my pyramid, then stamped lots o'flourishes using Brilliance "Graphite Black" ink. After heat setting, I used the "Bandana" technique to create my background. For more info on this kewl techinque, or to see another project featuring this technique, click HERE.

I stamped my CTMH woodblock-style focal image on Stamper's Select card stock using the same ink, double-matted it, attached a black frame hanger, and tied on some grosgrain ribbon.

Easy; but not peasy! And what the heck does one DO with these thangs?!? I s'pose I could plop it on a table for a festive Halloween accent, or, I could turn it upside down and put in on the wall to hold flowers or ... ummmm, spumoni!

And stayed tuned boys and girls, 'cuz being the over-achiever that I am, I created another Pyramid card that's so over-the-top, it could adorn a Christmas tree! Seriously.

Thanks so much for spending part of your busy day with me; YKYR!

~Hugs,

  • Card Stock: DCWV; Bazzill Basic; Papertrey Ink
  • Stamps: "Witch" by Close to My Heart; "Flourishes" by Pink Cat Studio
  • Ink: "Graphite Black" Brilliance by Tsukineko
  • Color Medium: Copic Marker (YR68); "Inkssentials" Pen by Ranger
  • Accessories: Grosgrain Ribbon; Black Mini-Frame Hanger
  • Tools: Die-Cut Machine; Spellbinder's Die; Black Dimensionals; Double-Sided Tape


Wednesday, August 20, 2008

Don't Forget to Wipe Your Feet ... A "Tag, You're It" Challenge Entry

Pin It


Happy National Radio Day, boys and girls!

My photos are not the best and I apologize. My excuse is the crummy weather we here in So Florida are currently 'enjoying.' Between tornado, flood, tropical storm, monsoon, and hurricane warnings, it's either the lack of natural light or the lack of electricity that's to blame for my yucky photographs. Sorry 'bout that, kids!

Today's project was created for Anne and Sam's "Tag, You're It" blog challenge. This week's theme is Christmas ... I know you didn't see that comin'!

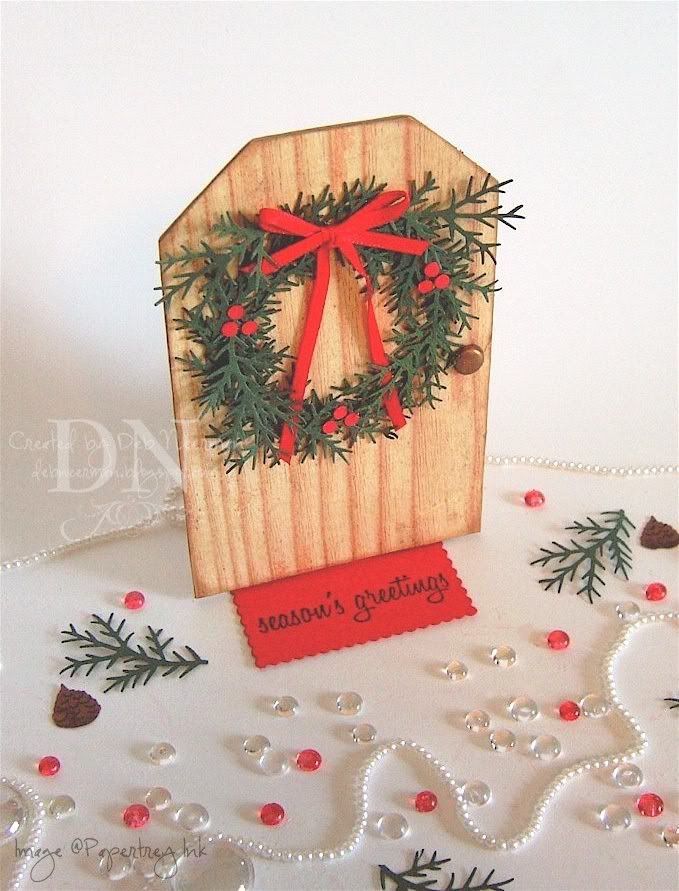
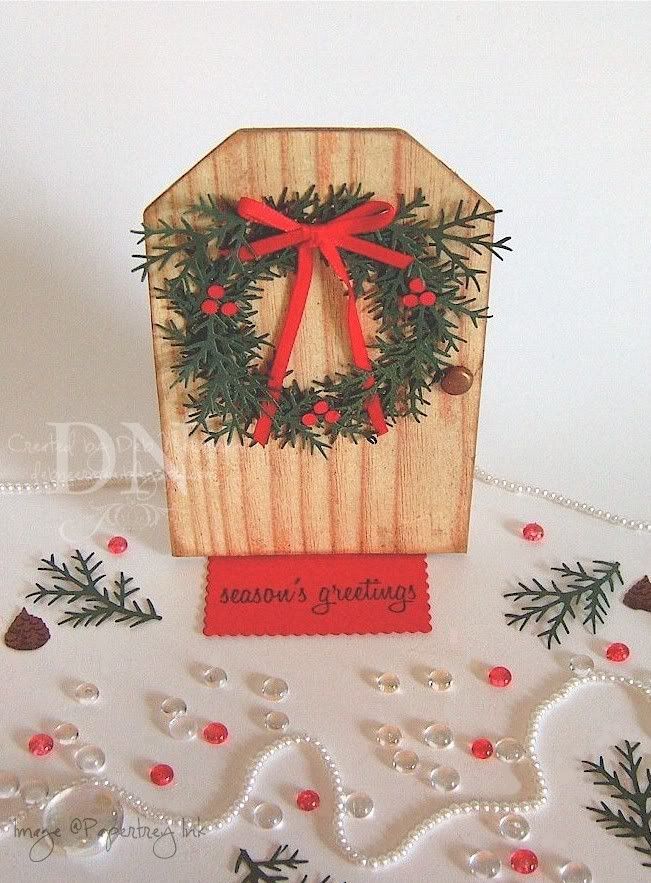
I covered my chipboard tag with DP from Cosmo Cricket's "Wanted" collection, then sponged the edges with fluid chalk ink. Next, I created a wreath using card stock and a pine bough paper punch. I added some ribbon and some "holly berries" to the wreath, and used a copper brad to create my "door knob."

I stamped my sentiment on red card stock and cut it out using a scallop-edge rectangular die. I created a hinge from matching card stock to attach my "door mat" to my "door."


Easy-peasy and ready to serve in just ..... ohhhhh, let's say, 30 minutes!

One quick, cute, topical joke to share:

At the Olympic Games, a girl bumps into a man carrying an eight-foot-long metal stick.
"Excuse me," says the girl to the man, "Are you a pole vaulter?"
"No," says the man, "I'm German, but how did you know my name is Walter?"

Hey, thanks for dropping by today!

~Hugs,

  • Card Stock: DCWV; Bazzill
  • Chipboard Tag
  • Designer Paper: Cosmo Cricket, "Wanted" Collection
  • Stamp: Papertrey Ink
  • Ink: Brilliance by Tsukineko; Colorbox Fluid Chalk
  • Accessories: Antique Copper Brad; 1/8" Satin Ribbon
  • Tools: Die-Cut Machine; Nestabilities Die; Pine Bough Punch; Mini-Hole Punch; "The Ultimate" Glue; Mini-Glue Dots

Tuesday, August 19, 2008

Life Delights in Life; I Delight in Chocolate ...

Pin It


Today's card project was created using beeee-you-tea-full card stock from Stampin' Up! that Mel-a-Licious sent me ... ummm, and the hardware too! Isn't Mel delicious!?!

I stamped my images on Vintage Cream card stock with dark brown fluid chalk ink, then heat embossed with clear powder. The focal image was die cut and matted on a scallop edge mat. I used the uber-kewl "Threading Water" border punch to create a l'il mat for my chocolate brown ribbon, then tied on a silver heart charm. My CTMH sentiment, available
HERE, was framed in Stampin' Up hardware.

And that's it! Can you believe that I managed to create a post in less than five paragraphs?!? That's becuz today is "Potato Day" and I'm doin' some very intricate potato-stampin' ... tuber continued!

~Hugs,


  • Card Stock: Bazzill Basic; Papertrey Ink; Stampin' Up!
  • Patterned Paper: Stampin' Up!
  • Stamps: PSX; Close to My Heart
  • Ink: Colorbox Fluid Chalk Ink; Versamark
  • Other: Clear Embossing Powder
  • Accessories: Metal Frame Holder; Brads; Jump Rings; Heart Charm; Grosgrain Ribbon
  • Tools: Die-Cut Machine; Nestabilities Dies; Heat Gun; Border Punch by Fiskars]

PS: Due to the current weather conditions here in So Florida, I will likely lose power ... and my Internet connection. The only real question is when and for how long!

I have several blog posts pre-scheduled for this week, but if you email me with a question, or leave me a comment and don't hear back from me, that will be the reason why. I'll respond to all comments and questions just as soon as possible. Thanks!

Monday, August 18, 2008

Geometric's: Without 'Em, Life's Pointless ...

Pin It


Hey, for those of you who are keepin' track, and even if you're not, today is "Bad Poetry Day." I'll bet you're a poet and just don't know it ...

Today's card project was created for no good reason. I had considered entering it in the Stamping Challenges to Love blog challenge, but decided against it and entered something else. But you can always use a thank you card, so sooner or later a good reason will appear. It's the law of card-making.

Anyway, this card is super-easy-peasy to CASE.

Using dies from the Large Classic Circle die set, I cut out two circles, cut them in half, then used one of the leftover circles as a base for my paper flowers. The flowers are adhered to the inside lower right-hand corner of the card, so I cut out a circle on the front lower right corner. Which explains why the card isn't standing ... although I do like to lay 'em down every now and then just to mix things up ... such a wild 'n crazy gal, huh?!?

I stamped my images on Stamper's Select card stock, cut them into circles, sponged 'em with fluid chalk ink, then adhered them to the front of the card with the pale blue half circles.

Finally, I sprinkled some extra-fine glitter over the paper flowers, and finis! Easy-peasy and read to serve in just 15 Minutes!

ONward: I received this award from someone recently and I'm embarrassed to say I forgot who. So thank you so much _______; I love your blog, too! Now, I'm gonna pass it on to five of my favorite bloggers (that part, I remember):


  1. Allison, from Stampin' When I Can;
  2. Annapurna, from Inspired by Nature/HomeMade Greetings;
  3. Julia, from Create With Me;
  4. Julie, from Out to Impress; and,
  5. Mel, from Mel Stampz

Here ya go, Chicklettes!

Okay, I'm off to do some research: I need to know where they get the seeds to grow seedless grapes. Hey, do you know?

~Huglettes,

  • Card Stock: Bazzill Basics; Papertrey Ink
  • Stamps: "Lexicon of Love" by Stampin' Up!
  • Ink: Staz-On; Colorbox by Clearsnap
  • Accessories: Felt Flowers by American Crafts; Paper Flowers by Prima; Brad, American Crafts; Ultra-Fine Glitter
  • Tools: Die Cut Machine; Nestabilties Dies; Scrap Fusion PA

Sunday, August 17, 2008

McHappy Mail ... Nutritious AND Delicious!

Pin It


Wooohoooo, talk about a gorgeous card! Clicky on the image for a ginormous look at this amazing card; you'll be glad you did.

I received this beauty from Bonnie, the uber-talented gal behind The Lucky Clucker blog.

The details in this card are simply amazing and Bonnie's coloring skillz truly rock! I love the four l'il inchies used as a focal point and the DP and background stamps* are the perfect compliment to Bonnie's fantastic design! Thanks, Bonnie! I LOVE, love, love this card!

Well, I'm off to my local thrift shop to hunt for some bargains ... after all, it IS National Thrift Shop Day. Thrift store shopping today isn't just a good idea: it's the law!

~Hugs,


*If those "background stamps" are DP, I HAVE to know where you got it, okeedokee, Bonnie?!?